
To use a Ryobi impact driver, insert the battery, attach the bit securely, and adjust the speed and torque settings as needed. With its powerful motor and easy-to-use features, the Ryobi impact driver is a versatile tool for DIY projects, woodworking, and automotive repairs.
Whether you’re a professional contractor or a weekend warrior, this tool can help you tackle tough jobs with ease. Its compact size and lightweight design make it easy to handle, while its ergonomic grip and variable speed trigger provide maximum control and precision.
From driving screws and bolts to removing stubborn nuts and bolts, the Ryobi impact driver is an essential tool for any toolbox.
Contents
- Introduction To Ryobi Impact Drivers
- Unboxing Your New Tool
- Setting Up The Ryobi Impact Driver
- Safety First
- Mastering The Basics
- Driving Screws Like A Pro
- Advanced Techniques
- Maintenance And Troubleshooting
- Creative Projects With Ryobi Impact Driver
- Joining The Ryobi Community
- Frequently Asked Questions
- Conclusion
Introduction To Ryobi Impact Drivers
Ryobi impact drivers are versatile power tools that make driving screws and fasteners much easier. To use a Ryobi impact driver, simply insert the bit into the chuck, adjust the torque settings, and press the trigger. The impact driver will do the rest, delivering powerful and precise results.
The Rise Of Diy Tools
DIY tools have become increasingly popular for home projects.
Why Choose Ryobi?
Ryobi is a trusted brand known for quality and innovation.
Unboxing Your New Tool
Unboxing your new Ryobi Impact Driver is an exciting first step towards tackling your next DIY project or professional task.
The unboxing process not only reveals the contents of the box but also offers the opportunity to form initial impressions of the tool’s build quality and included accessories.
In this section, we’ll walk you through the unboxing experience, covering what’s in the box and sharing our first impressions.
What’s In The Box?
When you unbox your new Ryobi Impact Driver, you’ll find a carefully curated selection of items that are designed to enhance your user experience and offer versatility in various applications. Here’s what you can expect to find:
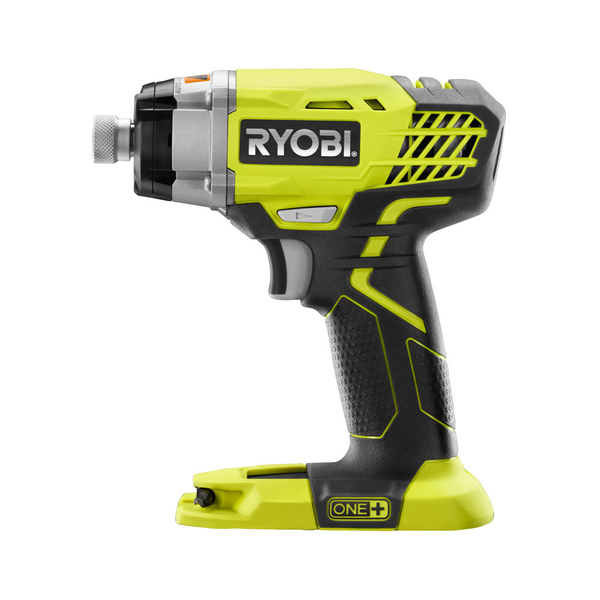
- Ryobi Impact Driver
- One or more high-capacity lithium-ion batteries
- Charger for the batteries
- Instruction manual and warranty information
- Additional accessories such as driver bits or carrying case (model-dependent)
First Impressions
Upon unboxing the Ryobi Impact Driver, the first thing you’ll notice is the sturdy construction and ergonomic design that indicates a comfortable grip during use.
The included lithium-ion batteries and charger signify the tool’s commitment to lasting power and efficient operation.
The presence of a comprehensive instruction manual demonstrates Ryobi’s dedication to ensuring users have the necessary guidance for safe and effective usage right from the start.
Setting Up The Ryobi Impact Driver
Setting up the Ryobi Impact Driver is a simple process that involves attaching the battery, selecting the right bit, and adjusting the torque settings. Once properly set up, the impact driver can be used for a variety of tasks, from loosening stubborn screws to driving in new ones.
Battery Installation And Care
Before using your Ryobi Impact Driver, it’s essential to ensure that the battery is correctly installed and maintained. To install the battery, align it with the base of the driver and firmly push it in until it clicks into place.
To remove the battery, press the release buttons on both sides and pull it out. Always keep the battery terminals clean to prevent power loss and ensure a secure connection.
Understanding The Settings
The Ryobi Impact Driver offers various settings to accommodate different tasks. The speed selector allows you to choose between different speed settings, while the torque control ring enables you to adjust the torque based on the application. Familiarize yourself with these settings to effectively tackle a wide range of projects.
Safety First
Safety should always be the top priority when using any power tool, and the Ryobi impact driver is no exception. By following some simple safety guidelines, you can ensure a safe and productive experience with this powerful tool.
Remember, accidents can happen if proper precautions are not taken, so it’s crucial to prioritize safety at all times.
Personal Protective Equipment
Before using the Ryobi impact driver, it’s essential to equip yourself with the necessary personal protective equipment (PPE) to safeguard against potential hazards.
The following PPE is recommended for safe operation:
- Safety Glasses: Protect your eyes from flying debris or particles.
- Gloves: Ensure a secure grip and protect your hands from potential injuries.
- Hearing Protection: Reduce the risk of hearing damage from prolonged exposure to loud noise.
- Dust Mask: Guard against inhaling dust and debris during operation.
Pre-operation Checks
Prior to using the Ryobi impact driver, conduct the following pre-operation checks to ensure the tool is in optimal condition and ready for use:
- Battery: Check the battery charge level and ensure it is fully charged before use.
- Bit Inspection: Examine the impact driver bit for any signs of wear or damage, and replace if necessary.
- Tighten Screws: Inspect and tighten all screws and fasteners on the tool to prevent any potential hazards during operation.
Mastering The Basics
Grip And Posture
When using a Ryobi impact driver, a proper grip and posture are essential for optimal control and safety. Ensure that you have a firm grip on the tool, with your dominant hand positioned comfortably on the handle. Maintain a stable posture and stance while operating the impact driver to minimize the risk of strain or injury.
Trigger Control
The trigger of a Ryobi impact driver allows for precise control over the speed and power of the tool. Gently squeeze the trigger to start the rotation, and adjust the pressure as needed for different tasks. Mastering the trigger control will enable you to drive screws with accuracy and efficiency.
Reversing Functionality
The reversing functionality of the Ryobi impact driver provides the versatility to loosen and remove screws.
Familiarize yourself with the reversing switch or button, and practice switching between forward and reverse modes. This feature enhances the tool’s usability for various applications, making it a valuable addition to your toolkit.

Driving Screws Like A Pro
The Ryobi impact driver is a versatile tool that can make driving screws a breeze. By mastering the key techniques and settings, you can achieve professional-looking results with ease. Let’s dive into the essential skills you need to drive screws like a pro using the Ryobi impact driver.
Choosing The Right Bit
Selecting the appropriate bit for your impact driver is crucial for achieving optimal results. Different types of screws require specific bits, such as Phillips, flathead, or Torx. Using the right bit not only ensures a secure fit but also minimizes the risk of damaging the screw head.
Depth And Torque Adjustment
Adjusting the depth and torque settings on your Ryobi impact driver is essential for precise and consistent screw driving. By setting the appropriate depth, you can prevent the screws from being driven too far or not deep enough.
Additionally, adjusting the torque allows you to control the driving force, reducing the likelihood of over-tightening or stripping the screws.
Advanced Techniques
When it comes to using a Ryobi impact driver, there are advanced techniques that can take your DIY projects to the next level. These techniques allow you to tackle challenging tasks with precision and efficiency, making the most out of your tool.
Managing Tough Materials
When working with tough materials such as hardwood or concrete, it’s essential to adjust the speed and torque settings of your Ryobi impact driver.
Higher torque settings are suitable for dense materials, while lower speeds are ideal for more delicate surfaces. Using the appropriate setting will help you avoid damaging the material and ensure a clean and precise result.
Angled Driving
For tasks in tight spaces or at awkward angles, the Ryobi impact driver’s compact design and lightweight construction make it a versatile tool.
Utilize the tool’s maneuverability to drive screws in confined areas with ease. Its ergonomic grip and adjustable head allow for comfortable and precise operation, even in challenging positions.
Removing Stripped Screws
Dealing with stripped screws can be frustrating, but the Ryobi impact driver offers a solution. Utilize the reverse function to apply firm and steady pressure while turning to grip and remove stripped screws effectively. The impact driver’s high rotational force can help loosen stubborn screws without damaging the surrounding surface.
Maintenance And Troubleshooting
Proper maintenance of your Ryobi Impact Driver is essential for its longevity and optimal performance. Regular cleaning and timely troubleshooting can prevent issues and ensure smooth operation.
Cleaning And Storage
- Clean the exterior: Wipe down the impact driver with a damp cloth after each use to remove dust and debris.
- Lubrication: Apply a few drops of lubricating oil to the chuck regularly to keep it functioning smoothly.
- Storage: Store the impact driver in a dry place away from direct sunlight or moisture to prevent rusting.
Common Issues And Fixes
- Battery not charging: Check the battery connection and charger. Replace the battery if needed.
- Overheating: Allow the impact driver to cool down before resuming work. Check for any obstructions in the cooling vents.
- Chuck jamming: Clean the chuck and apply lubricating oil. Avoid using excessive force when tightening screws.
Creative Projects With Ryobi Impact Driver
Are you ready to take your DIY skills to the next level with the Ryobi Impact Driver? Let’s explore some Creative Projects with Ryobi Impact Driver that will inspire you to unleash your creativity and tackle new challenges.
Home Improvement Ideas
- Upgrade kitchen cabinet handles for a modern look.
- Install floating shelves to display your favorite decor pieces.
- Hang curtains or blinds to enhance privacy and style.
Furniture Building Tips
- Build a stylish coffee table using reclaimed wood.
- Construct a bookshelf to organize your favorite reads.
- Create a plant stand to showcase your indoor greenery.
Joining The Ryobi Community
Are you ready to dive into the world of DIY projects with your Ryobi Impact Driver? Joining the Ryobi community will open up a treasure trove of resources and support to enhance your experience.
Online Resources And Forums
Access online resources for tips, tricks, and tutorials on using your Ryobi Impact Driver effectively. Learn from experts and fellow enthusiasts in the community.
Sharing Your Diy Success
Share your DIY success stories, projects, and challenges with the Ryobi community. Inspire others and receive feedback to improve your skills.
Frequently Asked Questions
How Do You Put A Drill Bit In A Ryobi Impact Driver?
To put a drill bit in a Ryobi impact driver, loosen the chuck, insert the bit, and tighten the chuck securely.
How Does A Ryobi Impact Drill Work?
A Ryobi impact drill works by combining rotational force with concussive blows to drive screws or drill holes efficiently.
How Do I Use An Impact Driver?
To use an impact driver, insert the appropriate bit, line it up with the screw, and apply pressure while squeezing the trigger. The driver will fasten or remove the screw efficiently.
Can You Use A Ryobi Impact Driver To Remove Lug Nuts?
Yes, a Ryobi impact driver can be used to remove lug nuts effectively.
Conclusion
Mastering the Ryobi Impact Driver can transform your DIY projects. With its versatility and power, this tool simplifies tasks and boosts efficiency.
Embrace the impact driver’s capabilities for precision and speed in your projects. Elevate your craftsmanship with the Ryobi Impact Driver as your trusted companion.