To put a blade on a Ryobi Circular Saw, loosen the arbor nut, remove the old blade, place the new blade, and tighten the arbor nut securely. Remember to disconnect the saw from the power source before changing the blade.
Properly installing the blade ensures safe and efficient operation of your Ryobi Circular Saw. Whether you’re a beginner or a seasoned DIY enthusiast, mastering this simple task will save you time and effort in your woodworking projects.
This guide will walk you through the quick and easy steps to get your saw ready for your next cutting job. Let’s dive in and learn how to put a blade on a Ryobi Circular Saw like a pro!
Contents
- Introduction To Ryobi Circular Saws
- Tools Needed For Blade Replacement
- Types Of Blades For Ryobi Circular Saws
- Initial Preparation Steps
- Removing The Old Blade
- Installing The New Blade
- Safety Checks Post-installation
- Testing The Saw With The New Blade
- Maintenance Tips For Blade Longevity
- Troubleshooting Common Issues
- Conclusion: Ensuring Prolonged Safety And Efficiency
- Frequently Asked Questions
- Conclusion
Introduction To Ryobi Circular Saws
Discover how to easily put a blade on your Ryobi Circular Saw for efficient cutting tasks. Follow the straightforward steps for seamless blade installation and get ready to tackle your projects with precision and ease. Mastering this process will enhance your woodworking experience.
The Popularity Of Ryobi Tools
Ryobi circular saws are among the most popular tools in the market today. They are known for their durability, versatility, and affordability.
If you’re a DIY enthusiast or a professional contractor, you’ll find that Ryobi circular saws are a great investment. With a wide range of models available, you can choose one that suits your needs and budget.
Safety First: Preparing For Blade Installation
Before you can put a blade on your Ryobi circular saw, it’s important to prepare for the installation. This involves taking safety precautions to ensure that you don’t injure yourself or damage your saw.
Here are the steps to follow:
- Turn off the power: Make sure your saw is unplugged or the battery is removed before you start working on it.
- Remove the old blade: Use a wrench to loosen the blade bolt and remove the old blade from the saw.
- Clean the saw: Use a clean cloth to wipe off any debris or dust from the saw, especially around the blade area.
- Inspect the blade: Check the new blade for any damage or defects. Make sure it’s the right size and type for your saw.
- Install the new blade: Place the new blade on the saw, making sure it’s properly aligned with the blade guard and the arbor.
- Tighten the bolt: Use a wrench to tighten the blade bolt, but don’t over-tighten it as this can damage the blade or the saw.
By following these steps, you can ensure that your blade installation is safe and successful. Remember to always wear protective gear, such as safety glasses and gloves, when working with power tools.

Tools Needed For Blade Replacement
To put a blade on a Ryobi Circular Saw, you will need a wrench to remove the bolt securing the old blade. Once removed, place the new blade on the saw, ensuring it aligns with the arrows marked on the tool. Tighten the bolt with the wrench to secure the new blade in place.
Essential Tools And Materials
To replace the blade on your Ryobi Circular Saw, you’ll need essential tools like a screwdriver, hex key, and protective gloves.
Screwdriver: Used to remove the screws holding the old blade in place.
Hex Key: Essential for loosening the arbor nut that secures the blade.
Protective Gloves: Ensure safety during the blade replacement process.
Optional Accessories For Enhanced Safety
For added safety, consider using optional accessories such as safety goggles, ear protection, and a workbench.
Safety Goggles: Protect your eyes from any debris or sparks during blade replacement.
Ear Protection: Minimize noise exposure while operating the circular saw.
Workbench: Provides a stable surface for working on the saw, enhancing precision.
Types Of Blades For Ryobi Circular Saws
When it comes to using a Ryobi circular saw, choosing the right blade is essential for achieving the best results in your woodworking projects.
There are different types of blades designed for specific cutting applications, each with its own unique features and benefits. Understanding the various blade varieties and their uses will help you select the most suitable blade for your project.
Blade Varieties And Their Uses
Blade varieties for Ryobi circular saws cater to different materials and cutting requirements, offering versatility and precision.
- Rip-Cut Blades: Designed for making cuts parallel to the wood grain, ideal for long, straight cuts along the length of the board.
- Crosscut Blades: Suitable for cutting across the wood grain, providing clean and precise cuts for a smooth finish.
- Combination Blades: Versatile option for both ripping and crosscutting, offering flexibility for various woodworking tasks.
- Fine-Tooth Blades: Designed for cutting through delicate materials like laminates and veneers without chipping or splintering.
- Abrasive Blades: Specifically designed for cutting through metal, concrete, or masonry, offering durability and strength for tough materials.
Choosing The Right Blade For Your Project
To achieve optimal results, selecting the right blade for your project is crucial for ensuring precision, efficiency, and safety.
- Consider the Material: Assess the type of material you will be cutting to determine the appropriate blade variety for the specific application.
- Evaluate Tooth Configuration: Different tooth configurations cater to specific cutting needs, such as fast cutting, smooth finishing, or aggressive material removal.
- Thickness and Diameter: Ensure the blade’s thickness and diameter are suitable for your saw to achieve accurate and stable cuts.
- Safety Features: Some blades come with added safety features like anti-kickback designs and vibration-reducing technology for enhanced user protection.
Initial Preparation Steps
When it comes to using a circular saw, proper initial preparation is crucial for safety and efficiency. Before you can even think about putting the blade on your Ryobi circular saw, there are a few essential steps you need to take to ensure everything goes smoothly.
In this guide, we’ll walk you through the initial preparation steps, including securing the saw and disconnecting the power source.
Securing The Saw
Before you start working on your Ryobi circular saw, it’s important to secure it properly. This involves placing the saw on a stable and level surface to prevent any accidental movement while you’re working with the blade.
Disconnecting The Power Source
Prior to putting the blade on your Ryobi circular saw, it’s crucial to disconnect the power source. This means unplugging the saw from the electrical outlet or removing the battery if it’s a cordless model. This step is essential for preventing any accidental activation of the saw during the blade installation process.
Removing The Old Blade
When it’s time to change the blade on your Ryobi circular saw, the first step is to remove the old blade. This process involves a few key steps to ensure safe and effective blade removal. Let’s walk through the process, starting with unlocking the blade guard.
Unlocking The Blade Guard
Before you can remove the old blade, you’ll need to unlock the blade guard. This safety feature protects your hands from the sharp blade during operation. To unlock the guard, locate the lever or button that secures it in place. Slide or press the mechanism to release the guard and expose the blade.
Retracting The Spindle Lock
Once the blade guard is unlocked, you’ll need to retract the spindle lock to prevent the blade from spinning while you remove it. Locate the spindle lock button near the blade, often found on the motor housing. Press and hold the button to keep the spindle from rotating as you loosen the blade.

Installing The New Blade
When it comes to using a circular saw, knowing how to properly install a new blade is essential for achieving precise and efficient cuts. In this guide, we will walk through the steps of installing a new blade on your Ryobi circular saw, focusing on aligning the blade and ensuring proper blade placement.
Aligning The Blade
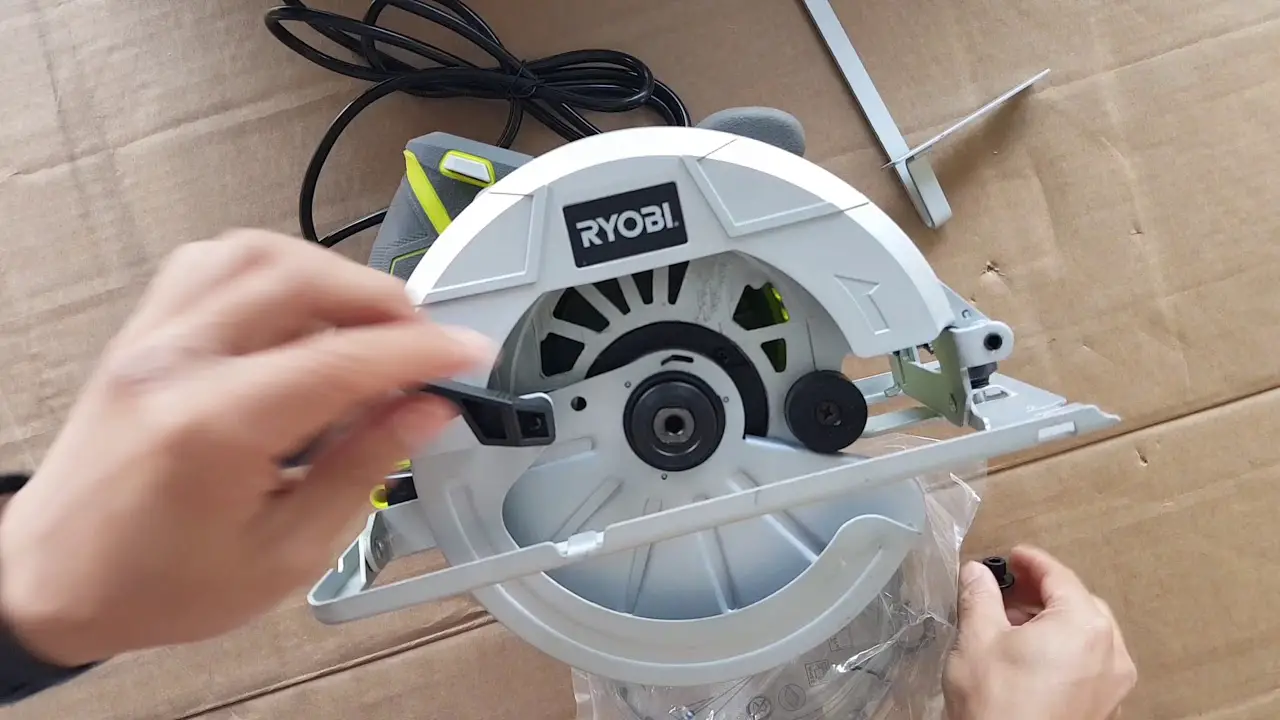
Before installing the new blade, it’s important to ensure that the blade is properly aligned. Start by unplugging the saw and retracting the blade guard. Then, use a wrench to loosen the arbor nut and remove the old blade.
Next, carefully inspect the arbor to ensure it is clean and free of any debris or damage. Finally, align the new blade on the arbor, making sure the teeth are facing in the right direction.
Ensuring Proper Blade Placement
Proper blade placement is crucial for safety and cutting accuracy. Once the blade is aligned, firmly tighten the arbor nut using the wrench, ensuring that the blade is secure.
After that, rotate the blade to ensure it moves freely without any wobbling or binding. Finally, carefully replace the blade guard and plug in the saw, ready to make precise cuts with your newly installed blade.
Safety Checks Post-installation
After successfully putting the blade on your Ryobi circular saw, it is crucial to perform safety checks post-installation to ensure everything is in proper working order.
Verifying Blade Tightness
- Use a wrench to check and tighten the blade securely.
- Ensure there is no looseness in the blade attachment.
Blade Movement And Clearance
- Rotate the blade manually to check for smooth movement.
- Verify there is adequate clearance between the blade and the saw body.
Testing The Saw With The New Blade
To put a blade on a Ryobi circular saw, start by unplugging the saw and retracting the blade guard. Then, use the provided wrench to loosen the arbor nut and remove the old blade. Next, place the new blade onto the arbor, making sure the teeth are facing the right way.
Finally, tighten the arbor nut securely and replace the blade guard before testing the saw with the new blade.
Performing A Test Cut
Before you start working on your project, it’s important to test the saw with the new blade. To do this, you need to make a test cut on a scrap piece of wood. This will help you make sure that the blade is properly installed and that it’s cutting smoothly.
To perform a test cut, first, make sure that the saw is properly aligned with the wood. Then, turn on the saw and slowly lower the blade onto the wood. Make sure that the blade is cutting straight and that it’s not wobbling or vibrating.
Observing Blade Performance And Adjustments
Once you’ve made the test cut, it’s time to observe the blade’s performance. Check the quality of the cut, making sure that it’s clean and precise. If you notice any issues with the cut, such as jagged edges or rough surfaces, you may need to make some adjustments. To adjust the blade, turn off the saw and unplug it from the power source.
Then, loosen the blade nut and adjust the blade’s alignment. Once you’ve made the necessary adjustments, re-tighten the blade nut and test the saw again. In addition to blade alignment, you may also need to adjust the saw’s depth and bevel settings.
This will depend on the type of cut you’re making and the thickness of the wood you’re working with. By testing the saw with the new blade and making necessary adjustments, you can ensure that your cuts are precise and of high quality. Remember to always follow safety precautions when working with power tools.
Maintenance Tips For Blade Longevity
To put the blade on a Ryobi circular saw, first, disconnect the saw’s power source. Then, loosen the blade nut using the wrench provided with the saw. After that, place the blade onto the saw’s spindle and tighten the nut firmly with the wrench.
Proper maintenance is crucial for blade longevity. Keep the blade sharp and clean, and store it in a dry place after use.
Maintenance Tips for Blade Longevity Proper maintenance of your Ryobi circular saw blade is crucial for ensuring its longevity and optimal performance. By following these maintenance tips, you can extend the life of your blade and achieve precise cuts with ease.
Regular Cleaning And Storage
After each use, clean the blade with a soft brush to remove sawdust, resin, and other debris. This prevents buildup that can affect cutting performance. Store the blade in a dry area to prevent rust and corrosion.
When To Replace Your Saw Blade
Over time, blades can become dull, leading to rough cuts and splintering. Inspect the blade regularly for dullness, chipped teeth, or warping. If you notice any of these signs, it’s time to replace the blade for optimal cutting results.
Troubleshooting Common Issues
When it comes to troubleshooting common issues with putting a blade on your Ryobi Circular Saw, there are a few key solutions to keep in mind. By addressing wobbly blade fixes and overcoming blade lock-ups, you can ensure a smooth and efficient cutting experience.
Wobbly Blade Fixes
- Check Tightness: Ensure the blade is properly tightened to avoid wobbling during operation.
- Inspect Washer: Verify the washer is correctly positioned to support the blade securely.
- Replace Damaged Parts: If any components are worn or damaged, consider replacing them to maintain stability.
Overcoming Blade Lock-ups
- Clean Blade Area: Remove any debris or buildup that may be causing the blade to lock up during use.
- Adjust Blade Depth: Ensure the blade depth is set correctly to prevent binding and lock-ups.
- Use Lubrication: Apply lubricant to the blade and moving parts for smoother operation and reduced friction.
Conclusion: Ensuring Prolonged Safety And Efficiency
To ensure prolonged safety and efficiency when putting the blade on your Ryobi Circular Saw, carefully follow the manufacturer’s instructions step by step. Prioritize safety by wearing protective gear and double-checking the blade alignment before operation for optimal results.
Recap Of Key Steps
Make sure the blade is unplugged before starting. Align the blade with the arrow. Use the wrench to tighten the blade nut. Double-check the blade is secure before use.
Emphasizing Routine Checks And Maintenance
Regularly inspect the blade for wear and tear. Clean the blade after use to prevent buildup. Lubricate moving parts as recommended by the manufacturer. Replace blades when necessary.
Frequently Asked Questions
How To Put A New Blade On A Ryobi Circular Saw?
To put a new blade on a Ryobi circular saw, follow these steps: 1. Unplug the saw. 2. Loosen the arbor nut. 3. Remove the old blade. 4. Install the new blade. 5. Tighten the arbor nut. 6. Plug in the saw and test.
How Do You Install Ryobi Blades?
To install Ryobi blades, first, unplug the saw. Then, raise the blade guard and loosen the arbor nut. Replace the blade, making sure the teeth face forward. Finally, tighten the arbor nut securely and lower the blade guard.
How To Attach Blade To Circular Saw?
To attach a blade to a circular saw, follow these steps: 1. Unplug the saw for safety. 2. Loosen the arbor nut using a wrench. 3. Place the new blade on the saw’s arbor. 4. Tighten the arbor nut securely.
5. Plug in the saw and you’re ready to cut.
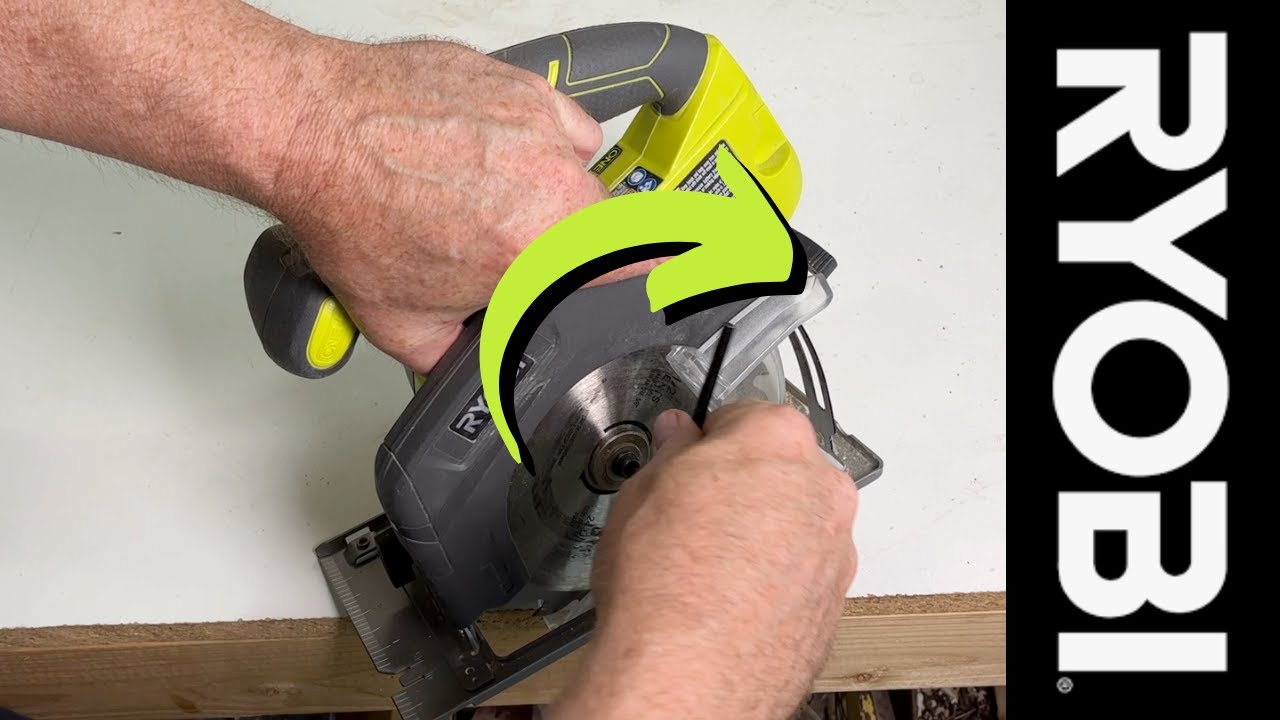
Which Way Does A Circular Saw Blade Go On?
The circular saw blade should go on with the teeth facing forward. Ensure the rotation matches the arrow on the blade.
Conclusion
Mastering how to put a blade on a Ryobi Circular Saw is vital for DIY enthusiasts. Follow the steps carefully for efficient and safe cutting operations.
Your precision and attention to detail will ensure successful blade installation every time. Now, go ahead and tackle your projects with confidence!