To use a Ryobi sander, first, choose the appropriate sandpaper grit and attach it to the sander’s pad. Then, turn on the sander and move it in a back-and-forth or circular motion over the surface to be sanded.
Sanding is a crucial step in any woodworking project, and the Ryobi sander is a versatile tool that can help you achieve a smooth and polished finish on a variety of surfaces.
Whether you’re sanding down rough edges on a piece of furniture, smoothing out a wooden floor, or preparing a surface for painting or staining, the Ryobi sander can get the job done quickly and efficiently.
With the right technique and sandpaper grit, you can achieve a professional-looking finish that will make your woodworking projects stand out. We’ll go over some tips and tricks for using a Ryobi sander to get the best results possible.
Contents
Introduction To Ryobi Sanders
Discover how to effectively operate a Ryobi Sander for your DIY projects. Learn the basics of using a Ryobi Sander to achieve smooth and professional finishes on your woodworking and home improvement tasks. Master the art of sanding with precision and ease using a Ryobi Sander.
The Rise Of Diy Projects
With the growing popularity of DIY projects, more and more people are taking on home improvement tasks themselves.
One essential tool for any DIY enthusiast is a reliable sander, and Ryobi sanders are known for their quality and performance.
Why Choose A Ryobi Sander?
Ryobi sanders are favored for their durability, versatility, and ease of use, making them ideal for various sanding applications.
Whether you are a beginner or a seasoned DIYer, a Ryobi sander can help you achieve professional results with minimal effort.
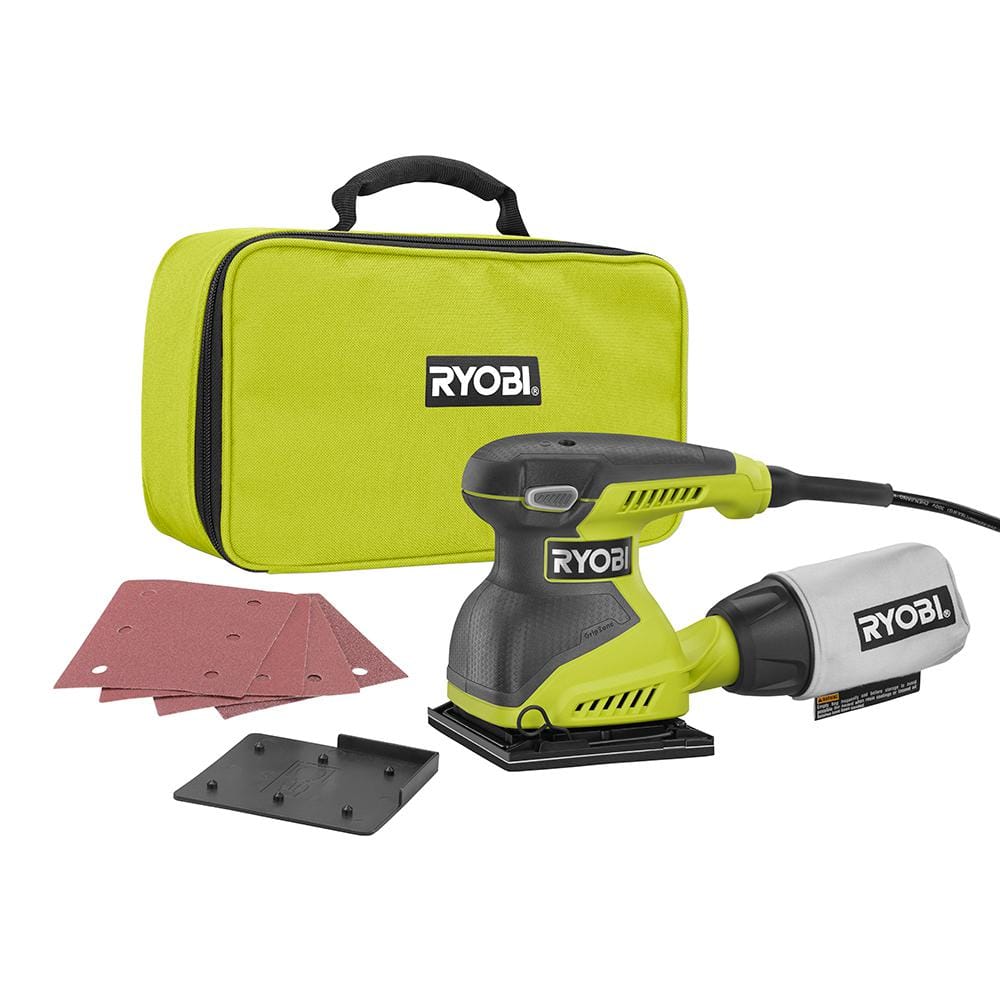
Types Of Ryobi Sanders
Ryobi offers a range of sanders designed to meet various sanding needs. Understanding the different types of Ryobi sanders can help you choose the right tool for your specific project. Here’s a breakdown of the main types:
Orbital Sanders For Beginners
Orbital sanders are perfect for beginners and DIY enthusiasts. They are versatile and easy to control, making them ideal for a wide range of sanding tasks. Whether you are smoothing out a surface or removing old paint, the orbital sander is a great tool to start with.
Belt Sanders For Heavy-duty Tasks
Belt sanders are designed for heavy-duty sanding tasks. They are powerful and efficient, making them suitable for large surface areas and tough materials. If you have a project that requires aggressive material removal, a belt sander is the right choice.
Preparing To Sand
When preparing to use a Ryobi Sander, it’s essential to start by ensuring that you have the right tools and safety gear in place.
Additionally, choosing the correct sandpaper for the job is crucial for achieving the desired result. Let’s delve into the details of preparing to sand with a Ryobi Sander.
Safety First: Gear And Precautions
Before starting any sanding project with a Ryobi Sander, it’s imperative to prioritize safety. Wear protective gear such as safety goggles, a dust mask, and ear protection to safeguard yourself from potential hazards.
Ensure the work area is well-ventilated to minimize dust inhalation. Keep the sander’s power cord away from the sanding path to avoid accidental damage or tripping.
Choosing The Right Sandpaper
When it comes to selecting the appropriate sandpaper for your Ryobi Sander, consider the type of material you’re sanding and the level of coarseness required.
Coarser grits are suitable for rough surfaces, while finer grits are ideal for smooth finishes. Ensure the sandpaper is securely attached to the sander’s base to prevent slippage during operation.
Setting Up Your Ryobi Sander
Setting up your Ryobi Sander is the first step to achieving a smooth and professional finish on your woodworking projects. Proper assembly and adjustment of settings are crucial to ensure the sander operates at its best.
In this guide, we’ll walk you through the process of setting up your Ryobi Sander, from assembling the components to adjusting settings for optimal use.
Assembling The Sander
Before you can start sanding, it’s essential to assemble your Ryobi Sander correctly. Refer to the user manual for detailed instructions, but here are the general steps to get you started:
- Attach the sanding pad to the sander base using the provided screws.
- Install the dust bag or connect a vacuum to minimize airborne dust.
- Insert the appropriate sandpaper grit onto the sanding pad, ensuring it’s securely in place.
- Check that all components are tightly secured before powering on the sander.
Adjusting Settings For Optimal Use
Once your Ryobi Sander is assembled, it’s time to adjust the settings for optimal performance:
- Sanding Speed: Use the speed control dial to adjust the sanding speed based on the material and desired finish.
- Dust Collection: Ensure the dust collection system is properly connected and functioning to maintain a clean working environment.
- Sanding Pressure: Apply even pressure while sanding to achieve uniform results and prevent overloading the motor.
Sanding Techniques
When it comes to using a Ryobi Sander, mastering the right sanding techniques can make all the difference. Whether you’re working on a woodworking project, refinishing furniture, or tackling a DIY home improvement task, knowing how to sand effectively is essential for achieving professional-quality results.
In this guide, we’ll explore the key sanding techniques that will help you get the most out of your Ryobi Sander, from achieving even sanding to navigating edges and corners with precision.
The Art Of Even Sanding
Even sanding is crucial for achieving a smooth and flawless finish on your workpiece. To achieve this, start by using a slow and steady motion with the sander, applying even pressure across the surface.
Move the sander in the direction of the wood grain to prevent any unwanted scratches or swirl marks. Regularly check the surface to ensure that the sanding is uniform and consistent.
Sanding edges and corners requires a different approach to ensure that you achieve a seamless finish. For edges, use the edge of the sanding pad to carefully sand along the edges without rounding them off.
When sanding corners, use a small, handheld sanding block to maintain control and prevent over-sanding. Switch to a finer grit sandpaper for these intricate areas to achieve a smooth, polished result.
Advanced Sanding Tips
When using a Ryobi sander, advanced sanding tips can help you achieve professional results and tackle challenging surfaces with ease. Here are some essential techniques to elevate your sanding game.
Dealing With Difficult Surfaces
1. Choose the Right Grit: Start with a coarse grit to remove any existing finishes or rough patches on difficult surfaces. Gradually transition to finer grits for a smoother finish.
2. Utilize Variable Speed: Adjust the sander’s speed based on the surface material. Lower speeds work well for delicate surfaces, while higher speeds are effective for tougher materials.
3. Sand Against the Grain: When dealing with interlocking grain or irregular patterns, sanding against the grain can help achieve a more even surface.
Achieving A Professional Finish
1. Use Proper Technique: Maintain a consistent and even pressure while sanding to prevent uneven patches and achieve a professional, uniform finish.
2. Employ Cross-Grain Sanding: After sanding with the grain, perform light cross-grain sanding to eliminate any remaining marks and ensure a smooth surface.
3. Dust Extraction: Regularly clean the work area and utilize a dust extraction system to prevent dust buildup, which can affect the quality of the finish.
By implementing these advanced sanding tips, you can optimize the performance of your Ryobi sander and elevate the quality of your woodworking projects.
Maintenance And Care
Proper maintenance and care are essential to ensure that your Ryobi sander continues to perform at its best. By following some simple maintenance and care guidelines, you can prolong the life of your sander and maintain its efficiency.
In this section, we will discuss cleaning your sander and the regular maintenance required to keep it in optimal condition.
Cleaning Your Sander
Regular cleaning of your Ryobi sander is crucial to prevent dust and debris buildup, which can affect its performance. Use a soft brush or cloth to remove dust and residue from the sander’s exterior, vents, and motor housing.
Ensure that the power is off and the sander is unplugged before cleaning. For stubborn debris, a mild detergent solution can be used, followed by thorough drying to prevent corrosion.
Regular Maintenance To Prolong Life
Performing regular maintenance on your Ryobi sander can significantly extend its lifespan. This includes inspecting the sanding pad for wear and tear, replacing it if necessary, and checking the power cord for any signs of damage.
Additionally, lubricating the moving parts and keeping the sander properly stored when not in use can help prevent unnecessary wear and tear.
Troubleshooting Common Issues
When it comes to using your Ryobi Sander, encountering common issues can be frustrating. Here are some tips to troubleshoot and resolve them effectively.
When Your Sander Isn’t Performing
If your Ryobi Sander is not working as expected, there are a few common issues you might encounter.
Solving Power And Efficiency Problems
- Ensure the power source is connected properly.
- Check the sanding pad for wear and tear.
- Adjust the sanding speed as needed.
By addressing these power and efficiency problems, you can optimize the performance of your Ryobi Sander.
Projects And Ideas
Are you wondering how to unleash the full potential of your Ryobi Sander? Look no further! In this section, we will explore creative uses and provide inspiration for your next DIY project.
Creative Uses For Your Ryobi Sander
- Refinishing Furniture: Give old furniture a new life by sanding and refinishing it.
- Creating Texture: Experiment with different sanding techniques to add texture to wood surfaces.
- Smoothing Edges: Achieve smooth and polished edges on your woodworking projects.
Inspiration For Your Next Diy Project
- Wooden Photo Frames: Sand and varnish wooden frames for a personalized touch.
- Custom Coasters: Sand and paint wooden coasters for a unique addition to your table setting.
- Rustic Shelves: Create rustic wooden shelves by sanding and staining reclaimed wood.

Frequently Asked Questions
How Do You Use A Sander For Beginners?
Using a sander for beginners requires following a few simple steps. First, choose the appropriate sandpaper grit for the job. Second, secure the material to be sanded firmly in place.
Third, turn on the sander and begin sanding with light pressure. Fourth, work in a back-and-forth motion until the desired smoothness is achieved. Finally, turn off the sander and clean up any debris.
How To Use Ryobi Handheld Sander?
To use a Ryobi handheld sander, first make sure it is unplugged. Attach the sandpaper to the sander and turn it on.
Hold the sander with both hands and move it in the direction of the grain. Apply light pressure and avoid tilting the sander. Keep the sander moving to prevent damage.
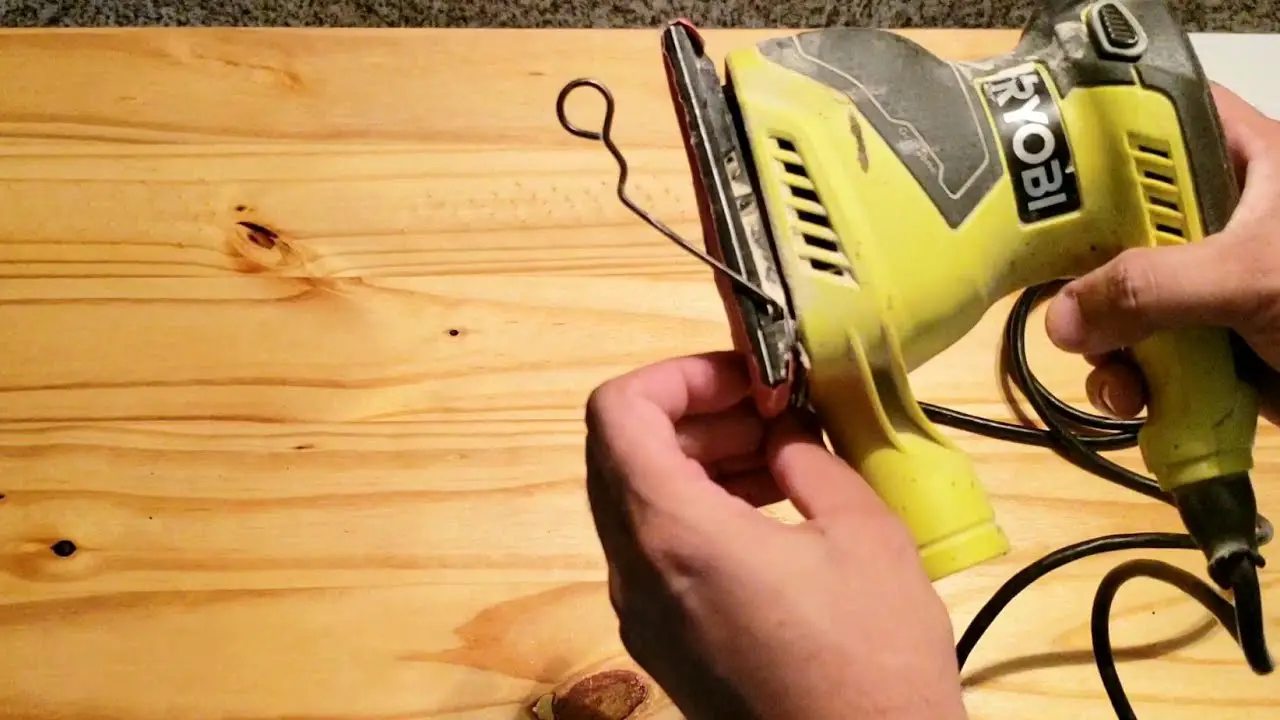
How Do You Attach Sandpaper To Ryobi Sander?
To attach sandpaper to a Ryobi sander, align paper with base, secure ends under clips, then press firmly.
How To Reload A Ryobi Sander?
To reload a Ryobi sander, first power off the tool. Then, release the sandpaper clamps, remove the old sandpaper, and replace it with a new sheet. Secure the sandpaper in place, tighten the clamps, and power on the sander.
Conclusion
To wrap up, mastering the Ryobi Sander can bring your woodworking projects to new heights. Remember to choose the right sandpaper grit, maintain proper technique, and prioritize safety. With these tips in mind, you’ll soon be creating smooth and polished surfaces effortlessly.