
To change the blade on a Ryobi 7 1/4 Miter Saw, first, unplug the saw for safety. Then, using the provided wrench, loosen the arbor bolt, remove the old blade, and install the new blade ensuring proper alignment.
Tighten the arbor bolt securely before testing the saw. Remember to wear protective gear during this process to prevent any injuries.
Changing the blade on your Ryobi 7 1/4 Miter Saw is a simple task that can be done quickly and easily with the right tools and precautions in place.
By following these steps, you can ensure that your saw continues to operate effectively and safely for all your cutting needs.
Contents
- Introduction To Ryobi 7 1/4 Miter Saw Blade Replacement
- Identifying When To Change The Saw Blade
- Tools Needed For Blade Replacement
- Powering Down And Preparing The Saw
- Removing The Old Blade
- Choosing The Right Blade For Your Saw
- Installing The New Blade
- Safety Checks And Testing
- Maintenance Tips For Longevity
- Troubleshooting Common Issues
- Frequently Asked Questions
- Conclusion
Introduction To Ryobi 7 1/4 Miter Saw Blade Replacement
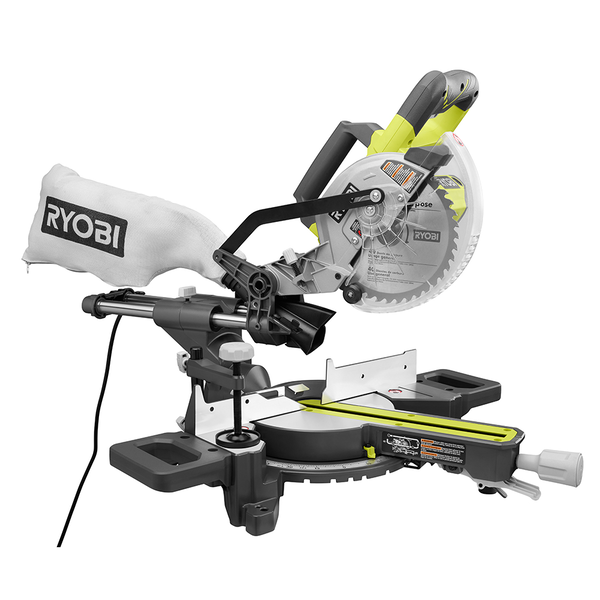
The Ryobi 7 1/4 Miter Saw is a versatile and essential tool for woodworking and carpentry projects. Understanding how to replace the blade on this miter saw is crucial for maintaining its efficiency and ensuring accurate cuts.
In this guide, we will walk you through the process of replacing the blade on the Ryobi 7 1/4 Miter Saw, emphasizing the importance of sharp blades and the necessary safety precautions before starting.
Importance Of Sharp Blades
Sharp blades are essential for achieving clean and precise cuts when using a miter saw. Dull blades can result in ragged edges, splintering, and overall poor cutting performance.
Regularly replacing the blade on your Ryobi miter saw ensures that your cuts remain accurate and smooth, enhancing the quality of your woodworking projects.
Safety First: Precautions Before Starting
- Before beginning the blade replacement process, always unplug the miter saw to prevent accidental start-up.
- Wear safety goggles and gloves to protect your eyes and hands from any potential hazards.
- Refer to the user manual for specific instructions and safety guidelines provided by the manufacturer.
- Secure the miter saw on a stable work surface to prevent any movement during the blade replacement.
- Handle the blade with caution, ensuring that it is properly installed and tightened according to the manufacturer’s specifications.
Identifying When To Change The Saw Blade
To determine when to change the saw blade on your Ryobi 7 1/4 Miter Saw, inspect for dullness and chipping. Unplug the saw, remove the old blade using the spindle lock, and install the new blade, ensuring it is securely tightened before use.
Signs Of A Dull Blade
A dull blade may produce splintered cuts, burn marks, or excessive sawdust.
Impact On Cutting Performance
A dull blade can slow down cutting speed and lead to inaccurate cuts.
Tools Needed For Blade Replacement
To change the blade on a Ryobi 7 1/4 Miter Saw, you will need essential tools like a wrench, blade clamp, and safety gloves.
Ensure the saw is unplugged before starting the blade replacement process for safety. Remember to follow the manufacturer’s instructions carefully for a smooth blade change experience.
Gathering The Right Equipment
When it’s time to change the blade on your Ryobi 7 1/4 miter saw, having the right tools is essential for a smooth and safe process. Here’s what you’ll need to gather before getting started:
Understanding Blade Specifications
Before diving into the blade replacement, it’s important to understand the specifications of the blade. The size, arbor, and type of blade required for your Ryobi 7 1/4 miter saw can vary, so be sure to consult the owner’s manual for the specific details.
Powering Down And Preparing The Saw
When changing the blade on your Ryobi 7 1/4 miter saw, it’s crucial to power down the saw and prepare it for the blade replacement process. Follow these steps to ensure a safe and efficient blade change.
Disconnecting Power Supply
Before starting any maintenance on your miter saw, disconnect the power supply to prevent any accidental starts. Unplug the saw from the electrical outlet or remove the battery if it’s a cordless model. This step is essential for your safety.
Securing The Saw
Once the power supply is disconnected, secure the miter saw to prevent any movement during the blade change. Use clamps or another suitable method to keep the saw in place. This will ensure stability and safety while working on the blade replacement.
Removing The Old Blade
When it’s time to replace the blade on your Ryobi 7 1/4 miter saw, it’s essential to know the proper steps for removing the old blade. By following the correct procedure, you can ensure a safe and successful blade replacement process.
Unlocking The Blade Guard
To begin, unlock the blade guard by locating the lever or knob that secures it in place. Once you’ve identified the locking mechanism, carefully disengage it to allow for the next steps in the blade removal process.
Retracting The Spindle Lock
Next, retract the spindle lock to immobilize the blade. This safety feature prevents the blade from rotating while you work to remove it, reducing the risk of accidents or injuries. Make sure the spindle lock is fully engaged before proceeding.
Choosing The Right Blade For Your Saw
When it comes to maximizing the performance of your Ryobi 7 1/4 Miter Saw, choosing the right blade is crucial. The blade you select can significantly impact the quality of your cuts, the materials you can work with, and the overall efficiency of your saw.
Understanding the different blade types, their purposes, compatibility considerations, and size requirements will help you make an informed decision when selecting a new blade for your miter saw.
Blade Types And Purposes
Choosing the right blade type is essential for achieving the best results with your miter saw. Different blade types are designed for specific materials and cutting applications. Crosscut blades are ideal for making smooth cuts across the grain of the wood, while rip-cut blades are designed to cut along the grain.
Combination blades offer versatility by providing the ability to perform both crosscuts and rip cuts. Fine-tooth blades are suitable for cutting delicate materials such as laminate, while coarse-tooth blades are better suited for rough cuts on thicker materials.
Compatibility And Size Considerations
When selecting a new blade for your Ryobi miter saw, it’s essential to consider compatibility and size. Arbor size is a critical factor, as it must match the arbor size of your saw. Additionally, ensuring that the blade diameter is compatible with your saw’s capacity is crucial.
Most 7 1/4 miter saws are designed to accommodate blades of this size, but it’s important to verify this before making a purchase. Kerf width is another consideration, as it should be compatible with the motor power and cutting capacity of your saw.
Installing The New Blade
When it comes to replacing the blade on your Ryobi 7 1/4 Miter Saw, installing the new blade correctly is crucial for optimal performance.
Aligning The Blade With The Arbor
1. Unlock the blade guard and rotate it away from the blade.
2. Align the new blade on the arbor ensuring the teeth face downwards.
3. Slide the blade onto the arbor, ensuring it sits flush against the arbor flange.
Tightening The Arbor Nut Securely
1. Hold the blade in place and tighten the arbor nut by turning it clockwise.
2. Use a wrench to secure the arbor nut firmly in place.
3. Double-check the tightness of the nut to avoid any blade slippage during operation.
Safety Checks And Testing
For safety, conduct thorough checks and testing before changing the blade on your Ryobi 7 1/4 Miter Saw. Ensure power is off, use the correct tools, and follow the manufacturer’s instructions carefully to complete the task safely and effectively.
Maintenance Tips For Longevity
To ensure longevity of your Ryobi 7 1/4 Miter Saw, it is important to properly maintain it. One key aspect of maintenance is knowing how to change the blade. Follow the manufacturer’s instructions carefully and use the appropriate tools to make the process quick and easy.
Regular Cleaning
To keep your Ryobi 7 1/4 Miter Saw in top condition, regular cleaning is essential. After every use, clean the saw blade, the blade guard, and the table with a clean cloth.
Use an air compressor or a brush to remove any sawdust or debris that may have accumulated in the nooks and crannies of the saw.
Regular cleaning will help to prevent the buildup of sawdust and debris that can cause the blade to overheat, resulting in damage to the saw or even injury to the operator.
Storage
Proper storage of your Ryobi 7 1/4 Miter Saw is also important for its longevity. Store the saw in a dry, cool place, away from direct sunlight.
Before storing the saw, make sure the blade is clean and dry. Apply a light coat of oil to the blade to prevent rusting. Always store the saw in an upright position to prevent the blade from warping or bending.
When To Seek Professional Sharpening?
Even with regular cleaning and proper storage, the blade on your Ryobi 7 1/4 Miter Saw will eventually become dull and in need of sharpening.
If you notice that the saw is not cutting through materials as easily as it used to, or if you notice that the blade is chipped or damaged, it’s time to seek professional sharpening.
Attempting to sharpen the blade yourself can cause further damage to the blade or the saw. Seek out a professional who has experience with sharpening saw blades to ensure that your blade is sharpened properly and safely.
Troubleshooting Common Issues
To change the blade on the Ryobi 7 1/4 Miter Saw, start by unplugging the saw and lowering the blade guard. Next, loosen the blade bolt using the wrench provided, and remove the old blade.
Install the new blade, making sure the teeth face the right direction, and then tighten the blade bolt securely. Remember to always wear protective gloves when handling the blade.
Wobble And Misalignment
If you notice wobbling or misalignment of the blade, check the blade mounting bolt for tightness. Ensure it is securely fastened. If the issue persists, inspect the blade for damages or dullness. Replace the blade if necessary. Refer to the user manual for detailed instructions.
Overcoming Blade Locking Challenges
To overcome blade locking challenges, follow these steps:
1. Ensure the saw is unplugged.
2. Use the arbor lock to hold the blade in place.
3. Loosen the arbor nut by turning it counterclockwise.
4. Remove the outer washer and blade.
5. Install the new blade, ensuring it is properly aligned.
6. Tighten the arbor nut by turning it clockwise.
Remember to always wear protective gear when working with power tools for safety.
Frequently Asked Questions
How To Change Blade On Ryobi 7 1/4 Circular Saw?
To change the blade on a Ryobi 7 1/4 circular saw, follow these steps:
1. Unplug the saw.
2. Press the spindle lock button.
3. Use a wrench to loosen the arbor nut.
4. Remove the old blade.
5. Install the new blade, tighten the nut, and release the spindle lock.
How To Change A Ryobi Miter Saw Blade?
To change a Ryobi miter saw blade, first, unplug the saw. Then, retract the blade guard and loosen the arbor bolt.
Remove the old blade, insert the new one, and tighten the arbor bolt. Finally, replace the blade guard and plug the saw back in.
How To Unlock Ryobi Miter Saw Blade?
To unlock a Ryobi miter saw blade, follow these steps:
1. Disconnect the saw from power.
2. Press the spindle lock button to lock the blade.
3. Use the wrench to loosen the arbor bolt.
4. Remove the bolt and the blade guard.
5. Replace the blade, then tighten the bolt.
How To Change The Blade On A Miter Saw?
To change the blade on a miter saw, first, unplug the saw. Then, raise the blade guard and loosen the arbor bolt.
Remove the old blade and replace it with a new one, making sure the teeth face down. Tighten the arbor bolt, lower the guard, and plug in the saw.
Conclusion
Mastering the process of changing the blade on your Ryobi 7 1/4 Miter Saw is a valuable skill for any DIY enthusiast or professional woodworker.
By following the step-by-step guide provided in this blog post, you can efficiently and safely replace the blade whenever needed.