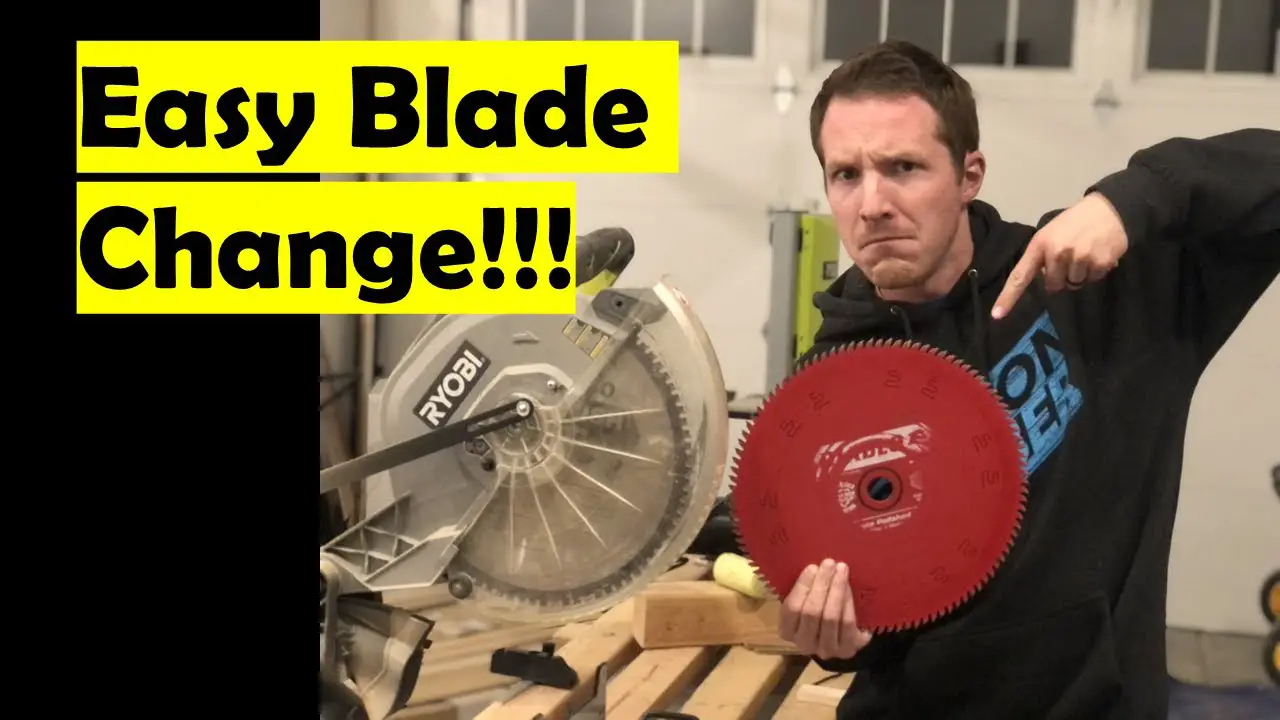
To change the blade on a Ryobi Miter Saw, first, unplug the saw for safety. Loosen the blade bolt, remove the old blade, and replace it with a new one.
Secure the blade with the bolt, and plug the saw back in. Always wear safety goggles and gloves when changing the blade. Changing the blade on a Ryobi Miter Saw is a straightforward process that can be done in a few simple steps.
By following the manufacturer’s instructions and taking necessary safety precautions, you can quickly and efficiently replace the blade on your saw. This guide will walk you through the process to ensure a smooth blade replacement experience.
Contents
- Introduction To Ryobi Miter Saw Maintenance
- Identifying When To Change The Blade
- Selecting The Right Replacement Blade
- Gathering Necessary Tools And Equipment
- Powering Down And Prepping The Saw
- Removing The Old Blade
- Installing The New Blade
- Post-installation Checks
- Maintaining Your Miter Saw And Blade
- Troubleshooting Common Issues
- Frequently Asked Questions
- Conclusion
Introduction To Ryobi Miter Saw Maintenance
Maintaining your Ryobi miter saw includes knowing how to change the blade effectively. To change the blade on your Ryobi miter saw, follow these simple steps to ensure smooth operation and precise cuts every time.
Regular blade changes are key to keeping your saw in optimal working condition. Regular maintenance is crucial for keeping your Ryobi miter saw in top condition. One essential task is changing the blade, which ensures precise and safe cuts.
Importance Of Regular Blade Changes
- Blade changes maintain cutting performance and accuracy.
- Regular changes prevent blade dullness and reduce kickback risk.
Safety First: Preparing For The Task
- Turn off and unplug the miter saw before starting.
- Wear safety goggles and gloves to protect your eyes and hands.
- Secure the blade to prevent accidental movement.
Identifying When To Change The Blade
To change the blade on a Ryobi Miter Saw, start by disconnecting power, then loosen the blade bolt, remove the outer washer and blade. Install the new blade, ensuring proper alignment, reattach the washer, and tighten the bolt securely before testing the saw’s functionality.
Changing the blade on your Ryobi miter saw is an important maintenance task that can improve the performance and extend the life of your saw.
However, before you can change the blade, you need to identify when it is time to do so. In this section, we will discuss the signs of a dull blade and the impact it can have on cutting performance.
Signs Of A Dull Blade
There are a few telltale signs that indicate it is time to change the blade on your Ryobi miter saw. One of the most obvious signs is a reduction in cutting performance.
If you notice that the saw is struggling to make smooth cuts or is producing rough edges, it may be time to change the blade.
Another sign of a dull blade is burn marks on the wood. If you see charred or discolored areas on the wood after cutting, it is likely that the blade is not cutting cleanly.
Impact On Cutting Performance
A dull blade can have a significant impact on cutting performance. Not only does it make it more difficult to make clean, precise cuts, but it can also cause damage to the saw itself.
A dull blade puts more strain on the motor, which can lead to overheating and premature wear and tear. Additionally, a dull blade can cause the saw to kick back or bind, which can be dangerous for the user.
To ensure optimal cutting performance and safety, it is important to change the blade on your Ryobi miter saw as soon as you notice any of the signs of a dull blade. With the right tools and techniques, changing the blade is a quick and easy task that can be done in just a few minutes.
Selecting The Right Replacement Blade
When it comes to maintaining your Ryobi miter saw, selecting the right replacement blade is crucial to ensure the best performance for your specific cutting needs. With the wide array of blade types available, it’s important to understand the different options and select the one that is compatible with your Ryobi model.
Blade Types And Purposes
Various blade types are designed for specific cutting applications. Crosscut blades are ideal for making smooth cuts across the grain of the wood, while ripping blades are specifically designed for cutting with the grain.
Combination blades offer versatility, allowing you to perform both crosscuts and rip cuts with a single blade. Consider the type of cutting you will be doing most frequently to determine the most suitable blade type for your needs.
Compatibility With Your Ryobi Model
Before selecting a replacement blade for your Ryobi miter saw, it’s essential to ensure compatibility with your specific model.
Refer to your saw’s manual or check the manufacturer’s guidelines to determine the compatible blade sizes and types that are suitable for use with your Ryobi miter saw model.
Using an incompatible blade may lead to safety hazards and compromise the performance of your saw.
Gathering Necessary Tools And Equipment
Gathering the necessary tools and equipment is the first step in changing the blade on your Ryobi Miter Saw. Before you begin, make sure you have the following items ready.
Safety Gear
- Safety goggles: Protect your eyes from any debris or particles that may be released during the process.
- Gloves: Ensure a secure grip and protect your hands from sharp edges.
- Ear protection: Guard your ears against the noise generated by the power tools.
Tools For Blade Replacement
- Hex key or wrench: Used to loosen the blade bolt.
- Blade locking pin: Helps in securing the blade during the replacement process.
- Clean cloth: Use it to clean the saw and the new blade before installation.
- New blade: Ensure it is compatible with your Ryobi Miter Saw model.
Powering Down And Prepping The Saw
When it comes to changing the blade on your Ryobi miter saw, it’s essential to start by powering down and prepping the saw. This process ensures your safety and the efficiency of the blade replacement. Let’s dive into the initial steps of this essential task.
Unplugging And Securing The Saw
Before beginning any work on the miter saw, unplug it from the power source to prevent any accidental activation. Additionally, engage the safety lock to keep the saw in a secured and stable position.
Clearing The Workspace
Prior to changing the blade, it’s crucial to clear the workspace around the saw. Remove any debris, tools, or materials that may obstruct the blade replacement process. This step ensures a safe and unobstructed environment for the blade change.
Removing The Old Blade
When it comes to maintaining your Ryobi miter saw, knowing how to change the blade is an essential skill.
Whether you’re looking to replace a dull blade or upgrade to a different type, this guide will walk you through the process step by step. In this section, we’ll focus on the crucial first step: removing the old blade.
Accessing The Blade
To begin, unplug the miter saw from the power source and ensure that the blade and the surrounding components are completely stationary. Identify the blade guard and the arbor bolt, as these are the key elements you’ll need to access to remove the old blade.
Loosening And Removing The Blade Safely
First, ensure that the blade is secure by engaging the spindle lock to prevent it from rotating. Next, using the provided wrench, loosen the arbor bolt by turning it in the same direction as the blade’s rotation.
Once the arbor bolt is sufficiently loosened, carefully remove it and the outer washer. Finally, gently lift the old blade from the arbor and set it aside in a safe location.
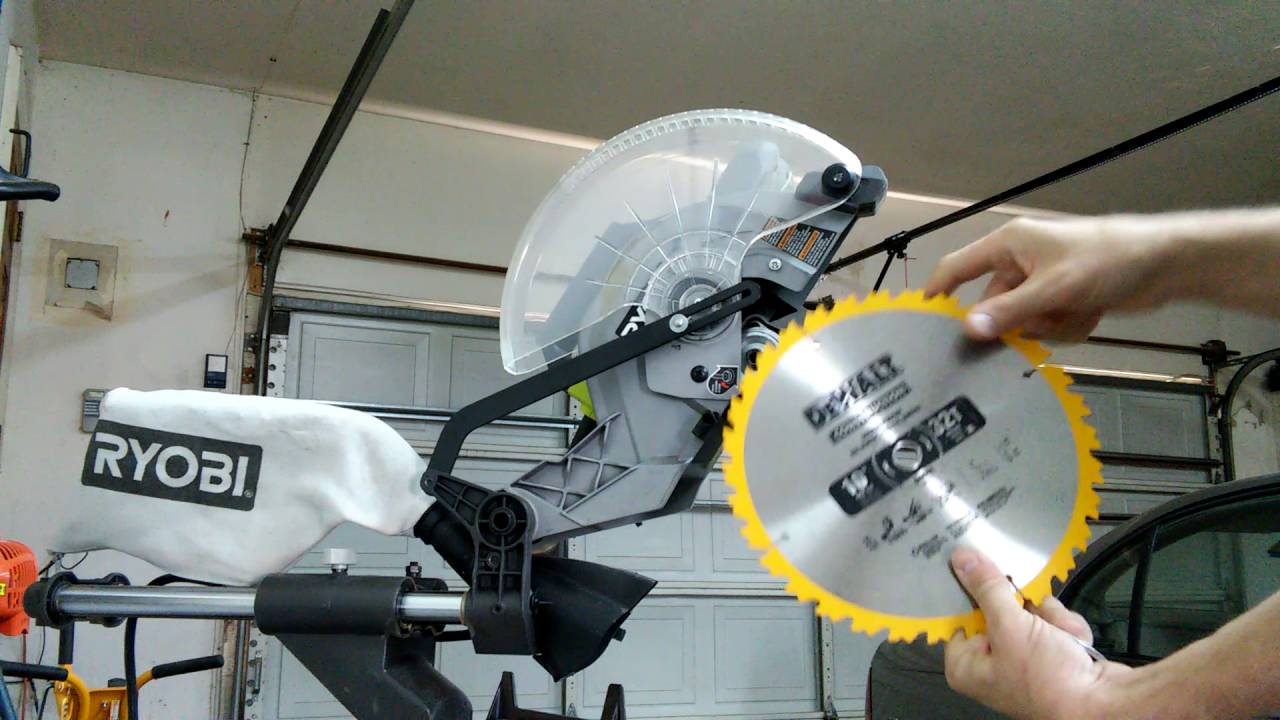
Installing The New Blade
To change the blade on your Ryobi Miter Saw, start by unplugging the saw and loosening the blade bolt. Next, remove the old blade, insert the new one, and tighten the bolt securely. Finally, plug in the saw and test the new blade for smooth operation.
Installing a new blade on your Ryobi miter saw is an easy task that can be accomplished with just a few simple steps. In the previous section, we discussed removing the old blade. Now, let’s move on to installing the new blade. Follow these steps to install the new blade:
Aligning The Blade Correctly
Before installing the new blade, make sure to align it correctly. The blade should be installed so that the teeth are pointing down towards the table and the cutting edge is facing forward. This will ensure that your cuts are clean and precise.
Securing The Blade
Once the blade is aligned correctly, it’s time to secure it in place. Follow these steps to secure the blade:
- Place the new blade onto the spindle, making sure that it’s seated all the way down.
- Thread the arbor nut onto the spindle and tighten it by hand.
- Use a wrench to tighten the arbor nut securely. Make sure to hold the spindle lock button while tightening the nut to prevent the spindle from turning.
- Double-check that the blade is securely fastened and that the teeth are pointing down towards the table.
That’s it! Your new blade is now installed and ready to use. Remember to always use caution when handling power tools, and wear appropriate safety gear such as eye protection and gloves.
By following these simple steps, you can easily change the blade on your Ryobi miter saw and get back to your woodworking projects in no time.
Post-installation Checks
Once you have successfully changed the blade on your Ryobi Miter Saw, it is essential to perform thorough post-installation checks to ensure optimal performance and safety.
Ensuring Tightness And Alignment
- Check all bolts and screws for tightness to prevent any loosening during operation.
- Inspect the blade for proper alignment to avoid wobbling or vibrations while cutting.
- Use a square to verify the perpendicularity of the blade to the miter saw table for accurate cuts.
Test Cuts For Verification
- Perform test cuts on scrap wood to ensure the blade is cutting smoothly and accurately.
- Check for any burn marks on the wood, which may indicate dullness or misalignment of the blade.
- Adjust the bevel and miter angles to verify the blade’s precision in cutting angles.
Maintaining Your Miter Saw And Blade
To change the blade on your Ryobi Miter Saw, start by unplugging the saw and lowering the blade guard. Next, use the spindle lock to secure the blade and then use a wrench to loosen the arbor bolt. Once the bolt is removed, you can replace the blade with a new one and tighten the arbor bolt back in place.
Remember to always follow the manufacturer’s instructions for your specific model. Maintaining Your Miter Saw and Blade Taking care of your miter saw and blade is essential for optimal performance and longevity. By following routine cleaning tips and proper storage advice, you can ensure that your tools remain in top condition for years to come.
Routine Cleaning Tips Regular cleaning is crucial for keeping your miter saw and blade in good working condition. To clean your miter saw, start by unplugging it and using a soft brush or cloth to remove any sawdust and debris from the blade guard, fence, and other exposed parts.
Next, lubricate the moving parts to prevent rust and ensure smooth operation. Inspect the blade for any signs of damage or dullness, and replace it if necessary. Storage Advice for Longevity Proper storage is key to extending the life of your miter saw and blade.
When not in use, store your miter saw in a dry and secure location to prevent exposure to moisture and potential damage. Consider investing in a blade storage case to protect the blade from corrosion and dulling. Additionally, use a blade stabilizer when storing the saw to keep the blade secure and prevent any accidental damage.
In conclusion, regular cleaning and proper storage are essential for maintaining the functionality and longevity of your miter saw and blade. By following these tips, you can ensure that your tools remain in top condition for all your future projects.

Troubleshooting Common Issues
When changing the blade on your Ryobi Miter Saw, you may encounter common issues that can be easily resolved. Below are some troubleshooting tips to help you address these problems quickly.
Addressing Wobble Or Noise
If your Ryobi Miter Saw is experiencing wobbling or making unusual noises, the blade may not be installed correctly. Ensure the blade is properly aligned and tightened to prevent any movement during operation.
What To Do If The Saw Won’t Cut?
If your Ryobi Miter Saw is not cutting effectively, check the blade for dullness or damage. Replace the blade if necessary to ensure clean and precise cuts. Additionally, ensure the material is properly secured and the saw is set to the correct cutting angle.
Frequently Asked Questions
How To Unlock Ryobi Miter Saw Blade?
To unlock a Ryobi Miter Saw blade, loosen the blade locking pin, remove the blade guard, and unscrew the blade bolt.
How To Change Blade On Ryobi Saw?
To change the blade on a Ryobi saw, first unplug the tool. Then, locate the blade release button and press it to release the blade.
Remove the old blade and insert the new blade, making sure it’s securely in place. Finally, release the blade release button and plug in the saw to test the new blade.
How Do I Change The Blade In A Miter Saw?
To change the blade in a miter saw, first, unplug the saw. Then, loosen the blade bolt with a wrench, remove the old blade, and install the new one. Finally, tighten the blade bolt and plug in the saw. Always wear gloves and eye protection.
How Do You Change The Blade On A Ryobi Ems254l?
To change the blade on a Ryobi EMS254L, follow these steps:
1. Unplug the saw for safety.
2. Loosen the blade bolt with the wrench provided.
3. Remove the outer flange and blade.
4. Replace with a new blade, ensuring it’s securely in place.
5. Tighten the bolt and you’re ready to go!
Conclusion
Mastering how to change the blade on your Ryobi miter saw is crucial for smooth operations. By following these simple steps, you can enhance your tool skills and safety.
Remember to refer to the user manual for detailed instructions. Keep your saw in top condition for accurate and efficient cuts.