To put the chain back on Ryobi chainsaw, first, loosen the tensioning screw and remove the guide bar side panel. Then, place the chain onto the guide bar and around the drive sprocket.
Finally, reattach the side panel and adjust the tension as necessary. If you’re a DIY enthusiast or a professional, there’s a good chance you’ve encountered a chainsaw with a loose chain. Chainsaw chains can come off for various reasons, including poor maintenance or improper use.
However, putting the chain back on a Ryobi chainsaw is a simple process that can be done in a few minutes with the right tools and knowledge. We’ll guide you through the process of putting the chain back on your Ryobi chainsaw.
Contents
- Introduction To Ryobi Chainsaw Chain Issues
- Safety First: Preparing For The Fix
- Identifying The Chain Type And Size
- Tools Required For Chain Adjustment
- Step-by-step Guide To Reattaching The Chain
- Adjusting Chain Tension
- Final Checks And Maintenance Tips
- Troubleshooting Common Chain Issues
- Professional Help And Resources
- Conclusion: The Benefits Of Diy Chainsaw Repair
- Frequently Asked Questions
- Conclusion
Introduction To Ryobi Chainsaw Chain Issues
Ryobi chainsaws are reliable tools for homeowners and professionals alike, but even the most well-maintained chainsaw can encounter chain issues.
Understanding common reasons for chain slippage and the importance of proper chain tension is crucial for maintaining the performance and safety of your Ryobi chainsaw.
Common Reasons For Chain Slippage
Chain slippage can occur due to various reasons, such as improper tension, worn-out drive sprocket, or damaged chain links. Additionally, incorrect bar size or misaligned chain teeth can also lead to chain slippage. Identifying the specific cause of the issue is essential for effective troubleshooting and maintenance.
Importance Of Proper Chain Tension
Proper chain tension is vital for the safe and efficient operation of a chainsaw. Loose chains can not only lead to slippage but also pose a significant safety risk.
Conversely, overly tight chains can cause excessive wear on the bar and the sprocket, affecting the chainsaw’s performance. Regularly checking and adjusting the chain tension is crucial for ensuring optimal functionality.
Safety First: Preparing For The Fix
Protective Gear Essentials
Before starting the fix, ensure you have the following protective gear:
- Safety goggles to protect your eyes
- Gloves to safeguard your hands
- Ear protection to prevent hearing damage
- Appropriate footwear for a stable stance
Ensuring The Chainsaw Is Powered Off
Prior to fixing the chain, make sure to:
- Switch off the chainsaw to avoid accidental starts
- Wait for the chainsaw to completely stop moving
- Disconnect the spark plug for added safety
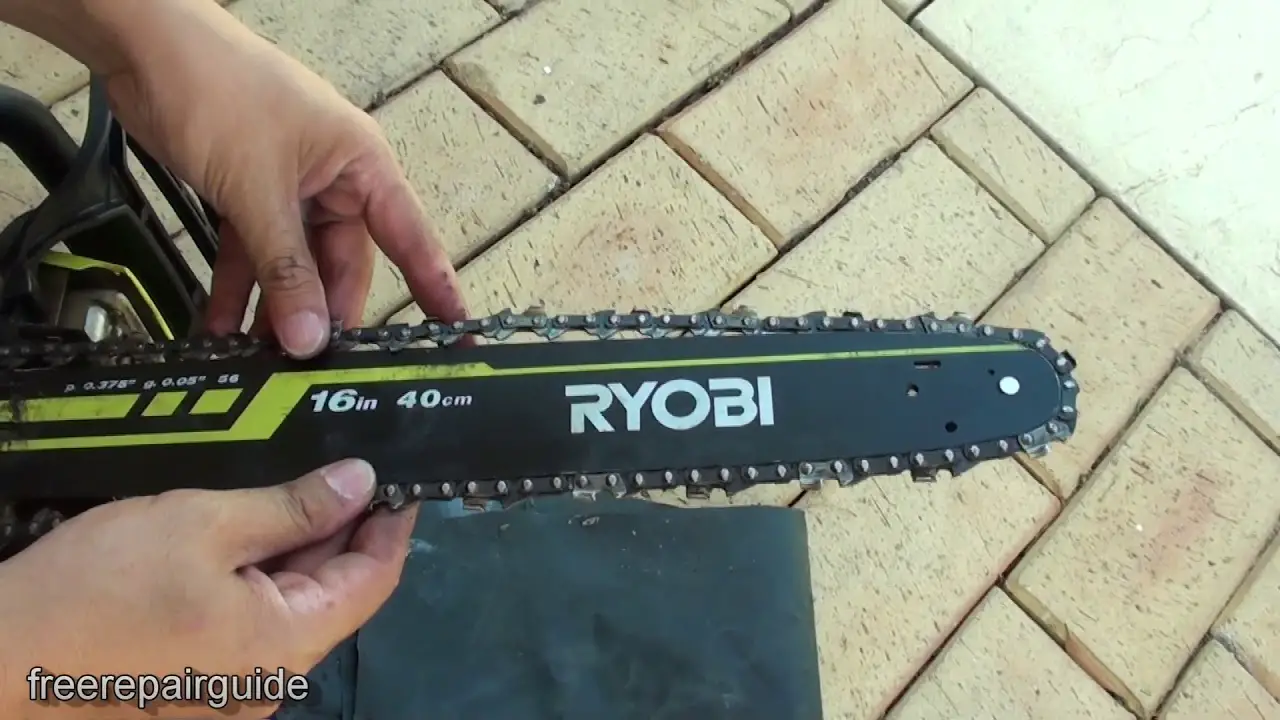
Identifying The Chain Type And Size
Identifying the Chain Type and Size is crucial for putting the chain back on your Ryobi chainsaw. It’s important to match the chain to your specific Ryobi model and understand the measurements to ensure a perfect fit.
Matching The Chain To Your Ryobi Model
When it comes to matching the chain to your Ryobi model, it’s essential to identify the specific model number of your chainsaw.
You can usually find this information on the chainsaw’s housing or in the owner’s manual. Once you have the model number, you can easily determine the compatible chain for your Ryobi chainsaw.
Understanding Chain Measurements
Understanding chain measurements is crucial to ensure that you get the right size for your Ryobi chainsaw. Chain measurements typically include the pitch, gauge, and the number of drive links.
The pitch is the distance between three rivets on the chain, divided by two. The gauge refers to the thickness of the drive links, and the number of drive links is the total number of links in the chain. Ensuring the correct measurements will guarantee that the chain fits perfectly on your Ryobi chainsaw.
Tools Required For Chain Adjustment
When it comes to maintaining your Ryobi chainsaw, having the right tools for chain adjustment is essential. Properly adjusting the chain tension ensures efficient and safe operation of your chainsaw.
In this section, we will discuss the necessary tools for adjusting the chain on your Ryobi chainsaw, as well as alternative options if specialized tools are unavailable.
Gathering The Necessary Tools
Before starting the chain adjustment process, it’s important to gather the required tools. The following table outlines the essential tools for chain adjustment on your Ryobi chainsaw:
| Tool | Description |
|---|---|
| Flat-head screwdriver | Used for adjusting the chain tensioning screw |
| Chainsaw wrench | Specifically designed for adjusting the chain tensioning screw and removing the guide bar and chain |
| Safety gloves | Protect your hands during the adjustment process |
| Protective eyewear | Ensure safety while working with the chainsaw |
If you don’t have access to the specialized tools mentioned above, there are alternative options to consider:
- Use a coin or flat object as a substitute for a flat-head screwdriver
- Adjust the chain tension with a standard wrench if a chainsaw wrench is unavailable
Step-by-step Guide To Reattaching The Chain
Learn how to put the chain back on your Ryobi chainsaw with this step-by-step guide. It’s important to follow each instruction carefully to reattach the chain correctly and safely.
Loosening The Guide Bar
To begin, loosen the nuts holding the guide bar in place using a wrench.
Then, adjust the tension screw to release pressure on the guide bar.
Fitting The Chain Onto The Bar
Place the chain over the bar, ensuring the cutting edges face in the direction of rotation.
Next, carefully fit the chain onto the drive sprocket, making sure the teeth align properly.

Adjusting Chain Tension
Adjusting the chain tension on your Ryobi chainsaw is an important maintenance task that ensures safe and efficient operation.
Properly tensioned chains are essential for optimal cutting performance and to prevent kickbacks. In this section, we will cover the steps to fine-tune the chain tension for optimal tightness and how to check for proper movement.
Fine-tuning For Optimal Tightness
When adjusting the chain tension on your Ryobi chainsaw, it’s crucial to achieve the perfect balance. Loose chains can jump off the guide bar while overly tight chains can cause excessive wear and decrease cutting efficiency.
To achieve optimal tightness, follow these steps:
- Turn off the chainsaw and allow it to cool down.
- Using a screwdriver, locate the chain tensioning screw and turn it counterclockwise to loosen the tension.
- Gently pull the chain around the guide bar to ensure it moves freely without sagging excessively.
- If the chain is too loose, turn the tensioning screw clockwise until it sits snugly against the guide bar without binding.
- Check the tension by gently pulling the chain by hand to ensure it remains snug against the guide bar.
- Once the desired tension is achieved, tighten the bar nuts to secure the guide bar in place.
Checking For Proper Movement
After adjusting the chain tension, it’s essential to check for proper movement to ensure the chain operates smoothly. Follow these steps to ensure proper chain movement:
- Inspect the chain to ensure it moves freely along the guide bar without binding or excessive resistance.
- Rotate the chain around the guide bar to ensure it moves smoothly without any jerking or hesitation.
- If you notice any irregularities in the chain movement, readjust the tension following the steps mentioned earlier until the chain moves smoothly.
Final Checks And Maintenance Tips
Final Checks and Maintenance Tips are crucial to keep your Ryobi chainsaw in top condition. By following these steps, you can ensure that your chainsaw is operating safely and efficiently.
Testing The Chainsaw Post-fix
- Start the chainsaw and observe the chain movement.
- Check for any unusual sounds or vibrations.
- Ensure the chain remains securely in place.
Routine Maintenance To Prevent Future Slippage
- Regularly inspect the chain tension and adjust as needed.
- Clean the chain and bar after each use to remove debris.
- Apply lubrication to the chain to reduce friction.
- Replace worn-out or damaged chains promptly.

Troubleshooting Common Chain Issues
When using a Ryobi chainsaw, encountering chain-related issues can be frustrating. However, understanding how to troubleshoot common chain problems can help ensure smooth operation and efficient cutting. Let’s explore some common chain issues and how to address them.
Addressing Chain Jamming
If you find the chain jamming frequently during operation, there are a few potential causes to consider:
- Inspect the chain for any debris or obstructions that may be causing the jamming.
- Check the tension of the chain to ensure it is properly adjusted. A loose chain can lead to jamming.
- Ensure that the chain is properly lubricated to prevent friction and binding.
Dealing With Unusual Chain Wear
Unusual chain wear can impact the performance and longevity of your Ryobi chainsaw. Here are some steps to address this issue:
- Regularly inspect the chain for signs of excessive wear, such as uneven cutting or dullness.
- Properly maintain the guide bar to prevent premature wear on the chain.
- Sharpen the chain regularly to maintain optimal cutting performance and reduce strain on the motor.
Professional Help And Resources
When dealing with complex tasks like putting the chain back on a Ryobi chainsaw, professional help and resources can be invaluable. Below are key points to consider when seeking assistance:
When To Seek Professional Repair
- Complex Issues: Seek professional help if the problem is beyond basic troubleshooting.
- Safety Concerns: If you are unsure about safety or proper chain installation, consult a professional.
Useful Online Guides And Tutorials
- Ryobi Website: Check Ryobi’s official website for instructional videos and manuals.
- YouTube Tutorials: Watch videos from experienced users demonstrating chain replacement.
- Online Forums: Engage with online communities for advice and troubleshooting tips.
Conclusion: The Benefits Of Diy Chainsaw Repair
Repairing your Ryobi chainsaw yourself can save you time and money. Putting the chain back on is a simple process that you can do at home with the right tools and knowledge. Enjoy the benefits of DIY chainsaw repair by taking control of your own maintenance needs.
Cost Savings And Satisfaction
Empowerment Through Learning New Skills
DIY chainsaw repair offers valuable benefits, including cost savings and a sense of accomplishment. Taking the time to learn how to put the chain back on a Ryobi chainsaw can save you money and provide satisfaction in fixing it yourself.
It empowers you to develop new skills and tackle challenges independently. By understanding the process, you can troubleshoot issues efficiently and maintain your chainsaw effectively. Whether it’s fixing a chain or handling other repairs, DIY chainsaw maintenance is a rewarding and practical skill to acquire.
Frequently Asked Questions
How To Put Chainsaw Chain Back On?
To put a chainsaw chain back on, loosen the chain tensioner, place the chain on the bar, and adjust the tension.
How To Tighten Chain On Ryobi 10 Inch Chainsaw?
To tighten the chain on a Ryobi 10-inch chainsaw, use the tensioning screw on the chainsaw’s side.
Turn it clockwise to tighten the chain until it fits snugly on the guide bar. Check the tension by pulling the chain – it should move smoothly without sagging.
How Do You Fix A Looped Chainsaw Chain?
To fix a looped chainsaw chain, first, turn off the chainsaw. Then, carefully remove the guide bar and the chain.
Untangle the chain and reposition it on the guide bar. Finally, reattach the guide bar and check the tension before restarting the chainsaw.
Which Direction Does A Chainsaw Chain Go?
The chainsaw chain should go in the direction that allows the teeth to cut towards you.
Conclusion
To wrap up, mastering how to put a chain back on a Ryobi chainsaw is crucial for DIY enthusiasts and professionals alike.
Following the correct steps ensures safety and efficiency in chainsaw operation. Remember to prioritize safety and maintenance for optimal performance of your Ryobi chainsaw.