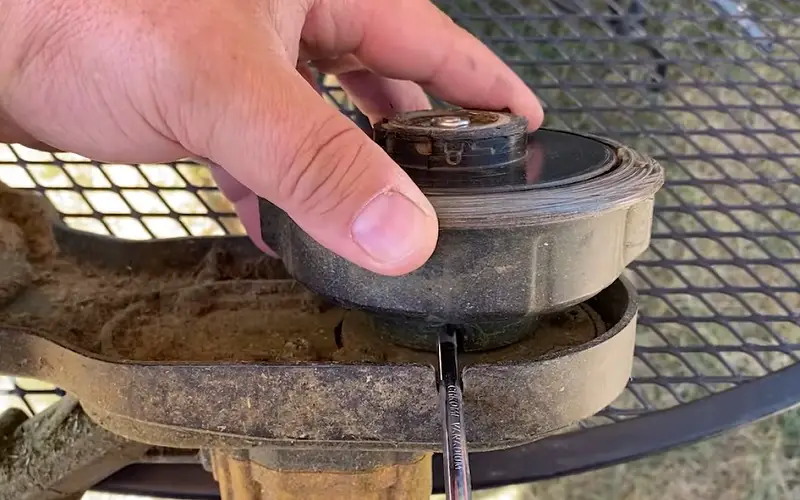
To remove the Dewalt 20V trimmer head, first, unscrew the head counterclockwise using the provided wrench. Pull off the head carefully to detach it from the trimmer.
The Dewalt 20V trimmer is known for its efficiency in keeping your lawn in top shape. Whether you need to replace a worn-out head or simply need to clean it, knowing how to remove the trimmer head is essential.
By following a few simple steps, you can quickly and easily detach the trimmer head and perform any necessary maintenance tasks.
Let’s delve into the process of removing the Dewalt 20V trimmer head in detail to ensure you can undertake this task with ease and confidence.

Contents
Understanding Dewalt 20v Trimmer Head
The Dewalt 20V trimmer head is a crucial part of the trimmer that requires proper understanding for efficient maintenance and removal.
By learning about the key components and functions of this essential tool, you can ensure smooth operation and timely maintenance, ultimately extending its lifespan.
Key Components
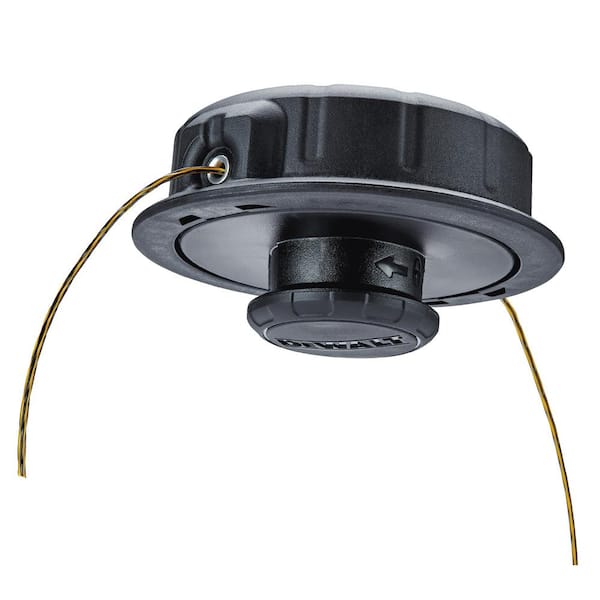
The Dewalt 20V trimmer head consists of several key components that all play a vital role in its functionality. These components include the trimmer line, trimmer head cover, spool, and trimmer head housing.
Functions
Understanding the functions of these key components is essential for efficient operation. The trimmer line is responsible for cutting grass and weeds, while the trimmer head cover protects the internal components from debris.
The spool holds the trimmer line, and the trimmer head housing encases the spool and other internal parts.
Tools Required
Removing the DeWalt 20V trimmer head requires specific tools to ensure the process is smooth and efficient.
Necessary Equipment
- Pliers: To grip and twist components securely.
- Adjustable Wrench: For loosening tight fasteners.
- Safety Glasses: Protect your eyes from debris.
Optional Accessories
- Work Gloves: Enhance grip and protect your hands.
- Lubricating Oil: Aid in loosening stuck parts.
- Clean Cloth: Wipe down the trimmer head for maintenance.
Step-by-step Removal Process
Removing the trimmer head from your Dewalt 20V trimmer requires a few simple steps. By following this step-by-step removal process, you can easily detach the trimmer head for maintenance, replacement, or cleaning purposes. Let’s dive into the details:
Step 1: Preparation
Before you begin removing the trimmer head, it’s essential to ensure that you have the necessary tools and a safe working environment. Here’s what you’ll need:
- Protective eyewear
- Gloves
- A clean work area
Make sure to wear your protective eyewear and gloves throughout the entire process for your safety.
Step 2: Detaching The Trimmer Head
Now that you’re ready, follow these instructions to detach the trimmer head:
- Turn off the trimmer and remove the battery to prevent accidental startup.
- Locate the trimmer head at the end of the trimmer shaft.
- Hold the trimmer head firmly with one hand.
- Using your other hand, rotate the bump knob counterclockwise to unlock it.
- Once the bump knob is loose, carefully slide the trimmer head out of the trimmer shaft.
Ensure that you handle the trimmer head with care while removing it to avoid any damage.
Step 3: Inspecting For Wear And Tear
After detaching the trimmer head, it’s a good idea to inspect it for any signs of wear and tear. Here’s what you should look for:
- Check the trimmer head for any cracks or damage.
- Inspect the trimmer’s line and spool for wear or tangles.
- Examine the trimmer head’s components to ensure everything is in working order.
If you notice any issues or if you have been experiencing decreased performance from your trimmer head, it may be time to consider a replacement or repair.
Code Example :
If you need to replace the trimmer head, simply follow the reverse process of removing it. Insert the new trimmer head into the trimmer shaft and rotate the bump knob clockwise to lock it in place.
Make sure it is securely attached before turning on your trimmer again. By following these step-by-step instructions, you can easily remove the trimmer head of your Dewalt 20V trimmer and perform any necessary maintenance or replacement tasks.
Remember to always prioritize safety and handle all tools and equipment with care to prevent accidents or damage.

Maintenance Tips
Dewalt 20V trimmer is a reliable tool for keeping your lawn neat and trim. To ensure its optimum performance, regular maintenance is essential. Here are some maintenance tips to help you keep your trimmer head in top condition.
Cleaning The Trimmer Head
Regularly cleaning the trimmer head is crucial to prevent dirt and debris buildup, which can affect its performance.
Here’s a simple process to keep your trimmer head clean and functioning smoothly:
- Detach the trimmer head from the power source.
- Use a brush to remove any accumulated grass or debris from the trimmer head.
- Wipe down the trimmer head with a damp cloth to remove any additional dirt or grass buildup.
Inspecting For Damage Regularly
Regularly inspecting the trimmer head for damage is essential to ensure its longevity and performance.
Here are some steps to follow when inspecting for damage:
- Check for any signs of wear, such as cracks or breakage in the trimmer head.
- Inspect the trimmer head for any loose or missing components that may impact its functionality.
- Ensure that the trimmer head is securely attached to the trimmer shaft to prevent any potential issues during operation.
By following these maintenance tips, you can ensure that your Dewalt 20V trimmer head remains in optimal condition, allowing you to tackle your lawn maintenance tasks with ease.
Reattachment And Testing
When reattaching and testing your Dewalt 20V trimmer head, it’s essential to follow these steps meticulously to ensure proper functionality.
Step 1: Attaching The Trimmer Head
To reattach the trimmer head, align the drive shaft with the gearbox and push the head onto the shaft until it snaps into place.
Next, twist the head clockwise to secure it properly and ensure it is tightly attached to the trimmer.
Step 2: Testing For Proper Functionality
- Before starting the trimmer, make sure the battery is securely attached and fully charged.
- Press the power button, and listen for the trimmer head to start spinning smoothly without any unusual noises.
- Check the cutting performance by trimming a small section of grass to ensure the head is functioning correctly.
Alternative Head Removal Methods
When it comes to removing the trimmer head on your Dewalt 20V trimmer, there are alternative methods you can use if the traditional approach doesn’t work. These alternative methods can be helpful in situations where the standard method is ineffective or when you don’t have the necessary tools at hand.
Specialized Tools
If you find that the traditional removal methods are not successful, specialized tools can provide a solution. There are various specialized tools available that are designed specifically for removing trimmer heads, such as trimmer head removal tools or universal trimmer head wrenches.
These tools are designed to securely grip the trimmer head and provide the necessary torque to loosen it. Utilizing these tools can make the removal process much easier and reduce the risk of damaging the trimmer or injuring yourself.
Seeking Professional Assistance
If you’ve exhausted all available methods and are still unable to remove the trimmer head, it may be time to seek professional assistance.
Professional technicians have the expertise and specialized equipment required to remove stubborn trimmer heads without causing damage to the trimmer.
They can also provide valuable advice on the best course of action if the trimmer head is stuck due to underlying issues.

Frequently Asked Questions
How Do You Remove The Head Of A Trimmer?
To remove the head of a trimmer, follow these steps:
1. Turn off the trimmer and unplug it.
2. Locate the locking mechanism or button on the head.
3. Press or unlock the mechanism to release the head.
4. Pull the head off the trimmer.
How To Remove Spool Cap?
To remove the spool cap, follow these steps:
1. Turn off the power to the device.
2. Locate the spool cap on the device.
3. Hold the spool cap firmly and rotate it counterclockwise.
4. Once it loosens, remove the spool cap completely.
5. You can now access the spool and replace it if needed.
How Do You Change The String On A Dewalt Electric Trimmer?
To change the string on a Dewalt electric trimmer, first, turn off the trimmer and disconnect the power.
Then, remove the spool cover, take out the old string, and insert new string following the arrows on the spool.
Finally, reassemble the trimmer and you’re good to go.
How To Rewind A Dewalt 20v Trimmer?
To rewind a Dewalt 20V trimmer, gently pull the string until it’s fully extended.
Hold the spool in place and wind the string in the direction indicated on the spool.
Once wound, line up the string with the eyelet and feed it through.
Conclusion
To sum up, removing the Dewalt 20V trimmer head is a simple task that anyone can accomplish with the right tools and know-how.
By following the steps outlined in this guide, you can efficiently detach and replace the trimmer head to ensure your gardening equipment stays in top condition.

