To change Ryobi sander pads, first, remove the old pad by unscrewing it from the sander base. Then, align and attach the new pad securely by tightening the screws.
Changing the sanding pad on your Ryobi sander is a simple process that can be done quickly and easily. Whether you are upgrading to a new pad or replacing a worn-out one, knowing how to change the sander pad will ensure your tool remains effective for all your sanding projects.
In this blog post, we will guide you through the step-by-step process of changing the sander pads on your Ryobi sander, helping you maintain optimal performance and achieve professional results in your woodworking or DIY projects.
Contents
- Introduction To Ryobi Sander Pads
- Identifying When To Change Sander Pads
- Types Of Ryobi Sander Pads
- Safety First: Preparing To Change The Pad
- Step-by-step Pad Removal
- Installing The New Sander Pad
- Troubleshooting Common Issues
- Maintenance Tips For Longer Pad Life
- Enhancing Your Sanding Experience
- Frequently Asked Questions
- Conclusion
Introduction To Ryobi Sander Pads
Ryobi sander pads are essential components of a sander that help in achieving smooth and polished surfaces. These pads play a crucial role in the sanding process, ensuring effective and efficient results.
Understanding the importance of proper maintenance and regular replacement of sander pads is vital for achieving optimal performance and extending the lifespan of your Ryobi sander.
Importance Of Proper Maintenance
Regular maintenance of Ryobi sander pads is crucial to ensure consistent performance and high-quality sanding results.
Proper maintenance includes keeping the pads clean, free from debris, and ensuring they are securely attached to the sander. Neglecting maintenance can lead to diminished sanding efficiency and potential damage to the sander.
Benefits Of Changing Sander Pads
Changing the sander pads on your Ryobi sander offers several benefits.
Improved Performance: Fresh sander pads ensure smoother operation and better sanding results.
Enhanced Durability: Regularly changing the pads can extend the lifespan of the sander, preventing unnecessary wear and tear.
Consistent Quality: New pads help maintain consistent sanding quality, resulting in professional-looking finishes.

Identifying When To Change Sander Pads
Properly maintaining your Ryobi sander pads is key to ensuring a smooth sanding experience. It’s important to identify when it’s time to change your sander pad, as worn pads can lead to uneven sanding and damage to your surface. Follow the manufacturer’s instructions to safely and easily replace your sander pad.
Signs Of Wear And Tear
- Uneven sanding results indicate worn pads.
- Decreased sanding efficiency can signal pad deterioration.
- Visible tears or holes on the pad are clear signs of damage.
Frequency Of Replacement
- For moderate use, consider replacing every 3-6 months.
- Heavy usage may require more frequent replacements, around every 1-3 months.
- Inspect the pad regularly for signs of wear, regardless of frequency.
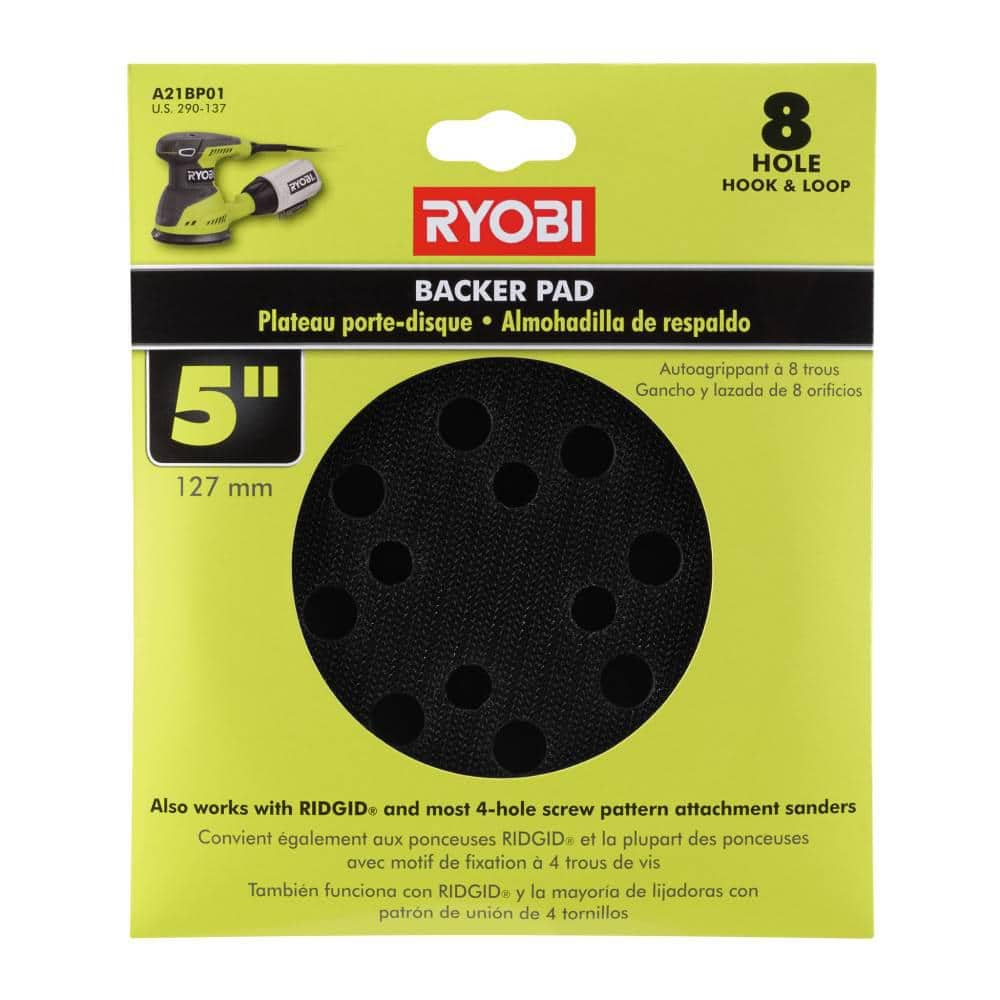
Types Of Ryobi Sander Pads
When it comes to using a Ryobi sander, choosing the right sanding pad is crucial for achieving the best results. Ryobi offers a variety of sander pads designed for different purposes, each with unique features that cater to specific sanding needs.
Understanding the types of Ryobi sander pads and how to choose the right one can significantly impact the quality of your sanding projects.
Varieties And Purposes
Ryobi provides a range of sander pads, each tailored to specific sanding tasks. These pads are designed to accommodate various materials and surface types, ensuring optimal performance and efficiency during sanding.
Choosing The Right Pad
When selecting a Ryobi sander pad, it’s essential to consider the material being sanded and the desired finish. By understanding the different pad options and their intended applications, you can make an informed decision that leads to successful sanding outcomes.
Safety First: Preparing To Change The Pad
When it comes to changing the sanding pad on your Ryobi sander, it’s crucial to prioritize safety. Before beginning the process, it’s important to take the necessary precautions to ensure a safe and successful pad replacement. By following these steps and guidelines, you can effectively prepare for the task at hand.
Disconnecting Power
Before starting the pad replacement process, it’s essential to disconnect the power source to the sander. This helps to prevent any accidental activation of the tool during the pad change, reducing the risk of injury. Always unplug the sander from the power outlet or remove the battery if it’s a cordless model to ensure complete safety.
Gathering Necessary Tools
Ensuring that you have all the required tools at hand is crucial to a smooth pad replacement process. Gather the necessary tools such as a screwdriver or Allen wrench, depending on the sander model, to remove the existing pad.
Having the right tools readily available saves time and ensures that the replacement can be carried out without interruptions.
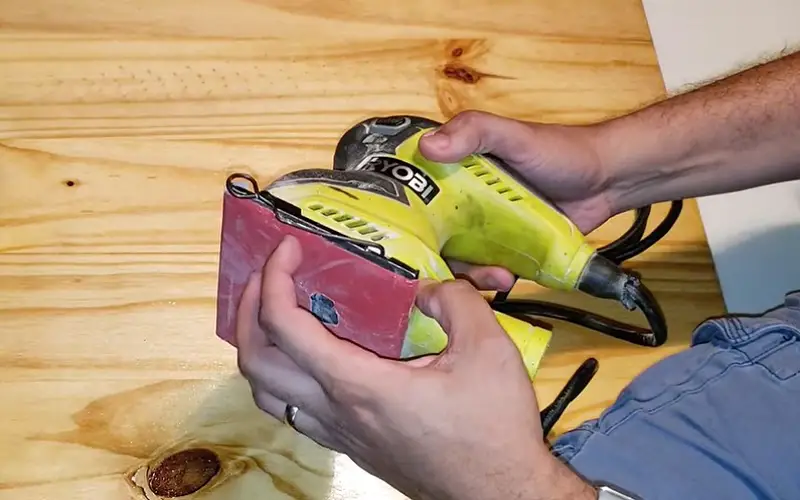
Step-by-step Pad Removal
When it’s time to replace the pad on your Ryobi sander, it’s essential to follow a step-by-step process to ensure a smooth and efficient pad removal. Taking the time to do this properly will help maintain the performance and longevity of your sander.
Loosening The Fasteners
To begin, unplug the sander from the power source for safety. Use a suitable tool to loosen the fasteners that secure the sanding pad in place. Ensure to keep track of the fasteners to avoid misplacement during the reassembly process.
Carefully Removing The Used Pad
Once the fasteners are loose, gently remove the used pad from the sander. Take care to avoid damaging the sander or the pad during this process. Dispose of the old pad responsibly, and be sure to clean any residual adhesive or debris from the sander’s pad mounting surface.
Installing The New Sander Pad
Easily change Ryobi sander pads by following these simple steps to install the new sander pad. Ensure a smooth sanding experience by regularly replacing worn-out pads for optimal performance and quality results.
Keep your Ryobi sander in top condition with this quick and hassle-free process.
When it’s time to replace the sander pad on your Ryobi sander, installing the new pad is a straightforward process. Follow these steps to ensure a proper and secure installation of the new sander pad.
Aligning The Pad Correctly
1. Place the new sander pad over the sanding base, ensuring that the screw holes align perfectly.
2. Gently press down on the pad to make sure it sits flush against the sanding base.
Securing The Pad Firmly
1. Insert the screws into the designated holes on the sander pad.
2. Use a screwdriver to tighten the screws securely, but be careful not to over-tighten them.
Troubleshooting Common Issues
To change Ryobi sander pads, first unplug the tool for safety. Remove the existing pad and align the new one, ensuring a secure fit. Reattach the screws and test the sander to confirm proper installation.
Pad Doesn’t Stick
If the pad doesn’t stick: Ensure surface is clean and dry.
Use sticky-back sandpaper for better adhesion.
Vibration During Use
Check for loose screws or worn-out parts.
Balance the sander and apply even pressure.

Maintenance Tips For Longer Pad Life
Maintenance is key to ensuring a longer pad life for your Ryobi sander. Proper storage practices, regular cleaning, and appropriate pad replacement are essential for maintaining the efficiency of your sander.
These simple maintenance tips will not only extend the life of your sander pads but also improve the overall performance of your tool.
Proper Storage Practices
Store your Ryobi sander in a dry and clean environment to prevent moisture and dust accumulation. Keep it in its original case or a designated storage container to protect it from external elements. Avoid placing heavy objects on top of the sander to prevent damage to the pads.
Cleaning The Sander And Pads
Regularly clean the sander and replace the pads when necessary to prevent buildup of dust and debris. Use a soft brush or a vacuum cleaner to remove dust from the sander. For the pads, gently clean them with a damp cloth and allow them to dry thoroughly before reuse.
Enhancing Your Sanding Experience
Enhance your sanding experience with a Ryobi sander by learning how to change the sanding pads. This simple task can greatly improve the quality of your sanding and make your projects easier and more efficient.
Recap Of Steps
To change Ryobi sander pads, ensure the tool is unplugged and the dust bag is removed. Loosen the pad’s screws, remove the old pad, and attach the new one securely.
Encouragement For Diy Projects
Embarking on DIY projects fosters creativity and skill development. Don’t hesitate to tackle new tasks and learn along the way.
Frequently Asked Questions
How To Change Sandpaper On Ryobi Orbital Sander?
To change sandpaper on a Ryobi orbital sander, first, remove the current sandpaper. Next, place the new sandpaper onto the sanding pad, ensuring it’s secure. Lastly, tighten the sandpaper clamp and you’re ready to sand.
How To Change Pad On Sander?
To change the pad on a sander, first unplug it for safety. Then, remove the old pad and attach the new one according to the sander’s instructions. Make sure it’s securely in place before using the sander again.
How To Replace Sandpaper On Ryobi Belt Sander?
To replace sandpaper on a Ryobi belt sander, first, unplug the tool. Release the tension lever to open the belt.
Remove the old sandpaper and place the new one, ensuring it’s aligned. Close the sander, secure the tension lever, and plug it back in.
Can You Replace The Velcro Pad On A Sander?
Yes, you can replace the velcro pad on a sander. It’s a simple process. Just remove the old pad and attach the new one securely.
Conclusion
To summarize, changing the sanding pad on your Ryobi sander can be a simple process if you follow the steps outlined in this guide. Remember to take safety precautions and use the correct tools for the job.
With a little practice, you’ll be able to quickly and easily change your sanding pads as needed, ensuring that your projects are completed to the best of your ability. So, go ahead and put your new knowledge to the test, and happy sanding!