To use the Ryobi stud finder, simply place it against the wall and press the button to scan for studs. The device will indicate when it detects a stud.
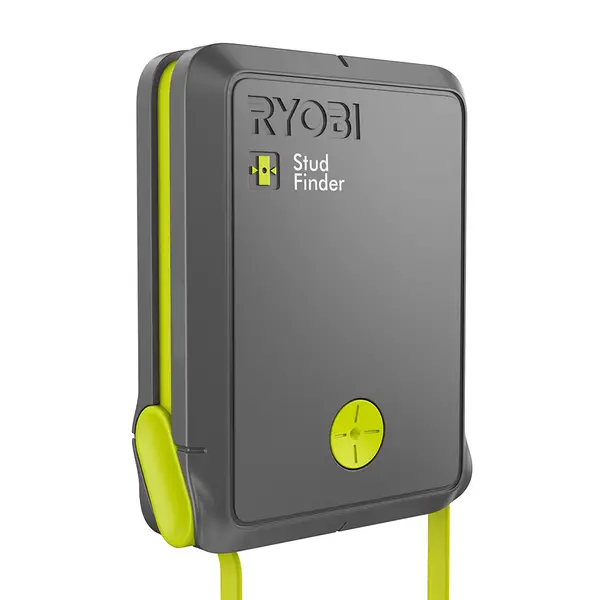
Are you embarking on a DIY project that requires locating studs in your walls with precision? The Ryobi stud finder is a handy tool that can make this task a breeze.
By following a few simple steps, you can quickly and accurately identify studs to ensure secure and stable mounting of shelves, cabinets, or other heavy objects.
In this blog post, we will guide you on how to effectively use the Ryobi stud finder to streamline your home improvement projects. Let’s dive in and master the art of stud-finding with ease!

Contents
Introduction To Ryobi Stud Finder
Discover how to effectively use the Ryobi Stud Finder to locate studs in your walls. This innovative tool helps you identify the perfect spot for securely hanging shelves, TVs, and more, making your DIY projects a breeze. Mastering the Ryobi Stud Finder is the key to achieving professional results with ease.
The Importance Of Accurate Stud Finding
Locating studs in your walls is crucial for securely hanging heavy objects.
Using a reliable stud finder like Ryobi can help prevent damage to your walls.
Key Features Of Ryobi Stud Finder
- Multi-surface scanning capabilities for various wall types.
- Wire warning detection to avoid electrical mishaps.
- Center-find technology for precise stud location.
When it comes to home improvement projects, having the right tools is essential for success. One such tool that can make your life easier is the Ryobi Stud Finder.
This handy device is designed to help you locate studs behind your walls quickly and accurately, allowing you to securely mount shelves, cabinets, and other heavy items without the risk of damaging your walls.
Getting Started With Your Tool
Discover how to effectively utilize the Ryobi Stud Finder for accurate wall scanning. Locate studs effortlessly with the step-by-step guide provided to streamline your DIY projects. Master the tool’s features and ensure precise results every time.
Unboxing And Initial Setup
Upon receiving your Ryobi Stud Finder, start by carefully unboxing all components.
- Check for the main unit, batteries, and user manual.
- Insert the batteries as per the instructions in the manual.
- Power on the stud finder to begin the initial setup process.
Understanding The User Manual
The user manual is a valuable resource for maximizing the functionality of your stud finder.
- Read through the manual thoroughly to grasp its features.
- Pay attention to calibration and usage guidelines.
- Refer to troubleshooting tips in case of any issues.
Preparing For Your Project
Safety Precautions To Consider
When using the Ryobi Stud Finder, it is crucial to prioritize safety. Here are a few safety precautions to keep in mind:
- Wear protective gear, such as safety goggles and gloves, to prevent any potential injuries during the project.
- Ensure the work area is well-lit to accurately identify studs and avoid any mishaps.
- Avoid placing excessive pressure on the stud finder to prevent damage to the device or the wall.
Materials Needed Alongside The Stud Finder
Before using the Ryobi Stud Finder, gather the following materials to streamline the process:
- Pencil or marker to mark the identified studs on the wall.
- Level to ensure that the markings are straight and accurate.
- Hammer and nails or screws for hanging items securely on the located studs.
Operating The Ryobi Stud Finder
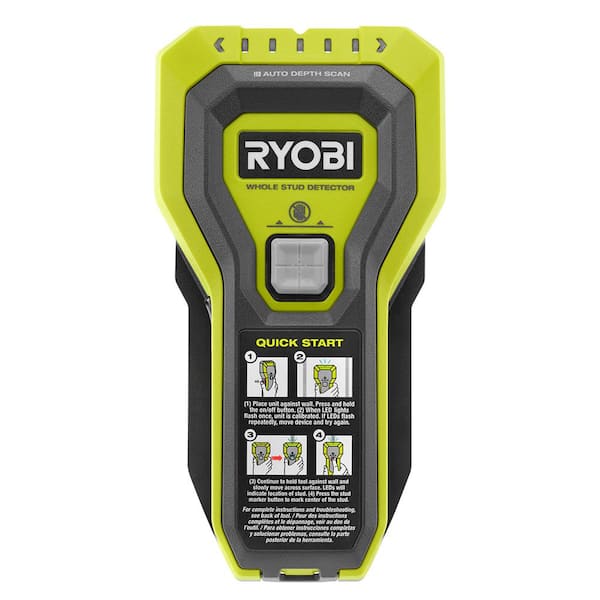
Operating the Ryobi Stud Finder is a simple and straightforward process that allows you to accurately locate studs behind walls. Understanding how to power on and calibrate the device, as well as navigating through its different modes, is essential for efficient use.
Powering On And Calibration
To power on the Ryobi Stud Finder, simply press the power button located on the device. Once powered on, it’s important to calibrate the stud finder before use. This ensures accurate detection of studs within the wall.
The Ryobi Stud Finder features different modes for versatile stud detection. To switch between the modes, use the mode selection button on the device. Each mode is designed for specific wall materials and thicknesses, providing optimal results.
Techniques For Stud Detection
When it comes to effectively using a Ryobi stud finder, mastering the techniques for stud detection is essential. By understanding how to scan walls effectively and interpret signals and indicators, you can confidently locate studs for various installation projects.
Scanning Walls Effectively
For optimal stud detection, start by placing the Ryobi stud finder flat against the wall. Slowly slide it horizontally while holding the power button.
Keep the device level and move it at a consistent speed to ensure accurate results. When the stud is detected, the unit will emit a series of beeps and illuminate the indicator lights.
Interpreting Signals And Indicators
Understanding the signals and indicators displayed by the Ryobi stud finder is crucial for successful stud detection. Pay close attention to the visual and audible cues provided by the device.
When the stud is located, the LED lights will illuminate, and the device will emit a continuous beep. This indication confirms the presence of a stud at the specific location.
Troubleshooting Common Issues
Troubleshooting common issues when using the Ryobi Stud Finder can help you make the most of this handy tool. By addressing common problems, you can ensure accurate and efficient stud detection for your projects.
Dealing With False Positives
If you’re experiencing false positives with your Ryobi Stud Finder, it could be due to interference from electrical wiring or metal objects in the wall. To address this, move the stud finder in a horizontal and vertical direction, recalibrating it as necessary.
Avoid rushing through the scanning process to reduce the likelihood of false readings. Additionally, ensure the stud finder is being held flat against the wall for accurate results.
What To Do If No Studs Are Detected?
If your Ryobi Stud Finder is not detecting any studs, it’s important to verify that the device is properly calibrated. Refer to the user manual for calibration instructions and follow them carefully.
Additionally, ensure the batteries are fully charged and the stud finder is being used on a suitable wall surface. If no studs are still being detected, try adjusting the sensitivity settings or utilizing a different scanning mode to improve results.
Enhancing Your Stud Finder Experience
Useful Accessories And Add-ons
Consider these accessories to make your stud finder more efficient:
- Laser Level: Provides precise leveling for accurate stud detection.
- Marker Pens: Helps mark the spots where studs are detected.
- Protective Case: Safeguards your stud finder during storage and transport.
Maintenance Tips For Longevity
Follow these tips to ensure your stud finder lasts longer:
- Regular Calibration: Maintain accuracy by calibrating your device frequently.
- Proper Storage: Store your stud finder in a dry place away from extreme temperatures.
- Battery Care: Replace batteries promptly to prevent damage from leaks.
Real-world Applications
Discover the practical applications of the Ryobi Stud Finder for accurate wall scanning and locating studs effortlessly.
Simplify your DIY projects by using this user-friendly tool to easily find hidden studs behind walls. Save time and effort with this essential gadget for any home improvement enthusiast.
Examples Of Projects Using Ryobi Stud Finder
When hanging heavy items like shelves or mirrors, a Ryobi stud finder is essential to locate sturdy wall studs for secure installation.
For DIY enthusiasts, using the Ryobi stud finder to find studs before drilling for curtain rods ensures proper anchoring and prevents damage.
Advanced Techniques For Professional Results
Professional contractors rely on the Ryobi stud finder to precisely locate studs for framing walls during home renovation projects.
Utilizing the deep scan mode on the Ryobi stud finder enhances accuracy when identifying studs behind thicker wall materials.
Conclusion And Next Steps
Upon understanding how to use the Ryobi stud finder, you can confidently conclude your search for wall studs. Next steps involve applying the device to locate studs and marking their positions for your project. Mastering this tool will enhance your DIY skills.
Summarizing Key Takeaways
To recap, the Ryobi Stud Finder is a handy tool that can help you locate studs and other objects behind walls with ease. By following the steps outlined in this guide, you should be able to use the device accurately and efficiently.
Remember to calibrate your stud finder before use and keep it flat against the wall to ensure accurate readings.
Further Resources For Diy Enthusiasts
If you’re a DIY enthusiast looking to expand your knowledge and skills, there are plenty of resources available to you. From online tutorials and forums to books and magazines, there is a wealth of information out there to help you tackle your next project with confidence. Some popular resources include:
By taking advantage of these resources and continuing to practice your DIY skills, you’ll be well on your way to becoming a DIY pro in no time.

Frequently Asked Questions
What Is The Correct Way To Use A Stud Finder?
To use a stud finder correctly, follow these steps:
1. Choose the right type of stud finder for your task.
2. Hold the stud finder flat against the wall and calibrate it.
3. Move the stud finder slowly over the wall until it indicates the location of a stud.
4. Mark the spot where the stud is located.
5. Verify the location of the stud using a level or by drilling a small hole.
Does The Ryobi Stud Finder Detect Wires?
Yes, the Ryobi stud finder can detect wires along with studs in walls. Be cautious when scanning for wires.
Why Won’t My Ryobi Stud Finder Calibration?
Ensure Ryobi stud finder is on a flat surface. Hold down power button until “CAL” appears. Slowly move it over a known stud.
Press and hold button until beep sounds. If issues persist, check for low battery or contact customer support.
How To Find Out If Studs Are Wood Or Metal?
To find out if studs are wood or metal, use a magnetic stud finder. Slide it along the wall, and it will attract to metal studs.
For wood studs, use an electronic stud finder with a deep scan mode. It will detect the density difference between wood and empty space.
Conclusion
The Ryobi Stud Finder is a valuable tool for any DIY enthusiast or professional. Its user-friendly design and accurate results make it a must-have for any home improvement project.
With its advanced features and affordable price, it’s the perfect companion for locating studs with ease and precision.