To use Dremel sanding discs, attach the disc to the Dremel tool and secure it in place. Then, turn on the tool and gently guide the spinning disc across the surface you want to sand.
Are you looking to enhance your DIY projects with precise sanding and shaping? Dremel sanding discs are a versatile and effective tool for achieving smooth finishes on various materials, from wood to metal.
With their easy-to-use design and compatibility with Dremel rotary tools, these discs can help you achieve professional results.
We will explore the proper techniques for using Dremel sanding discs, as well as some tips for getting the most out of this versatile tool. Whether you’re a hobbyist or a professional, mastering the use of Dremel sanding discs can elevate the quality of your projects.

Contents
Introduction To Dremel Tools And Sanding Discs
Discover the versatility of Dremel tools with sanding discs for precision crafting and DIY projects. Easily use Dremel sanding discs for shaping, smoothing, and refining various materials with precision and ease. Unlock the potential of your Dremel tool by mastering the art of using sanding discs effectively.
The Versatility Of Dremel Rotary Tools
Dremel rotary tools are versatile and can be used for various tasks. They are compact, lightweight, and easy to handle.
Dremel tools are known for their precision and efficiency in sanding, cutting, grinding, and polishing tasks.
Types Of Sanding Discs And Their Uses
There are different types of sanding discs available for Dremel tools, each serving a specific purpose.
Sanding discs range from coarse to fine grits, suitable for shaping, smoothing, and finishing different materials.
Selecting The Right Sanding Disc
When it comes to achieving a smooth and polished finish, selecting the right sanding disc for your Dremel tool is crucial.
The sanding disc you choose can make a significant difference in the quality of your project, so it’s important to consider several factors to ensure that you’re using the most suitable disc for the task at hand.
Factors To Consider
When selecting a sanding disc for your Dremel tool, there are several important factors to consider:
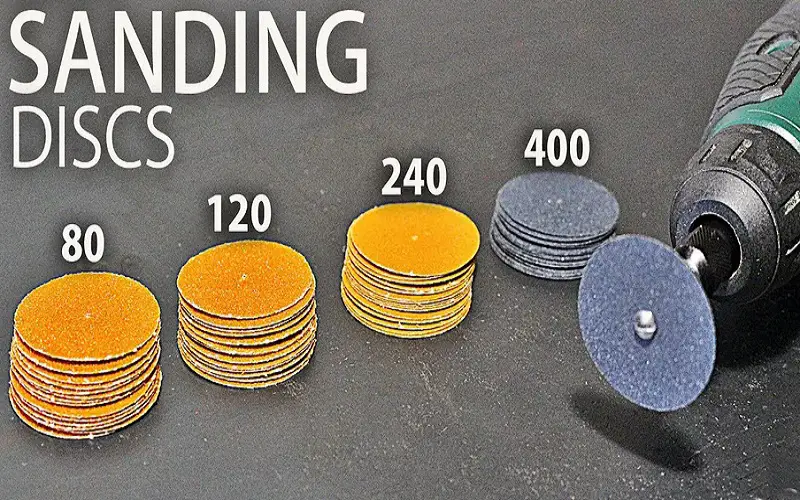
Comparing Grit Sizes
One of the key considerations when choosing a sanding disc is the grit size. Different grit sizes are suitable for different tasks, so it’s essential to understand the differences and select the appropriate grit for your specific project.
Setting Up Your Dremel For Sanding
Prepare your Dremel for sanding by attaching the sanding discs securely. Ensure the Dremel is set to the correct speed for optimal sanding results. Start sanding by gently guiding the Dremel over the surface in smooth, controlled motions.
Before you begin sanding with your Dremel, it’s crucial to set it up correctly. This involves attaching the sanding disc and taking safety measures to ensure that your work area is safe. In this article, we’ll explain how to set up your Dremel for sanding, so you can achieve a smooth finish on your woodworking projects.
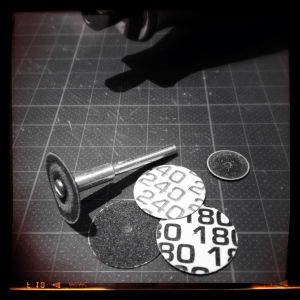
Attaching The Sanding Disc
The first step in setting up your Dremel for sanding is to attach the sanding disc. Here’s how to do it:
- Unplug your Dremel from the power source.
- Locate the screw at the top of the Dremel.
- Insert the sanding disc onto the Dremel.
- Tighten the screw to secure the sanding disc in place.
It’s essential to ensure that the sanding disc is firmly attached to the Dremel before you start sanding. Otherwise, it could fly off and cause injury or damage.
Safety Measures Before Starting
Before you start sanding, it’s essential to take safety measures to protect yourself and your work area. Here are some safety tips to follow:
- Wear safety goggles to protect your eyes from dust and debris.
- Wear a dust mask to prevent breathing in harmful particles.
- Secure your workpiece in a vice or clamp to prevent it from moving around while you’re sanding.
- Make sure your work area is well-lit and free of clutter.
By following these safety measures, you can minimize the risk of injury and ensure that your work area is safe and conducive to sanding.
In conclusion, setting up your Dremel for sanding is a straightforward process that involves attaching the sanding disc and taking safety measures.
By following the steps outlined in this article, you can set up your Dremel correctly and achieve a smooth finish on your woodworking projects.

Techniques For Effective Sanding
When using Dremel sanding discs, mastering the right techniques is crucial for achieving smooth and professional results. By understanding the importance of speed settings and movement techniques, you can enhance the quality of your sanding projects.
The Importance Of Speed Settings
Selecting the appropriate speed setting on your Dremel rotary tool is essential for effective sanding. Higher speeds are suitable for removing material quickly, while lower speeds provide more control and precision.
Experiment with different speed settings on a scrap piece of material to determine the most suitable speed for your specific project.
Movement Techniques For Smooth Results
When sanding with Dremel discs, it’s important to move the tool continuously to avoid creating uneven surfaces. Use a gentle back-and-forth motion while applying even pressure.
Avoid staying in one spot for too long as this can result in over-sanding and uneven surfaces. Regularly check the progress to ensure consistent results.
Common Sanding Projects
Wood Smoothing
Wood smoothing is a popular sanding project that can be easily accomplished with Dremel sanding discs.
Whether you’re working on a DIY furniture project or refinishing a wooden surface, these sanding discs can efficiently smooth out rough spots and imperfections, leaving the wood surface with a polished and professional appearance.
The versatility of Dremel sanding discs allows for precise control and enables you to achieve a smooth finish on various types of wood, including hardwoods and softwoods.
Removing Rust From Metals
When it comes to removing rust from metals, Dremel sanding discs are an indispensable tool.
Whether you’re restoring an old metal tool or refinishing metal furniture, these sanding discs effectively eliminate rust and corrosion, leaving the metal surface clean and ready for refinishing or painting.
The abrasive nature of the sanding discs ensures efficient removal of rust while providing a smooth finish, making them a go-to choice for metal restoration projects.
Troubleshooting Common Issues
To troubleshoot common issues when using Dremel sanding discs, ensure the disc is properly secured on the mandrel. Check for any debris that may be affecting the disc’s performance, and adjust the speed settings as needed for optimal results.
Regularly inspect the disc for wear and tear to prevent any potential issues during use. Sanding discs are an essential tool for DIY projects, but like any tool, they can encounter some common issues.
Knowing how to troubleshoot these issues will help you get the most out of your Dremel sanding discs and avoid frustration. Here are some tips for troubleshooting common issues when using Dremel sanding discs.
Sanding Disc Slips Or Misaligns
One common issue when using Dremel sanding discs is that they can slip or misalign during use. This can happen if the disc is not properly secured to the Dremel tool. To avoid this issue, make sure that the sanding disc is securely fastened to the Dremel tool before use.
Also, ensure that the tool is turned off before attaching or removing the disc. If the disc continues to slip or misalign, check that the disc is the correct size for the tool and that it is installed correctly.
Uneven Abrasion
Another common issue when using Dremel sanding discs is uneven abrasion. This can happen if the disc is not held at the correct angle or if it is not moved evenly across the surface being sanded. To avoid uneven abrasion, hold the tool at a consistent angle and move it in a smooth, even motion across the surface being sanded.
Additionally, make sure that the sanding disc is the appropriate grit for the material being sanded. By troubleshooting common issues when using Dremel sanding discs, you can ensure that your DIY projects are successful and that you get the most out of your tools.
Remember to always follow safety guidelines when using power tools, and if you are unsure about how to use a particular tool or accessory, consult the manufacturer’s instructions or seek advice from a professional.
Maintenance And Care For Sanding Discs
To maintain and care for Dremel sanding discs, it’s important to clean them regularly to remove debris and extend their lifespan. Always store them in a dry place and avoid exposing them to moisture, which can cause damage.
Additionally, make sure to use them with the appropriate Dremel tool for optimal performance. Maintenance and care for sanding discs are crucial for prolonging their effectiveness and lifespan. Cleaning sanding discs regularly helps to maintain their abrasive qualities and prevent clogging.
When to replace sanding discs depends on their condition and wear. It is important to monitor them for signs of damage to ensure optimal performance. Here are some essential tips for the maintenance and care of sanding discs. Cleaning sanding discs Regularly cleaning sanding discs is essential for maintaining their effectiveness.
Use a soft brush or compressed air to remove dust and debris from the disc surface. Avoid using solvents or harsh chemicals as they can damage the abrasive material. Additionally, check for any buildup of material on the disc and gently remove it to prevent clogging.
When to replace sanding discs Knowing when to replace sanding discs is crucial for achieving the best results. Inspect the disc for signs of wear, such as a reduced abrasive surface or damage to the backing material. If the disc becomes less effective or starts to deteriorate, it is time to replace it.
Regularly checking the condition of the sanding discs will ensure that you always have a fresh and efficient disc for your projects. By following these maintenance and care tips, you can ensure that your sanding discs remain in optimal condition, providing excellent results for your projects.
Regular cleaning and timely replacement will help you achieve the best performance from your sanding discs, ensuring smooth and efficient sanding operations.
Advanced Tips And Tricks
Using Sanding Discs For Detailed Work
When precision is key, opt for smaller sanding discs to target intricate areas.
Combining Sanding Discs With Other Attachments
Enhance your Dremel’s versatility by pairing sanding discs with various attachments.
Frequently Asked Questions
How To Put A Sanding Disk On A Dremel?
To put a sanding disk on a Dremel, unscrew the collet nut, insert the disk, and tighten the nut securely.
How To Attach A Sanding Drum To A Dremel?
To attach a sanding drum to a Dremel, unscrew the collet nut, insert the drum, and tighten the nut securely.
Can I Use A Dremel For Sanding?
Yes, you can use a Dremel for sanding. It’s versatile and effective for various sanding tasks.
How Do You Put A Sanding Disc On A Sander?
To put a sanding disc on a sander, align the disc with the sander’s attachment pad. Press it firmly until it sticks. Check the instructions for specific details.
Conclusion
Mastering the use of Dremel sanding discs enhances precision and efficiency in your projects. The versatility and effectiveness of these tools make them a valuable asset for any DIY enthusiast or professional.
With the right techniques and knowledge, you can achieve smooth finishes and precise detailing with ease. Experiment, practice, and enjoy the benefits of Dremel sanding discs in your woodworking and crafting endeavors.