To smooth out polyurethane, sand the surface lightly with fine-grit sandpaper, then apply another coat evenly. Achieving a smooth polyurethane finish requires proper sanding and application technique.
Polyurethane can develop a smooth, flawless finish with the right approach. By incorporating the correct sanding methods and applying the material evenly, you can enhance the appearance and durability of your polyurethane-coated surface.
Understanding the steps to smooth out polyurethane will allow you to create a professional-looking finish that will protect and enhance your woodwork or furniture.
Whether you are a seasoned DIY enthusiast or a beginner, mastering the art of smoothing polyurethane is essential for achieving a high-quality outcome.
Let’s explore the steps involved in achieving a smooth polyurethane finish and how you can elevate the look of your projects.
Contents
Preparation
Before you can achieve that smooth and flawless finish on your polyurethane project, it is important to make adequate preparations. The preparation stage is crucial as it sets the foundation for a successful outcome.
By taking the time to properly clean and sand the surface, you’ll ensure that the polyurethane adheres evenly and provides the desired result.
Clean The Surface
One of the first steps in preparing the surface for smooth polyurethane application is cleaning it thoroughly. Remove any dust, dirt, or debris that may be present, as they can interfere with the adhesion process.
Here’s a simple method to get your surface clean:
- Wipe the surface using a lint-free cloth or tack cloth to remove loose dust particles.
- Prepare a mild soap solution by mixing a few drops of dish soap with warm water.
- Dampen a clean cloth with the soapy solution and gently wipe the surface to remove any grime or grease.
- Rinse the cloth in clean water and wipe the surface again to remove any soap residue.
- Allow the surface to dry completely before proceeding to the next step.
Sand The Surface
Sanding is an important step in smoothing out polyurethane. It helps to create an even and smooth surface by removing imperfections and rough areas.
Follow these steps to effectively sand your surface:
- Begin by selecting the appropriate sandpaper grit. Coarser grits, such as 120 or 150, are suitable for initial sanding, while finer grits, like 220 or 320, are ideal for final sanding.
- Wrap the sandpaper around a sanding block or use a sanding sponge for better control and even pressure distribution.
- Hold the sanding block at a slight angle to ensure smooth and consistent sanding motions.
- Start sanding the surface using light to moderate pressure. Move in a circular or back-and-forth motion, working systematically to cover the entire area.
- Inspect the surface frequently to ensure consistent sanding and to identify any rough spots that need further attention.
- After completing the initial sanding, switch to a finer grit sandpaper and repeat the process. This helps to refine the surface further and achieve a smoother finish.
- Once you are satisfied with the smoothness of the surface, clean away any sanding residue with a damp cloth.
By following these steps to clean and sand the surface, you are setting the stage for a successful polyurethane application. Remember that proper preparation is key to achieving the smooth and flawless finish you desire.
Choosing The Right Tools
Select The Appropriate Brush
When choosing a brush for your polyurethane application, consider the type of project and the finish you desire.
Use A Foam Brush For Smoother Finish
Opt for a foam brush to achieve a smoother finish with polyurethane, especially on flat surfaces.
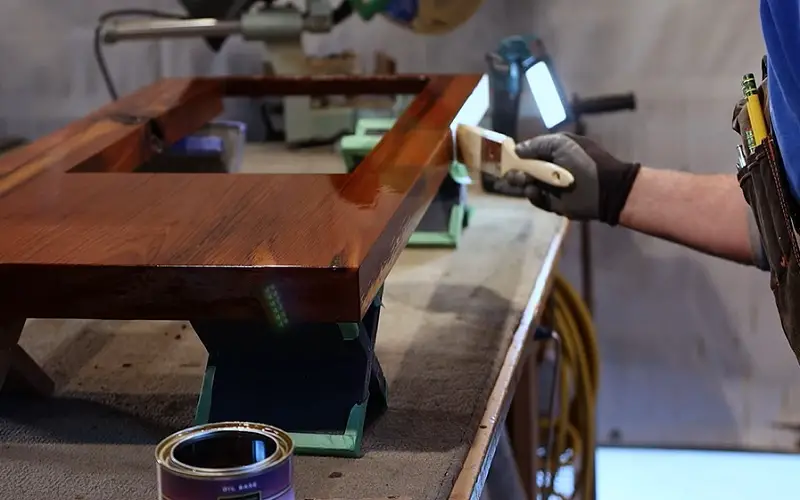
Applying The Polyurethane
When it comes to applying polyurethane, it’s critical to follow the correct steps to achieve a smooth and professional finish.
From stirring the polyurethane thoroughly to sanding between coats, these steps are essential for a successful application process.
Stir The Polyurethane Thoroughly
Before applying polyurethane, it’s crucial to thoroughly stir the product to ensure an even consistency.
Use a stirring stick or a paint stirrer to mix the polyurethane, being careful to incorporate any settled particles at the bottom of the can. Properly blending the polyurethane will help achieve a smoother finish and consistent application.
Apply Thin And Even Coats
When applying polyurethane, it’s important to use thin and even coats to prevent drips and bubbles.
Avoid overloading the brush or roller, and instead, apply a light layer of polyurethane, ensuring it spreads evenly across the surface.
This approach will yield a more uniform finish and minimize the need for excessive sanding in between coats.
Sand Between Coats
To achieve a smooth and flawless finish, it’s essential to sand between coats of polyurethane.
Use fine-grit sandpaper to lightly sand the surface after each coat has dried completely.
This process helps to remove imperfections, smooth out any raised grain, and promote better adhesion for subsequent coats of polyurethane.
Dealing With Bubbles And Brush Marks
Polyurethane is a popular choice for preserving and protecting wood surfaces due to its durability and long-lasting finish. However, achieving a smooth and flawless application can be challenging, especially when dealing with bubbles and brush marks.
Fortunately, there are specific techniques you can employ to address these common issues and ensure a professional-looking finish.
Use A Foam Brush To Remove Bubbles
Foam brushes are excellent tools for achieving a bubble-free polyurethane finish. These brushes do not leave behind bristle marks, and their soft, smooth foam helps to distribute the polyurethane evenly.
To remove bubbles, lightly drag the foam brush over the surface in a single, continuous motion. This gentle application will help to release any trapped air bubbles, resulting in a more uniform finish.
Brush Out Brush Marks
When applying polyurethane, brush marks can sometimes appear, marring the smoothness of the finish. To address this issue, work in long, even strokes with a high-quality brush to minimize the visibility of brush marks.
Additionally, sand the surface with fine-grit sandpaper after the first coat to smooth out any imperfections. Finally, ensure that the room temperature is optimal, as extreme temperatures can cause the polyurethane to dry too quickly and result in visible brush marks.
Creating A Smooth Finish
Smooth out polyurethane for a flawless finish by sanding with fine-grit paper after each coat. Remove dust particles with a tack cloth to achieve a professional result. Foam brushes or spray applications help apply polyurethane smoothly with minimal imperfections.
Creating a smooth finish when working with polyurethane is crucial to achieving a professional-looking result. Use Fine Sandpaper for Final Sanding After applying the polyurethane, let it dry completely before sanding with fine sandpaper in smooth, circular motions.
Buff the Surface for a Glossy Look For a glossy finish, buff the surface using a clean, soft cloth or a buffing tool to enhance the shine. Remember: Consistent sanding and buffing are key to achieving a flawless finish on polyurethane-coated surfaces. Follow these steps diligently to create a smooth and polished look on your next project.

Avoiding Common Mistakes
Learn how to achieve a flawless finish when working with polyurethane by avoiding common mistakes. Follow these guidelines for smooth and professional results.
Avoiding Common Mistakes Don’t Overbrush Overbrushing can quickly ruin the finish of your polyurethane project. When you overbrush, you risk creating streaks, bubbles, and even brush marks on the surface.
To avoid this, use a high-quality brush with natural bristles, like a china bristle brush specifically designed for polyurethane applications. Using lighter brush strokes and applying less pressure will help you achieve a smoother finish.
Avoid Applying Too Much Pressure Applying excessive pressure while smoothing out polyurethane can lead to a variety of issues. It can cause the brush bristles to dig too deeply into the finish, leaving visible marks.
Additionally, pressing too hard may disrupt the flow of the polyurethane and create unevenness or raised areas on the surface. Instead, apply gentle and consistent pressure, allowing the brush to glide smoothly over the surface for an even and flawless finish.
When smoothing out polyurethane, it is important to pay attention to brushing techniques and avoid common mistakes that can compromise the final result. Here are two essential mistakes to avoid: 1.
Don’t Overbrush
Overbrushing can create streaks, bubbles, and brush marks that ruin the finish. To avoid this, use a high-quality brush with natural bristles. Lighter brush strokes and less pressure will help achieve a smoother finish. 2.
Avoid Applying Too Much Pressure
Applying excessive pressure can cause visible marks and disrupt the flow of polyurethane. Instead, apply gentle and consistent pressure while allowing the brush to glide smoothly for an even finish.
By avoiding these common mistakes, you can ensure a seamless and professional-looking polyurethane finish. Remember to choose the right brush and apply just the right amount of pressure for an impeccable result.
Drying And Curing
When it comes to achieving a perfectly smooth and professional finish on your polyurethane coating, the drying and curing process is crucial.
In this section, we will explore two key factors that you need to consider for a flawless result: allowing sufficient drying time and ensuring proper ventilation.
Allow Sufficient Drying Time
One of the common mistakes people make when applying polyurethane is not allowing enough drying time between coats. To achieve a smooth finish, it is vital to be patient and give each coat ample time to dry completely.
The drying time required may vary depending on factors such as temperature, humidity, and thickness of the polyurethane. As a general rule of thumb, hot and dry conditions accelerate the drying process, while cooler and more humid environments slow it down.
Typically, water-based polyurethane dries faster than oil-based counterparts. Water-based polyurethane can take around two to four hours to dry between coats, while oil-based polyurethane may require eight to ten hours or even longer.
It is advisable to consult the manufacturer’s instructions for the specific drying time recommendations.
Ensure Proper Ventilation
Proper ventilation is essential during the drying and curing process of polyurethane to enhance the overall performance and finish. When the coating undergoes the curing process, it releases volatile organic compounds (VOCs) into the air.
These emissions can be harmful if inhaled in excessive amounts and may cause health issues. To ensure proper ventilation, open windows and doors to create a cross breeze, allowing fresh air to circulate. Using fans or portable air purifiers can further aid in expelling the harmful fumes and reducing the drying time.
Additionally, wearing a mask and working in a well-ventilated area can protect your health and provide a safe environment for the curing process.
Now that you understand the importance of allowing sufficient drying time and ensuring proper ventilation, you are one step closer to achieving a flawless and smooth polyurethane finish. Remember, patience and attention to detail are key when it comes to creating a professional-looking result.
Finishing Touches
After applying polyurethane to your project, the finishing touches are crucial to achieving a professional and smooth result. Taking care in the final steps can make all the difference in the appearance and durability of the finish.
Remove Dust Particles
Using a fine-grit sandpaper, gently sand the surface of the polyurethane to remove any dust particles that may have settled during the drying process. Wipe the surface clean with a tack cloth to ensure all residual dust is removed.
Apply A Final Topcoat
Complete the finishing process by applying a final topcoat of polyurethane. Ensure the surface is clean and dust-free before applying the topcoat.
Use long, even strokes to achieve a smooth and uniform finish. Allow the topcoat to dry completely according to the manufacturer’s instructions before handling the project.
Frequently Asked Questions For How To Smooth Out Polyurethane
How Do I Get A Smooth Finish After Polyurethane?
To achieve a smooth finish after applying polyurethane, follow these steps:
1. Start by sanding the surface with progressively finer sandpaper.
2. Remove any dust or debris from the surface using a tack cloth.
3. Apply a thin and even coat of polyurethane using a high-quality brush or applicator.
4. Allow the polyurethane to dry completely before lightly sanding with fine-grit sandpaper.
5. Repeat the process of applying thin coats and sanding between each coat for a smooth, professional finish.
How Do You Fix Rough Polyurethane Finish?
To fix a rough polyurethane finish, sand the surface with fine-grit sandpaper, then apply a new coat of polyurethane. Sand lightly between coats for smooth finish.
How Do You Make Polyurethane Smooth And Shiny?
To make polyurethane smooth and shiny, sand the surface with fine-grit sandpaper, clean it thoroughly, and apply a layer of polyurethane.
Allow it to dry, then sand it lightly, clean, and apply another coat. Repeat as necessary for desired smoothness and shine.
How Do You Remove Imperfections From Polyurethane?
To remove imperfections from polyurethane, sand the surface gently and evenly with fine-grit sandpaper.
Clean the area thoroughly. Apply a new layer of polyurethane, ensuring even coverage. Let it dry completely before sanding lightly and adding another coat if needed.
Conclusion
To sum it up, mastering the art of smoothing out polyurethane takes practice and patience. From proper sanding techniques to applying even coats, attention to detail is key.
Remember to allow sufficient drying time between coats for a flawless finish. With these tips in mind, your project will shine.