For door casing, use 2-inch finishing nails for installation. These nails provide a secure attachment.
Choosing the correct nail size for door casings is crucial for a professional and durable installation. By using 2-inch finishing nails, you can ensure a secure attachment that will withstand daily use.
Properly sized nails will also help prevent splitting of the wood and ensure a clean and seamless finish for your door casing.
It’s important to consider the thickness of the casing and the material of the door frame when selecting the appropriate nail size. By following these guidelines, you can achieve a polished look for your door casing that will enhance the overall aesthetic of your space.
Contents
- Determining The Right Size
- Common Nail Sizes For Door Casings
- Choosing The Right Nail Size
- Recommended Nail Sizes For Different Door Casings
- Alternative Methods For Securing Door Casings
- Tips For Proper Installation
- Common Mistakes To Avoid
- Consulting An Expert
- Frequently Asked Questions For What Size Nails For Door Casing
- Conclusion
Determining The Right Size
When determining the right nail size for door casing, consider 2-inch finishing nails for optimal results. These nails provide sufficient strength without causing damage to the delicate trim.
Choose a nail size that ensures secure installation while preserving the aesthetic appeal of your door casing.
Determining the Right Size When it comes to installing door casing, finding the right size nails is crucial for a secure and long-lasting installation. Using the wrong size can lead to issues such as loose or wobbly casing, or even damage to the door jamb.
In this section, we will discuss the factors to consider and how to measure the door casing to determine the appropriate nail size. Consideration Factors Before hammering in any nails, there are several factors you should take into consideration.
These factors will help you determine the right size nails for your door casing. Let’s have a look at them:
1. Material of the Casing: The type of material used for your door casing will influence the size of nails you need. For example, if you have a softwood casing, you may require thinner nails compared to hardwood casing.
2. Thickness of the Casing: The thickness of the casing will also play a role in determining the correct nail size. Thicker casings may require longer or thicker nails to ensure a secure fit.
3. Location of the Nails: Consider where the nails will be placed on the casing. If you are nailing close to the edges, shorter nails may be necessary to prevent splitting. On the other hand, if you need to nail through multiple layers of casing, longer nails will be required.
4. Nail Head Type: Different nail head types have their own characteristics and requirements. For instance, round or flathead nails are commonly used for door casing as they provide a flush finish.
5. Load-Bearing Considerations: If the door casing will be supporting heavy objects, such as shelves or mirrors, heavier nails may be needed for added stability and strength.
Measuring the Door Casing Properly measuring the door casing is essential to ensure the correct nail size. Follow these steps:
1. Measure the Width: Use a tape measure to determine the width of the door casing. This measurement will help you choose the appropriate nail length.
2. Measure the Depth: Measure the depth of the door casing to ensure the nails will be long enough to penetrate through the casing and into the door jamb.
Remember, it is important to choose nails that are long enough to hold the casing securely in place, but not so long that they penetrate through the other side or damage the door jamb.
By considering these factors and accurately measuring your door casing, you can confidently select the right size nails for a sturdy and visually appealing installation.
Common Nail Sizes For Door Casings
16-penny Nails
16-penny nails are commonly used for door casings due to their durable and strong nature.
8-penny Nails
8-penny nails are ideal for securing door casings with a medium level of holding power.
10-penny Nails
10-penny nails strike a balance between strength and ease of installation for door casings.
Choosing The Right Nail Size
Choosing the right nail size is crucial when installing door casings. The size of nails will depend on the door casing thickness, type of material, and installation method.
Let’s delve into the specifics of each factor to ensure you select the appropriate nail size for your door casing project.
Door Casing Thickness
The thickness of the door casing determines the length of the nails. Use 1 ½ to 2-inch nails for standard door casings with a thickness of around ½ inch.
However, for thicker casings, such as those exceeding ¾ inch, opt for longer nails, preferably 2 ½ to 3 inches.
Type Of Material
Consider the material of the door casing when selecting the nail size. For wooden door casings, utilize finishing nails to prevent splitting. When securing metal or vinyl casings, utilize screws rather than nails for enhanced stability.
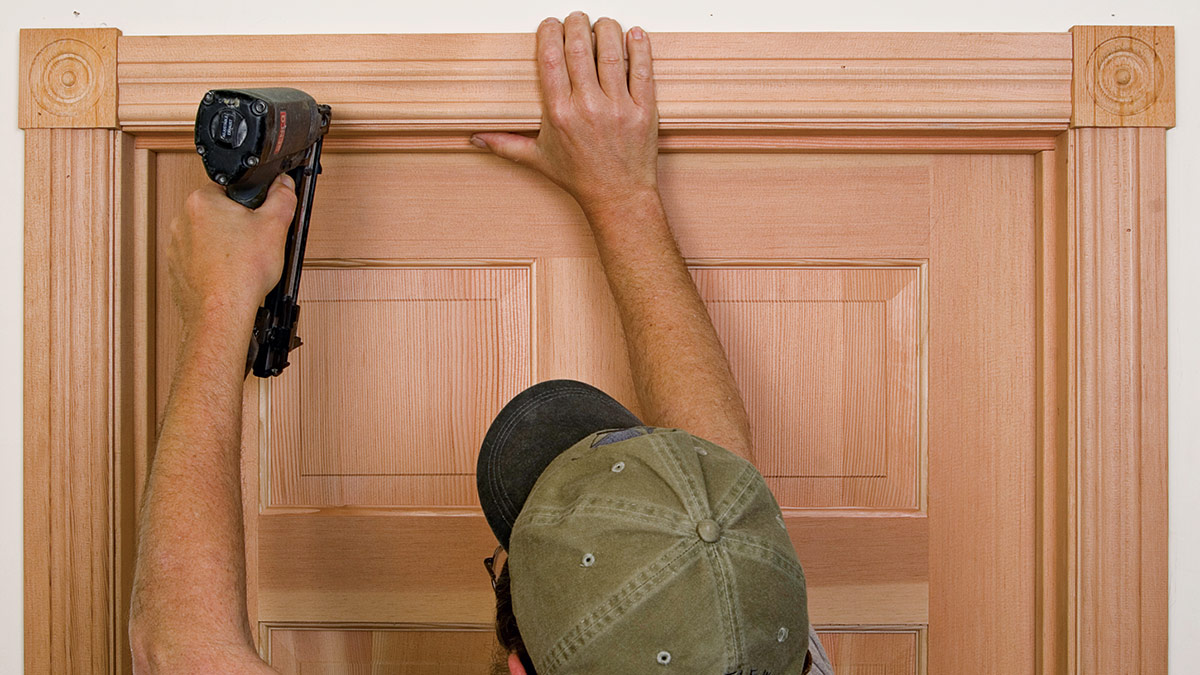
Installation Method
The installation method also influences the choice of nail size. For a secure and seamless installation, use a nail gun for efficiency and precision. When using a hammer, ensure the nails provide sufficient grip by utilizing the correct size based on the door casing thickness and type of material.
Recommended Nail Sizes For Different Door Casings
When it comes to installing door casings, using the right nail size is crucial. By using nails that are too long or too short, you risk damaging the casing or not securing it properly.
In this article, we will discuss the recommended nail sizes for different door casings so you can ensure a professional and secure installation.
Standard Wooden Door Casings
A common type of door casing is the standard wooden casing. These casings are typically made of solid or engineered wood and require different nail sizes depending on their dimensions.
Here are the recommended nail sizes for standard wooden door casings:
- For door casings with a thickness of 1/2 inch to 3/4 inch, use 1 1/2 inch nails.
- For door casings with a thickness of 3/4 inch to 1 inch, use 2 inch nails.
- For door casings with a thickness exceeding 1 inch, use 2 1/2 inch nails.
Metal Door Casings
Some door casings are made of metal, which requires a different approach when it comes to nailing them in place. Metal door casings are typically thinner and require shorter nails that can securely hold them.
Here are the recommended nail sizes for metal door casings:
- For door casings with a thickness of 1/2 inch to 3/4 inch, use 1 inch nails.
- For door casings with a thickness exceeding 3/4 inch, use 1 1/4 inch nails.
Custom Or Specialty Door Casings
If you are working with custom or specialty door casings, it is important to consider their unique dimensions and materials. These casings may require special attention and customized nail sizes.
It is best to consult the manufacturer’s recommendations or seek advice from a professional to ensure the proper nail size for your custom or specialty door casings.
Alternative Methods For Securing Door Casings
When installing door casings, there are various alternative methods you can utilize for securing them in place aside from traditional nailing.
Trim Head Screws
Trim head screws are an effective alternative to nails for securing door casings. They provide a strong hold and can be easily concealed for a seamless finish.
Finish Nails With Adhesive
Finish nails with adhesive offer a combination of mechanical strength from the nails and added bonding from the adhesive, ensuring a secure and durable installation.
Tips For Proper Installation
Proper installation of door casings is crucial for a professional finish and long-lasting performance. One key aspect of installation is choosing the right size nails and using them correctly.
Here are some essential tips to ensure a successful door casing installation.
Pre-drilling Holes
Pre-drilling holes before inserting nails can help prevent splitting or damaging the door casing. This is especially important when working with hardwood or delicate materials.
By pre-drilling, you create a pilot hole that provides guidance for the nail, ensuring it goes in smoothly without causing any damage.
Avoiding Splitting
Avoiding splitting is crucial to maintaining the structural integrity of the door casing. Splitting can occur if the nails are too long or too wide for the material.
To prevent this, choose nails that are just the right size for the job. Additionally, you can apply a small amount of wood glue along the length of the casing before nailing to further strengthen the bond and reduce the risk of splitting.
Proper Nail Placement
Proper nail placement is essential for a secure and visually pleasing installation. To determine the ideal placement, consider the thickness of the casing and the location of any studs behind it.
Typically, nails should be placed about 2 inches from the top and bottom of the casing and spaced evenly along the length. This ensures that the door casing stays firmly in place and resists any potential movement or warping over time.
Furthermore, it is recommended to use finishing nails, as they have small heads that can be easily concealed with putty or filler, resulting in a smooth and seamless appearance.
If you prefer greater holding power, consider using brad nails, which have slightly larger heads but still offer a neat finish when properly concealed.
By following these tips for proper installation, you can ensure that your door casings not only look beautiful but also stand the test of time. Take the necessary time and care during installation, and you’ll enjoy the benefits of a well-crafted and durable door casing for years to come.
Common Mistakes To Avoid
Using Incorrect Nail Size
One of the most common mistakes when installing door casing is using the wrong size of nails. Using nails that are too long can cause them to protrude from the door casing.
On the other hand, using nails that are too short may not provide sufficient grip, leading to instability. Therefore, it is crucial to choose the appropriate nail size for door casing to ensure a secure and professional installation.
Over- Or Under-driving Nails
Another major mistake is over- or under-driving nails during installation. Over-driving nails can cause the wood to split, compromising the structural integrity of the door casing.
Conversely, under-driving nails may result in loose or wobbly casing. Proper care should be taken to drive the nails to the correct depth, ensuring that they are secure without damaging the casing.
Neglecting Pre-drilling
Neglecting to pre-drill holes before driving nails into the door casing is another common error. Failure to pre-drill can cause the wood to splinter, especially near the edges, leading to an unsightly finish.
To avoid this, it is essential to always pre-drill small pilot holes before inserting nails, ensuring a clean and precise installation.
Consulting An Expert
Seeking Advice
When determining the size of nails to use for door casing, consulting an expert can provide invaluable guidance. Picking the right expert can make a significant difference in the outcome of your project.
Working With A Professional
When working with a professional carpenter or trim installer, they can accurately recommend the suitable nail size for door casing based on the material and dimensions involved.
Engaging with a skilled craftsman ensures precision and quality in the installation process.
Frequently Asked Questions For What Size Nails For Door Casing
What Nails Do You Use For A Door Frame?
For a door frame, you can use finishing nails or brad nails. They are small and sturdy, ensuring a secure installation.
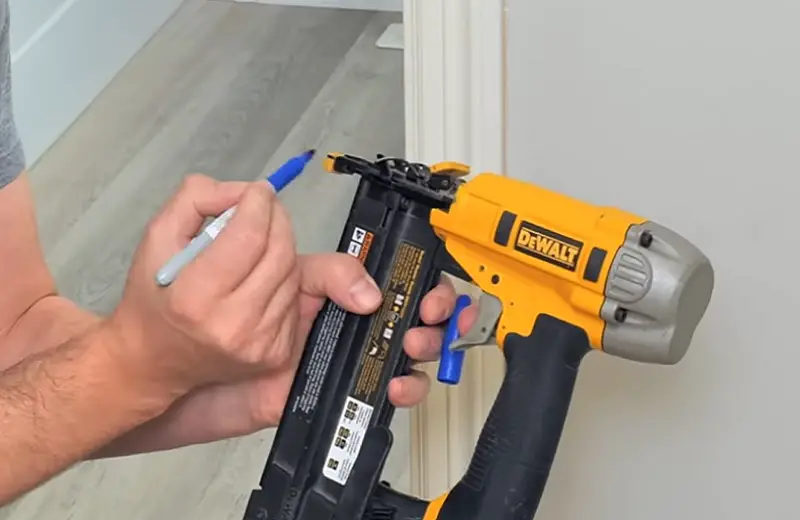
What Is The Best Nail Gun For Door Casing?
The best nail gun for door casing depends on your specific needs. A pneumatic nail gun offers power and precision, while a cordless nail gun provides convenience and portability.
Consider factors like the type of material and the size of nails needed before choosing the best option for you.
What Gauge Nail Gun For Door Trim?
For door trim, a 15 or 16 gauge nail gun is recommended for secure and efficient installation. Choose based on your preference.
How Long Should Door Frame Nails Be?
Door frame nails should be at least 3 inches long to provide a secure and durable fastening. Using nails that are too short may result in instability and damage to the frame over time.
Always check the specific requirements for your door frame and consult with a professional if needed.
Conclusion
Selecting the right size nails for your door casing is crucial. Remember, 2 ½ inch finishing nails are commonly used. Factors like material and desired finish should also be considered.
Ultimately, choosing the correct nail size will ensure a secure and visually appealing door installation.