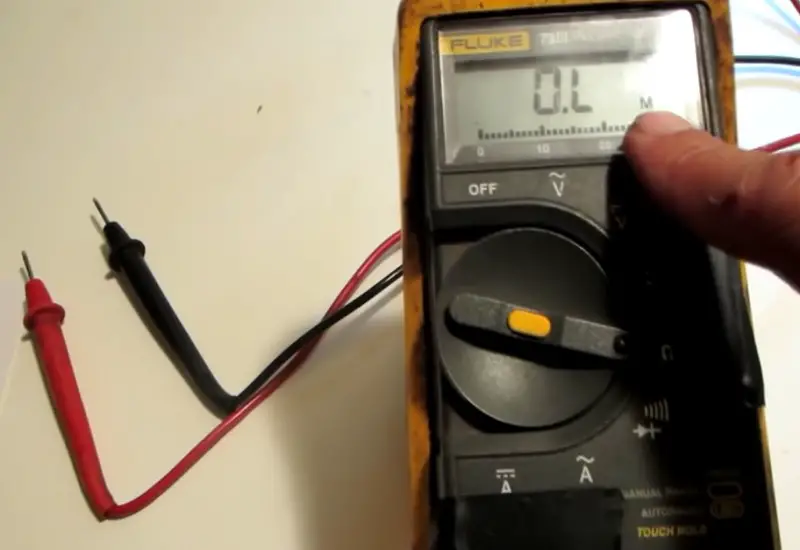
To test a light switch with a voltage tester, turn off the power and remove the switch cover. Test for voltage with the tester by touching the probes to the switch terminals.
Checking the voltage of a light switch is crucial for safety and functionality. By following simple steps, you can ensure that your light switch is operating properly. In this guide, we will explore the process of testing a light switch using a voltage tester.
It is essential to understand how to safely check for voltage to avoid any risks of electrocution. Taking the necessary precautions and using the right tools will help you effectively test your light switch without any issues.
:max_bytes(150000):strip_icc()/how-to-use-a-multimeter-5194980-01-acb6dc0e02254358b597206a4b1ba48e.jpg)
Contents
Understanding A Voltage Tester
A voltage tester is a crucial tool for testing electrical circuits, including light switches. It helps to determine if there is electrical current flowing through the switch safely.
The Purpose Of A Voltage Tester
- Detect the presence of electrical current in a circuit.
- Ensure the switch is functioning properly and safely.
Types Of Voltage Testers
| Type | Features |
|---|---|
| Non-contact voltage tester | Indicates voltage without direct contact. |
| Contact voltage tester | Requires direct contact with the wire or terminal. |
Importance Of Testing A Light Switch
Ensuring electrical safety is a crucial part of maintaining a secure home environment. Testing a light switch with a voltage tester is paramount to guarantee that your electrical system is functioning properly. By understanding the importance of testing a light switch, you can identify faulty switches and prevent potential electrical hazards.
Ensuring Electrical Safety
When it comes to household safety, testing light switches is more than just a precautionary measure – it’s a necessity. Regular testing ensures that the switches are functioning correctly, helping to prevent electrical fires and shocks.
Identifying Faulty Switches
Testing a light switch allows you to identify faulty switches that may otherwise go unnoticed. By systematically testing each switch, you can proactively address any malfunctions, contributing to a safer living environment.
Preparing For The Test
Before testing a light switch with a voltage tester, it is important to properly prepare for the task at hand. This involves taking certain safety precautions and gathering the necessary tools.
By following these steps, you can ensure that the testing process is conducted safely and effectively.
Safety Precautions
When working with electrical components, it is crucial to prioritize safety to avoid potential hazards. Follow these safety precautions before testing a light switch with a voltage tester:
- Turn off the power supply to the light switch at the breaker panel to prevent shock or injury.
- Use insulated tools to handle electrical components and avoid direct contact with live wires.
- Wear rubber-soled shoes and non-conductive gloves to provide additional protection against electrical shocks.
Gathering Necessary Tools
Having the right tools on hand is essential for accurately testing a light switch with a voltage tester. Before beginning the test, ensure that you have the following items:
- Voltage tester: A non-contact voltage tester or a multimeter with voltage testing capabilities.
- Insulated screwdriver: Use an insulated screwdriver to safely remove the switch plate and access the wiring.
- Pen and paper: Take notes and record your findings during the testing process for reference.
By adhering to these safety precautions and preparing the necessary tools, you can set the stage for a successful and secure light switch voltage test.

Step-by-step Guide To Testing A Light Switch
Learn how to use a voltage tester to check the functionality of a light switch. Follow a step-by-step guide to ensure safety and proper testing for accurate results. Master the process to diagnose and resolve light switch issues efficiently.
Turning Off The Power
Before testing a light switch, always make sure to turn off the power to the circuit to avoid any risk of electrical shock.
Preparing The Voltage Tester
Grab a voltage tester and check that it is working properly to ensure accurate test results.
Testing The Switch
Ensure the voltage tester is set to AC voltage setting, then place one probe on the screw of the switch and the other probe on the metal box.
Interpreting The Test Results
Understanding Voltage Readings
Understanding the voltage readings you obtain from testing a light switch is crucial to determining its functionality.
A voltage tester serves as your diagnostic tool, allowing you to measure the electrical potential difference between two points in a circuit.
These measurements are typically displayed in volts (V) and can help you identify whether the switch is functioning properly or not.
Identifying Normal And Abnormal Readings
When testing a light switch, it is important to be able to identify what constitutes a normal or abnormal reading.
A normal reading indicates that the switch is working correctly and properly conducting electricity.
On the other hand, an abnormal reading may indicate a faulty switch or an issue with the electrical circuit.
Here is a breakdown of what you need to know:
- Normal reading: A normal reading typically falls within a specific voltage range, often specified by the manufacturer. If the reading aligns with this range, it suggests that the switch is operating as intended.
- Abnormal reading: An abnormal reading may occur when the voltage reading is significantly lower or higher than the expected range. This could indicate a loose connection, a faulty switch, or other electrical issues that require further investigation.
- No reading: If the voltage tester does not register any reading at all, it could mean that there is no power flowing to the switch or that the circuit is open. In such cases, it is essential to check the wiring and the power source to determine the cause of the problem.
This information will help you interpret the voltage readings accurately and make informed decisions about the functionality of the light switch.
Remember, if you are uncertain about the readings or if the switch exhibits any signs of malfunction, it is always recommended to seek professional assistance to ensure your safety and prevent further damage to the electrical system.
Troubleshooting Common Issues
In order to ensure that your light switch is functioning properly, it’s important to be aware of common issues that may arise.
By troubleshooting these issues, you can determine the cause of the problem and make the necessary repairs. Here are some common problems you may encounter when testing a light switch with a voltage tester:
Switch Not Working
If you find that your light switch is not working, there are a few potential causes to consider. First, check to see if there is power coming to the switch. To do this, attach the voltage tester to the terminals of the switch.
If you get a voltage reading of zero, then the problem may lie with the circuit breaker or fuse. Check the breaker box or fuse box to see if any switches have been tripped or fuses have blown.
If everything looks normal, the issue may be with the wiring or the switch itself.
Inconsistent Voltage Readings
Another common issue you may encounter is inconsistent voltage readings when testing a light switch. If you are getting differing voltage readings each time you test the switch, it could indicate a loose wire connection.
Inspect the wiring connections in the switch box to ensure they are tight and secure. If you find any loose wires, use a screwdriver to tighten the connections.
In addition to loose connections, inconsistent voltage readings may also be caused by a faulty or worn-out switch. Over time, switches can become worn and lose their effectiveness.
If you suspect this is the case, it may be necessary to replace the switch with a new one.
Furthermore, inconsistent voltage readings can also be the result of a faulty voltage tester. To ensure accurate readings, it’s important to use a high-quality voltage tester that is in good working condition.
Consider testing the voltage tester on a known power source to determine if it is providing accurate readings. To summarize, troubleshooting common issues with a light switch involves identifying if the switch is not working or if there are inconsistent voltage readings.
By checking the power supply, inspecting wiring connections, and testing the voltage tester, you can determine the cause of the problem and take appropriate action to rectify it.
Frequently Asked Questions On How To Test A Light Switch With A Voltage Tester
How Do You Test A Light Switch With A Voltage Meter?
To test a light switch with a voltage meter, set meter to AC voltage, turn off power, remove switch cover, place probes on screw terminals, turn power on.
How Can You Tell If A Light Switch Is Bad?
To determine if a light switch is faulty, check for signs like flickering lights, loose switches, or switches that are hot to the touch.
Additionally, if the switch doesn’t work consistently or emits sparks, it’s likely defective.
How Do You Test A 12 Volt Switch With A Multimeter?
To test a 12 volt switch with a multimeter, set the multimeter to the voltage setting. Connect the red lead to the terminal where the power is coming from, and the black lead to the terminal where the power goes. Activate the switch and check if the multimeter displays 12 volts.
How Do You Use A Voltage Tester On A Light?
To use a voltage tester on a light, turn off the power, insert one probe into hot wire, and touch the other probe to neutral wire.
Observe for voltage indication to ensure no electricity is flowing before proceeding with repairs or installation.
Conclusion
Ensure safety, follow steps accurately, and test the light switch confidently with these tips.
By using a voltage tester correctly, you can troubleshoot effectively and identify any electrical issues.
Now you are equipped to determine the functionality of your light switch with ease.

