To put a drill bit in a Dewalt Impact Driver, insert the bit securely into the chuck and tighten it. When working with a Dewalt Impact Driver, knowing how to properly insert a drill bit is essential for efficient and effective drilling.
By following a few simple steps, you can quickly and accurately secure the bit in the chuck of the impact driver. This ensures that you can tackle your projects with ease and precision.
In this guide, we will walk you through the process of putting a drill bit in a Dewalt Impact Driver, so you can get started on your tasks with confidence and ease.
Let’s delve into the specifics of this straightforward procedure.
Contents
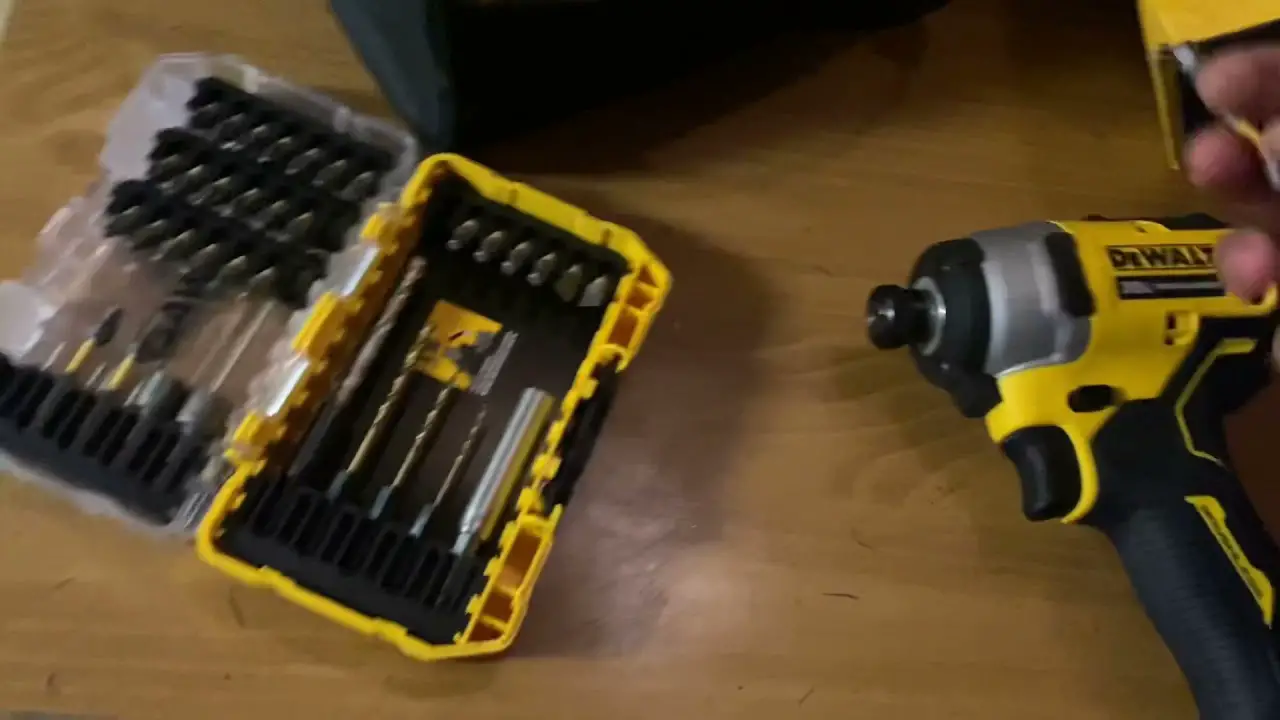
Choosing The Right Drill Bit
When it comes to using a Dewalt impact driver, choosing the right drill bit is crucial for achieving the best results.
The drill bit you select can make all the difference in the outcome of your project, so it’s important to understand how to choose the appropriate one for your needs.
Understanding The Impact Driver’s Chuck Size
The chuck size of your impact driver is the key factor to consider when choosing the right drill bit. Impact drivers typically come with either a 1/4-inch or 1/2-inch chuck size. It’s essential to match the chuck size with the shank size of your drill bit to ensure a secure and stable fit.
Selecting The Appropriate Drill Bit
Before selecting a drill bit for your Dewalt impact driver, consider the material you’ll be drilling into. Different materials require different types of drill bits, such as twist bits for wood, masonry bits for concrete, and titanium-coated bits for metal.
It’s crucial to choose a drill bit that is compatible with your project’s material to achieve the best results. Moreover, paying attention to the drill bit’s length is essential. The length should be appropriate for the depth at which you need to drill into the material.
Be sure to check the drill bit’s durability as well. High-quality drill bits are less likely to break during use and can last longer, saving you time and money in the long run.
When using a Dewalt impact driver, it’s important to select drill bits specifically designed for use with impact drivers. These bits are engineered to withstand the high torque and vibrations produced by impact drivers, ensuring optimal performance and safety during use.
Preparing The Impact Driver
Checking The Battery Level
Before inserting the drill bit, check the battery level on your Dewalt impact driver to ensure it has enough power.
Adjusting The Speed And Torque Settings
Adjust the speed and torque settings on the impact driver based on the requirements of the task at hand.
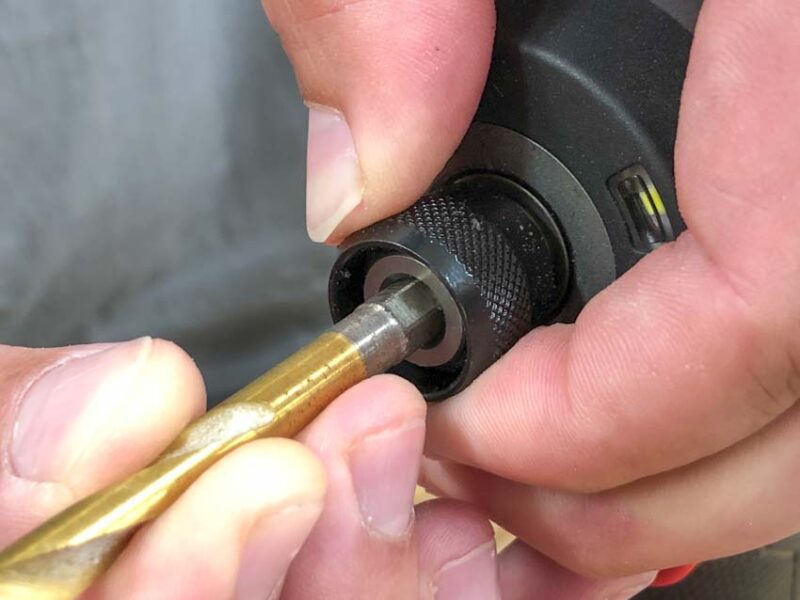
Installing The Drill Bit
In order to use a Dewalt Impact Driver effectively, it’s important to know how to properly install the drill bit. With a seamless installation process, you’ll be equipped to tackle various projects with ease.
Here’s a step-by-step guide on aligning the shank with the chuck and securing the drill bit:
Aligning The Shank With The Chuck
The first step in installing a drill bit is aligning the shank with the chuck. The shank refers to the smooth portion of the drill bit that fits into the chuck – the part that holds the bit in place. Here’s how you can do it:
- Ensure the Dewalt Impact Driver is turned off and unplugged for safety.
- Insert the desired drill bit into the chuck. Make sure the shank is straight and centered.
- Use your hand to tighten the chuck by rotating it clockwise. Continue turning until it feels snug and secure. Avoid overtightening, as this may damage the chuck.
- For added safety, give the drill bit a gentle pull to ensure it is properly seated in the chuck. If it moves or feels loose, repeat the process.
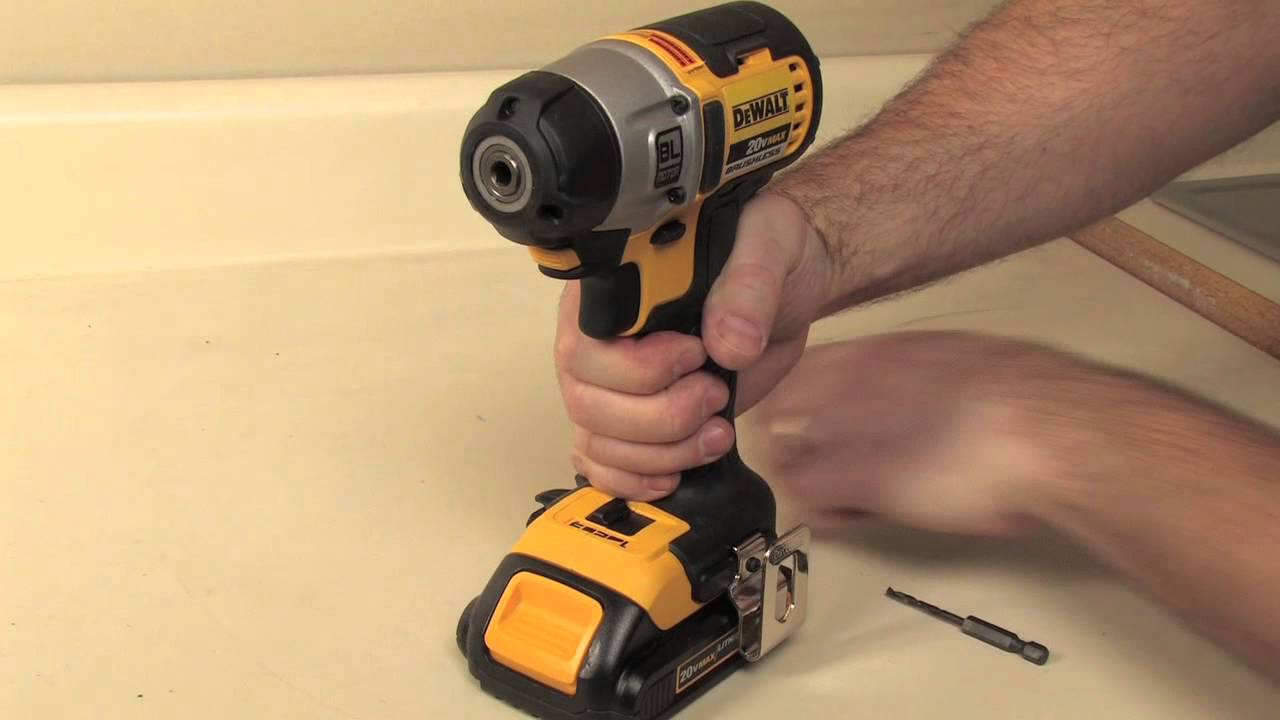
Securing The Drill Bit
Once you’ve aligned the shank with the chuck, the next step is to secure the drill bit in place. Follow these steps to ensure a secure attachment:
- Locate the chuck release mechanism on your Dewalt Impact Driver. This is typically a button or collar near the chuck.
- Hold the drill securely with one hand and use your other hand to engage the chuck release mechanism. This will loosen the grip of the chuck.
- While still holding the release mechanism, insert the drill bit into the chuck as far as it will go.
- Release the chuck release mechanism to allow the chuck to secure the drill bit. You should hear or feel a click, indicating that the drill bit is properly locked in place.
- Give the drill bit another gentle pull to ensure it is securely held by the chuck. If it moves or feels loose, repeat the process.
By following these simple steps, you can quickly and effectively install a drill bit in your Dewalt Impact Driver. With the drill bit properly aligned and secured, you’ll be ready to tackle any drilling task that comes your way.
Testing The Installed Drill Bit
Performing A Test Run
Before beginning your project, it’s essential to test the installed drill bit in your Dewalt Impact Driver to ensure it’s properly set up for use.
Ensuring Proper Attachment
Make sure the drill bit is securely inserted and attached to the chuck of the impact driver to prevent any accidents during operation.
Safety Measures
Learn how to safely put a drill bit in your Dewalt Impact Driver with these easy-to-follow steps. Ensure your safety measures are in place while handling power tools to prevent accidents and injuries.
Using Personal Protective Equipment
Ensure wear eye protection such as safety glasses or goggles throughout the drilling process. Use gloves to protect your hands from any sharp edges and to provide a better grip.
Avoiding Contact With The Drill Bit
Never touch the drill bit immediately after use as it may be hot. Keep your fingers away from moving drill bits to prevent potential injuries.
Maintenance Tips
Maintenance tips are essential for ensuring the longevity and smooth operation of your Dewalt impact driver.
By implementing regular maintenance practices, you can keep your tool in top condition for optimal performance. Here’s a closer look at some key maintenance tips for your Dewalt impact driver.
Cleaning The Chuck Regularly
Keeping the chuck of your Dewalt impact driver clean is crucial for its proper functioning. Use a clean cloth and mild detergent to wipe off any debris and excess grease.
Avoid using harsh chemicals that can damage the chuck. Inspect the chuck for any buildup of dirt or metal shavings, and remove it carefully to prevent any issues with drill bit insertion.
Inspecting For Wear And Tear
Regularly inspect the chuck and hex collet for any signs of wear and tear. Look for any cracks or deformities that may affect the grip on the drill bit.
Ensure the chuck is gripping securely and replace it if there are any indications of damage. Check if the hex collet is holding the drill bit firmly to avoid any slippage during operation.
Frequently Asked Questions
How Do You Attach Bits To Dewalt Impact Driver?
To attach bits to a DeWalt impact driver, first, locate the chuck at the front of the driver.
Then, firmly insert the bit into the chuck and tighten it by turning the chuck clockwise. Make sure the bit is securely fastened before using the impact driver for any task.
How Do You Put A Drill Bit In An Impact Driver?
To put a drill bit in an impact driver, insert the bit into the chuck, then tighten it securely.
Can A Dewalt Impact Driver Be Used As A Drill?
Yes, a DeWalt impact driver can be used as a drill thanks to its versatile design. With the right bits, it can effectively drill holes in various materials.
How Do I Change The Drill Bit On A Dewalt Drill?
To change the drill bit on a DeWalt drill, follow these steps:
1. Unplug or remove the battery.
2. Rotate the chuck counterclockwise to open it.
3. Remove the old bit.
4. Insert the new bit into the chuck.
5. Tighten the chuck by turning it clockwise.
Conclusion
Mastering how to put a drill bit in your Dewalt impact driver is crucial for efficient work.
By following the simple steps outlined in this guide, you can easily switch between different drill bits with ease.
Remember to always prioritize safety and precision when handling power tools.