To load a Ryobi nail gun, first, make sure the gun is disconnected from its power source. Then, open the magazine door and load the nails, making sure they are properly aligned.
Ryobi nail guns are a popular choice for both DIY enthusiasts and professionals due to their reliability and ease of use. Properly loading a Ryobi nail gun is essential to ensure its safe and efficient operation.
Before loading the gun, always disconnect it from its power source and ensure the trigger is not engaged.
Once the gun is safe to handle, open the magazine door and load the nails, making sure they are aligned correctly. With the nails loaded, the Ryobi nail gun is ready for use on your next project.
Contents
- Introduction To Ryobi Nail Guns
- Types Of Ryobi Nail Guns
- Safety First: Preparing To Load
- Step-by-step Guide To Loading
- Troubleshooting Common Loading Issues
- Maintenance Tips For Ryobi Nail Guns
- Best Practices For Efficient Use
- Accessorizing Your Ryobi Nail Gun
- Mastering The Ryobi Nail Gun
- Frequently Asked Questions
- Conclusion
Introduction To Ryobi Nail Guns
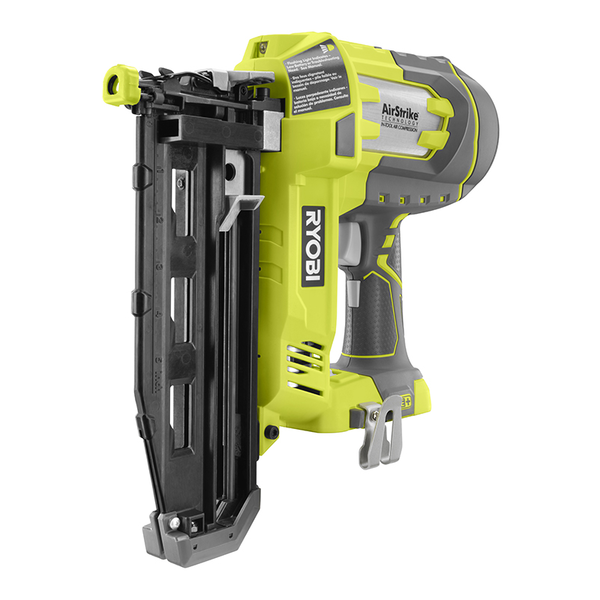
Ryobi nail guns are renowned for their quality and reliability in the construction industry. These power tools are designed to make nailing tasks efficient and precise. Whether you are a DIY enthusiast or a professional contractor, Ryobi nail guns offer a wide range of features to meet your needs.
The Popularity Of Ryobi Tools
Ryobi tools are favored by many due to their durability and ease of use. The brand’s reputation for producing high-quality power tools has made it a popular choice among professionals and hobbyists alike. When it comes to nail guns, Ryobi stands out for its innovative designs and affordable pricing.
Benefits Of Using Nail Guns
- Efficiency: Nail guns can drive nails quickly and accurately, saving you time on your projects.
- Precision: With a nail gun, you can place nails exactly where you need them, ensuring a neat and professional finish.
- Safety: Nail guns are designed with safety features to prevent accidents and injuries during operation.
- Versatility: Whether you are framing, installing trim, or working on furniture, a nail gun can handle a variety of nailing tasks with ease.
Using a Ryobi nail gun can elevate your woodworking projects to the next level, making your work faster and more precise. With the right techniques and proper maintenance, your Ryobi nail gun can be a valuable addition to your toolkit.
Types Of Ryobi Nail Guns
To load a Ryobi Nail Gun, first, ensure it’s disconnected from the power source. Then, slide the nails into the magazine, making sure they’re aligned properly. Lastly, reattach the battery or plug in the air hose before testing the gun on a scrap material.
Pneumatic Vs. Electric Models
Ryobi offers both pneumatic and electric nail gun models. Pneumatic models rely on air pressure to drive nails, while electric models use electricity.
Features Of Various Ryobi Models
Ryobi nail guns come in a variety of models with different features to suit various needs. Some models have adjustable depth settings for precise nailing, while others offer tool-free jam release for quick nail removal.
Safety First: Preparing To Load
Before loading your Ryobi nail gun, it is essential to prioritize safety. Taking the necessary precautions and properly preparing the nail gun will help prevent accidents and ensure a smooth and safe loading process.
Importance Of Safety Gear
Wearing appropriate safety gear is crucial when preparing to load a Ryobi nail gun. This includes safety glasses to protect your eyes from any potential flying debris, hearing protection to guard against the loud noise, and work gloves to shield your hands from sharp edges and splinters.
Inspecting The Nail Gun
Before loading the nail gun, it is important to thoroughly inspect it for any signs of damage or wear. Check for any loose or missing parts, and ensure that the trigger and safety mechanisms are functioning properly. Additionally, make sure the nail chamber is empty and free from any obstructions.
Step-by-step Guide To Loading
When it comes to using a Ryobi nail gun, understanding the proper loading process is essential for smooth and efficient operation.
This step-by-step guide will walk you through the process of loading the nail gun, from inserting the battery or connecting the air compressor to properly loading the nails for optimal performance.
Inserting The Battery Or Connecting Air Compressor
Before loading your Ryobi nail gun, you’ll need to power it up. If your nail gun is battery-powered, make sure to insert a fully charged battery into the designated slot.
For air-powered models, connect the nail gun to a compatible air compressor using the appropriate hose and fittings. Ensure that the battery is securely in place or the air compressor is properly connected before proceeding to the next step.
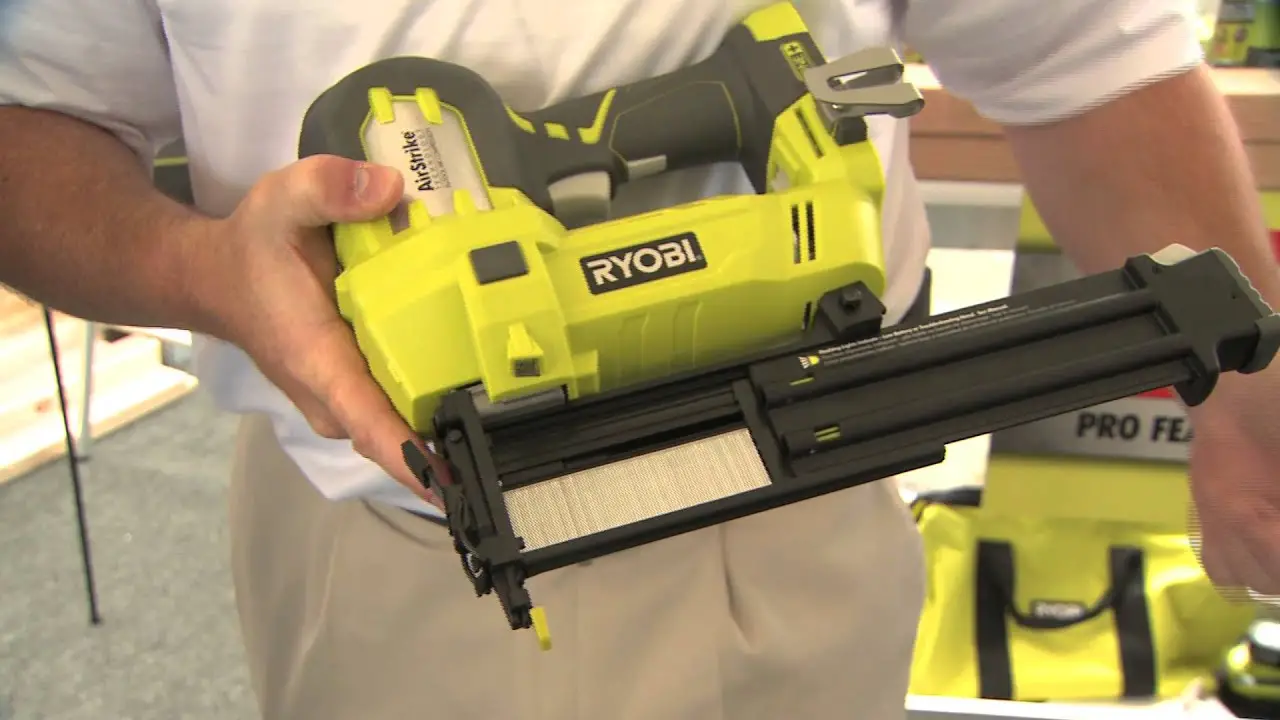
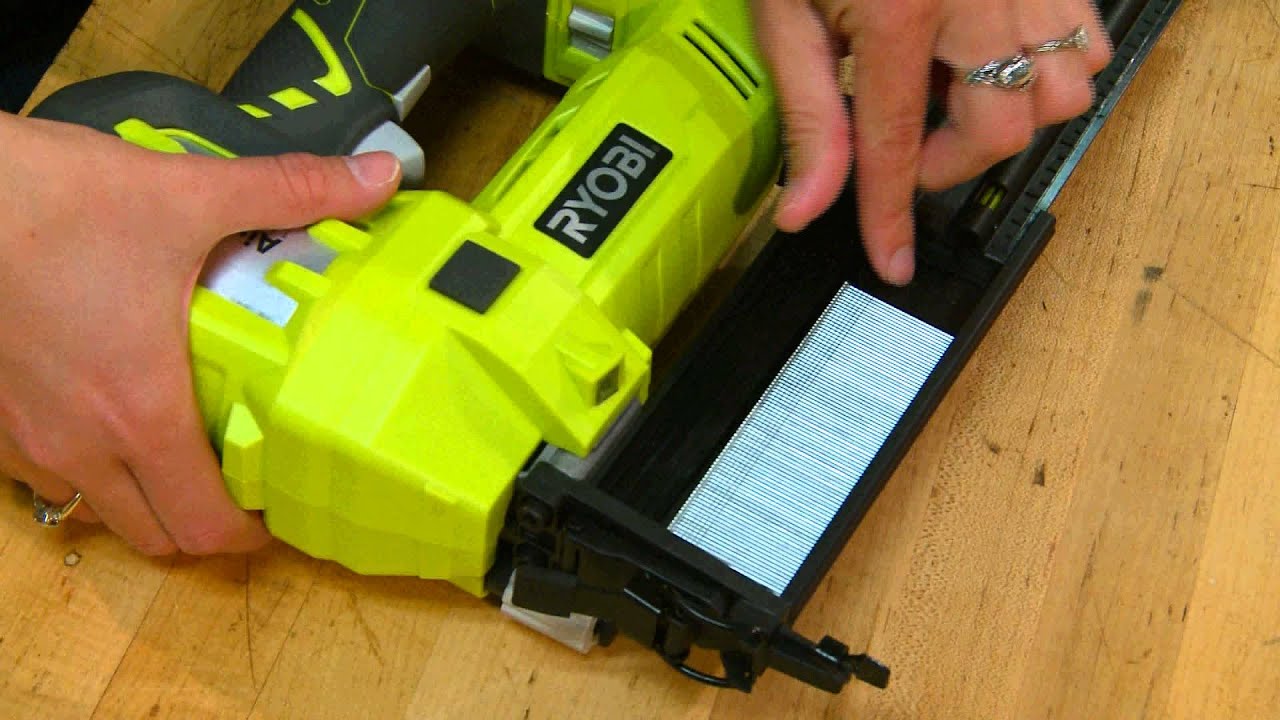
Loading The Nails Properly
Properly loading the nails into your Ryobi nail gun is crucial for achieving precise and consistent results. Start by unlocking the magazine and carefully inserting the nail strips, ensuring they are aligned and positioned correctly.
Avoid overloading the magazine to prevent jams and malfunctions during operation. Once the nails are loaded, lock the magazine in place to secure the nails for use.
Troubleshooting Common Loading Issues
When it comes to using a Ryobi nail gun, loading issues can sometimes arise, causing frustration and delays.
Understanding how to troubleshoot common loading issues can help you get back to your projects with minimal downtime.
Below, we’ll explore how to address two common loading issues: jammed nails and ensuring smooth nail delivery.
Jammed Nails: How To Clear Them?
If you encounter jammed nails in your Ryobi nail gun, it’s crucial to address the issue promptly to avoid damage to the tool.
Follow these simple steps to clear jammed nails:
- Disconnect the nail gun from the power source to ensure safety.
- Use an Allen wrench to remove any remaining nails from the magazine.
- Inspect the magazine for any debris or obstructions and clear them if present.
- Reload the nail gun with the appropriate nails according to the manufacturer’s guidelines.
Ensuring Smooth Nail Delivery
To ensure smooth nail delivery with your Ryobi nail gun, take the following steps:
- Regularly clean and lubricate the nail gun as per the manufacturer’s recommendations.
- Use high-quality nails that are compatible with your specific nail gun model.
- Check the magazine and feeder for any signs of wear or damage, and replace any worn parts as needed.
- Adjust the nail depth setting according to the material you are working with to prevent misfires and jams.
Maintenance Tips For Ryobi Nail Guns
Maintenance plays a crucial role in ensuring the longevity and optimal performance of your Ryobi nail gun. By implementing a regular cleaning routine and following proper storage practices, you can effectively extend the lifespan of your tool.
Here are some essential maintenance tips for Ryobi nail guns:
Regular Cleaning Routine
Regularly cleaning your Ryobi nail gun is essential to prevent dirt and debris from impacting its performance. Use a small brush to remove dust and particles from the exterior and the magazine. Additionally, ensure that the air vents are free from any obstructions to maintain proper airflow.
Storage Advice For Longevity
Proper storage is vital for preserving the functionality of your Ryobi nail gun. When not in use, store the tool in a dry and cool environment to prevent corrosion.
Consider using a protective case or cover to shield the nail gun from moisture and dust. Furthermore, it is advisable to release any remaining pressure from the nail gun before storage to avoid potential damage to internal components.
Best Practices For Efficient Use
Loading a Ryobi nail gun requires careful attention to detail. Begin by disconnecting the power source, then load the nails into the magazine, making sure they are aligned correctly. Finally, reattach the power source and test the nail gun before use.
Optimal Nail Gun Handling Techniques
When using a Ryobi nail gun, follow these handling techniques:
- Always wear safety goggles and gloves to protect your eyes and hands.
- Ensure a secure footing before firing the nail gun.
- Hold the nail gun firmly with both hands to maintain control.
- Keep your finger off the trigger until ready to shoot.
Project-specific Tips
For different projects, consider these tips:
- Use shorter nails for delicate trim work.
- Opt for longer nails for heavy-duty construction projects.
- Adjust the nail depth according to the material being nailed.
- Regularly clean and lubricate the nail gun for optimal performance.
Accessorizing Your Ryobi Nail Gun
Loading a Ryobi nail gun is a crucial step in accessorizing it. To do so, make sure to follow the manufacturer’s instructions and use the appropriate nails for the gun.
Recommended Accessories
Accessorizing your Ryobi Nail Gun with the right tools can enhance its performance and efficiency. Here are some recommended accessories to consider:
- Extra battery packs for uninterrupted usage
- Various nail sizes for different projects
- Magnetic nail holder for easier loading
- No-mar tips to prevent surface damage
Customizing Your Tool For Various Tasks
Customizing your Ryobi Nail Gun allows you to tackle a wide range of projects with ease. Here’s how you can tailor your tool for different tasks:
- Adjust depth settings for precise nail placement
- Use different firing modes for speed or accuracy
- Attach a belt hook for convenient carrying
- Install a work light for better visibility in dim areas
Mastering The Ryobi Nail Gun
Mastering the Ryobi nail gun is a valuable skill for DIY enthusiasts and professionals alike. With the right knowledge and technique, loading and using this tool becomes a seamless process.
By understanding the key points and embracing the potential for DIY projects, you can confidently wield the Ryobi nail gun to tackle various tasks, from simple repairs to major construction projects.
Recap Of Key Points
- Ensure the nail gun is disconnected from the power source before loading nails.
- Use the proper nail size and type recommended for the Ryobi nail gun model.
- Follow the manufacturer’s instructions for loading nails into the magazine.
- Double-check that the nails are aligned properly and securely in the magazine.
- Always wear appropriate safety gear when operating the nail gun.
Encouragement For Diy Projects
Empower yourself by taking on DIY projects, whether it’s enhancing your living space or crafting custom furniture.
With the Ryobi nail gun as a reliable companion, you can confidently tackle various woodworking and construction tasks. Embrace the satisfaction of completing projects with precision and efficiency, all while expanding your DIY skills.
Frequently Asked Questions
How To Load Nails Into A Ryobi Nail Gun?
To load nails into a Ryobi nail gun, follow these steps:
1. Disconnect the tool from the power source.
2. Slide the nail strip into the magazine.
3. Push the strip until it locks in place.
4. Reconnect the power source.
5. Test the gun before use.
How Do You Reload A Ryobi Finish Nailer?
To reload a Ryobi finish nailer, follow these steps:
1. Disconnect the air supply.
2. Open the magazine latch.
3. Insert the nails.
4. Close the latch securely.
5. Reconnect the air supply.
6. Test the nailer before use.
How Do I Load Nails Into A Nail Gun?
To load nails into a nail gun, follow these steps:
1. Disconnect the gun from the power source.
2. Open the magazine.
3. Insert the nails.
4. Close the magazine.
5. Reconnect the power.
How To Load Ryobi 23 Gauge Pin Nailer?
To load a Ryobi 23-gauge pin nailer, unlock the magazine, insert the pins, and lock the magazine back in place.
Conclusion
Mastering how to load a Ryobi nail gun is essential for DIY enthusiasts and professionals alike.
By following the manufacturer’s instructions and safety guidelines, you can ensure efficient and safe operation of your tool. Remember to always prioritize safety and precision when using any power tool.