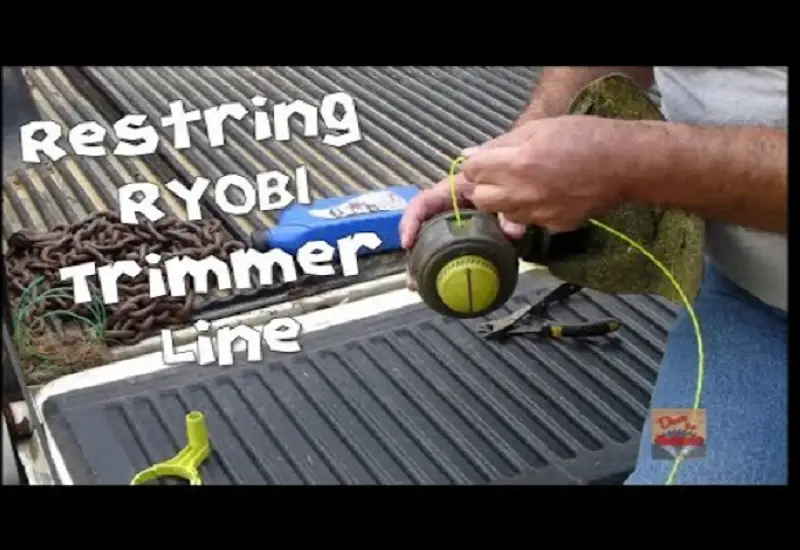
To restring a Ryobi trimmer, first, remove the spool cap and take out the spool. Then, wind the new line onto the spool, following the directional arrows.
Maintaining your Ryobi trimmer is essential for keeping your yard looking its best. One crucial aspect of maintenance is knowing how to restring the trimmer when the line runs out. Restringing a Ryobi trimmer is a straightforward process that can be done in just a few simple steps.
By following the correct procedure, you can ensure that your trimmer is always ready for action. We will outline the precise steps to restring your Ryobi trimmer, allowing you to keep your yard looking tidy and well-maintained.
Contents
- Introduction To Ryobi Trimmers
- Signs It’s Time To Restring
- Tools And Materials Needed
- Safety First: Preparing To Restring
- Removing The Spool Cap And Spool
- Winding The String Onto The Spool
- Reassembling The Trimmer Head
- Testing The Trimmer After Restringing
- Maintenance Tips For Longevity
- Troubleshooting Common Restringing Problems
- Professional Services Vs. Diy
- Mastering The Restringing Process
- Frequently Asked Questions
- Conclusion
Introduction To Ryobi Trimmers
Popularity Of Ryobi Trimmers
Ryobi trimmers are widely known for their durability and efficiency in trimming tasks.
They are popular among homeowners and professionals for their high-quality performance.
Importance Of Proper Maintenance
Regular maintenance of Ryobi trimmers is crucial to ensure their longevity and optimal performance.
Proper maintenance helps prevent breakdowns and costly repairs in the long run.

Signs It’s Time To Restring
If your Ryobi trimmer’s line is breaking frequently or not feeding properly, it may be time to restring it. Follow these simple steps to restring your Ryobi trimmer and ensure smooth and efficient operation for your yard maintenance needs. Regular restringing will help maintain the performance and longevity of your trimmer.
Worn-out String: If the string appears frayed or breaks frequently, it’s time to restring the Ryobi trimmer.
Decreased Cutting Efficiency: Notice a decrease in cutting power? It’s a sign that the string needs replacement.
Tools And Materials Needed
To restring your Ryobi trimmer, you will need to gather the necessary tools and materials. Ensuring you have the right equipment on hand will make the process smoother and more efficient. Here’s a look at the essential tools and materials needed for this task.
Types Of Replacement Strings
There are different types of replacement strings available for Ryobi trimmers, including twisted, serrated, and round lines. The type you choose depends on your specific trimming needs and the type of vegetation you will be cutting.
Essential Tools For The Job
When restringing your Ryobi trimmer, you will need the following tools:
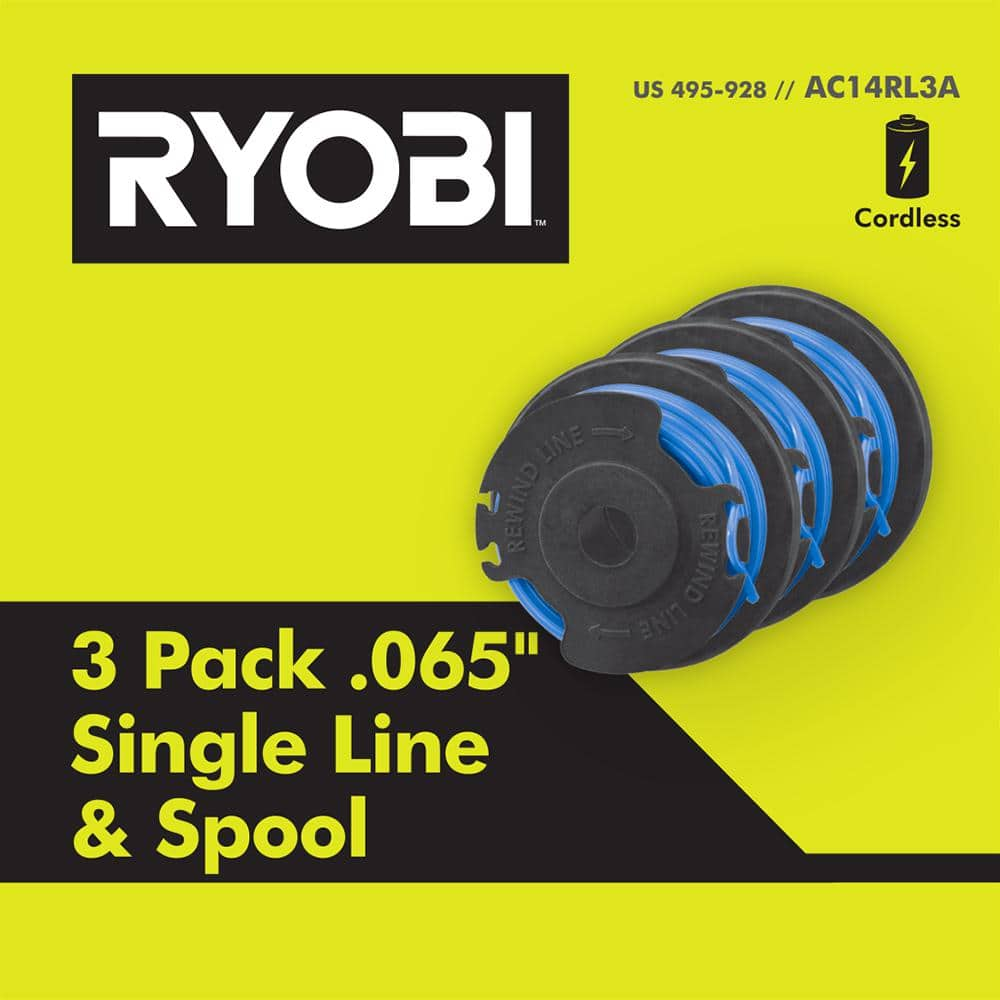
- Replacement Trimmer Line: Ensure you have the appropriate replacement line for your specific Ryobi trimmer model.
- Scissors or Wire Cutters: These are essential for cutting the replacement line to the required length.
- Ryobi Trimmer Head: You will need to remove the trimmer head to access and replace the line.
- Work Gloves: Protect your hands with a pair of sturdy work gloves while handling the trimmer line.
- Clean Cloth: Use a clean cloth to wipe any dirt or debris from the trimmer head and surrounding areas.
- Eye Protection: Safety goggles or glasses are crucial for eye protection during the restringing process.
Safety First: Preparing To Restring
Prepare your Ryobi trimmer for restringing by prioritizing safety. Clear the work area and inspect the trimmer head for any damage. Ensure the engine is off and the trimmer is cool before proceeding. Follow the manufacturer’s guidelines for restringing to maintain safety and efficiency.
Before starting the process of restringing your Ryobi trimmer, it is crucial to ensure your safety. In this section, we will outline the necessary steps to prepare for restringing your trimmer.
Protective Gear
It is important to wear protective gear before restringing your trimmer. Here is a list of recommended gear:
- Safety glasses
- Gloves
- Long pants
- Close-toed shoes
Securing The Trimmer
Before you start restringing, make sure the trimmer is turned off and secure. Here are the steps to follow:
- Place the trimmer on a flat surface
- Ensure the cutting head is facing up
- Disconnect the spark plug wire to prevent accidental start-up
- Secure the cutting head in place using a clamp or vise grip
By following these steps, you will have a secure and safe working environment for restringing your Ryobi trimmer. Remember, safety should always come first when handling any power tools.
Removing The Spool Cap And Spool
When restringing your Ryobi trimmer, the first step is to remove the spool cap and spool. This allows you to access the trimmer line for replacement or maintenance. Follow the steps below to easily accomplish this task.
Step-by-step Process
- Turn off the trimmer: Ensure the trimmer is powered off and disconnected from any power source.
- Locate the spool cap: Identify the spool cap on the trimmer head.
- Remove the spool cap: Twist the spool cap counterclockwise to unlock and remove it from the trimmer head.
- Take out the spool: Lift the spool out of the trimmer head carefully.
Troubleshooting Common Issues
- Spool cap stuck: If the spool cap is difficult to remove, try using a lubricant or gently tapping it to loosen.
- Spool tangled: Untangle the trimmer line on the spool before restringing to prevent jams.
Winding The String Onto The Spool
To restring a Ryobi trimmer, start by winding the string onto the spool. Hold the spool steady and wind the line in the direction indicated on the spool for a hassle-free restringing process. Remember to secure the ends properly before using the trimmer again.
Correct Winding Techniques
When winding the string onto the spool, ensure it is done correctly to prevent tangling.
How Much String To Use?
Determine the appropriate amount of string needed based on your trimmer’s spool capacity. Start by cutting a piece of trimmer line according to the manufacturer’s guidelines. Next, locate the arrows on the spool indicating the winding direction.
Insert the string into the hole and wind it evenly in the direction of the arrows. Avoid overlapping the string and leave a small tail to prevent unwinding.
Secure the ends of the string in the retaining slots on the spool. Trim any excess string to ensure it doesn’t interfere with the trimmer’s operation.
Reassembling The Trimmer Head
To restring a Ryobi trimmer head, first, remove the spool and clean it thoroughly. Then, wind the new line tightly in the direction indicated on the spool. Finally, reassemble the head by carefully following the manufacturer’s instructions for a properly restrung trimmer.
Reassembling the Trimmer Head of a Ryobi Trimmer is an important part of the process of replacing the trimmer line.
After you have installed the new line, you will need to reassemble the trimmer head to ensure that it is properly secured and ready for use. Here are the steps you need to follow to ensure that the trimmer head is reassembled correctly.
Ensuring Proper Fit
Before you start reassembling the trimmer head, you need to make sure that you have the right parts. Check to see if the old parts are still in good condition and can be reused.
If not, you will need to purchase new parts from a reputable dealer. Once you have the parts, make sure that they fit together properly. Check the manufacturer’s instructions to make sure that you have the right parts for your trimmer model.
Final Checks Before Use
After you have reassembled the trimmer head, you need to do some final checks before using it. First, make sure that the trimmer head is properly secured. Give it a gentle tug to make sure that it is firmly attached. If it comes loose, you will need to reassemble it.
Second, check the trimmer line to make sure that it is properly installed. Make sure that the line is the right length and that it is properly wound around the spool. Finally, check the trimmer head for any signs of damage or wear.
If you notice any problems, you will need to replace the trimmer head or have it repaired. In conclusion, reassembling the trimmer head of a Ryobi Trimmer is an important step in maintaining your trimmer.
Follow these steps to ensure that the trimmer head is properly secured and ready for use. By doing so, you can ensure that your trimmer will work efficiently and effectively, giving you the results you need to keep your lawn and garden looking great.

Testing The Trimmer After Restringing
After successfully restringing your Ryobi trimmer, it’s crucial to perform a series of tests to ensure that it’s functioning properly.
Testing the trimmer after restringing helps to guarantee that the restringing process was done correctly and that the trimmer is safe to use.
In this section, we will cover the essential steps for testing your restringed Ryobi trimmer to ensure its optimal performance.
Safety Inspection
Before conducting any tests, it is important to perform a safety inspection of the restringed Ryobi trimmer.
This involves checking for any loose or damaged components, ensuring that the trimmer guard is securely in place, and verifying that the safety features are functioning as intended.
Additionally, make sure that the trimmer is free from any obstructions or debris that could impede its operation.
Operational Test
Once the safety inspection is complete, the next step is to conduct an operational test of the restringed Ryobi trimmer. Start by carefully starting the trimmer according to the manufacturer’s instructions.
Then, engage the trimmer head to verify that the restringing has been done correctly and that the trimmer line feeds smoothly without any tangles or snags. Test the trimmer’s cutting performance on a small area of grass to ensure that it is effectively trimming and edging as intended.
Maintenance Tips For Longevity
To restring a Ryobi trimmer, start by removing the spool from the trimmer head. Then, unwind the old line and clean the spool.
Next, insert the new line and wind it evenly. Finally, reassemble the spool and your trimmer is ready for use. Following these maintenance tips will ensure the longevity of your Ryobi trimmer.
Regular Cleaning
Regular cleaning removes dirt and debris, ensuring optimal performance of your Ryobi trimmer. Use a soft brush to clean the trimmer head and wipe down the exterior with a damp cloth. Inspect for any damage during cleaning and address promptly to prevent further issues.
String Storage Best Practices
Store trimmer string in a cool, dry place to prevent moisture damage. Avoid direct sunlight to prevent weakening of the string material. Consider using a storage case to keep the string organized and protected from damage.
Troubleshooting Common Restringing Problems
When restringing your Ryobi trimmer, you may encounter some common issues that can be frustrating. Below are solutions to two of the most common restringing problems.
Jamming Issues
If you are experiencing jamming issues while restringing your Ryobi trimmer, try the following troubleshooting steps:
- Ensure that the trimmer head is properly secured.
- Check for any tangled or twisted line inside the trimmer head.
- Inspect the spool for any debris or dirt that may be causing the jam.
- Clean the trimmer head and spool before restringing to prevent future jams.
Uneven String Lengths
Uneven string lengths can lead to inefficiencies while using your Ryobi trimmer. Here’s how you can troubleshoot this problem:
- Make sure to cut the trimmer line to the recommended length before restringing.
- Ensure that the line is properly wound around the spool without any overlaps.
- Check for any tangles or knots in the trimmer line that may be causing uneven lengths.
- Replace the trimmer line if it is worn out or damaged to maintain consistent lengths.
Professional Services Vs. Diy
When it comes to restringing your Ryobi trimmer, you may find yourself at a crossroads: should you seek professional services or attempt a DIY approach? Let’s explore the pros and cons of each option to help you make an informed decision.
When To Seek Professional Help
If you lack the time, tools, or confidence to restring your Ryobi trimmer, professional help may be the best option. Additionally, if you encounter technical issues or complications, a trained technician can provide expert assistance.
Benefits Of Learning To Diy
Learning to restring your Ryobi trimmer on your own can save you time and money. It empowers you to take control of your equipment maintenance and gain valuable skills for future repairs. Furthermore, DIY restringing allows for customization and flexibility according to your specific needs.
Mastering The Restringing Process
Mastering the restringing process of your Ryobi trimmer is crucial to maintain its performance. By carefully following the steps outlined in this article, you can easily restring your trimmer and keep it in top shape, ensuring a neat and precise cut every time.
Summarizing Key Takeaways
When it comes to restringing your Ryobi trimmer, mastering the process can save you time and frustration. Remember to follow the manufacturer’s guidelines and take your time to ensure a smooth restringing experience. By understanding the key takeaways, you can confidently maintain your trimmer for optimal performance.
Encouragement For Future Maintenance
Encouragement for future maintenance is essential for keeping your Ryobi trimmer in top condition. Regularly checking the trimmer line and restringing it when necessary will ensure that your trimmer continues to operate efficiently.
By staying proactive with your maintenance, you can avoid unexpected issues and enjoy a well-maintained trimmer for years to come.
Frequently Asked Questions
How To Put String On Ryobi Grass Trimmer?
To put string on a Ryobi grass trimmer, first, unscrew the trimmer head and remove the spool. Next, insert the new trimmer line and wind it evenly. Finally, reassemble the head and trimmer, ensuring the string is secure.
How To Wind A Ryobi Line Trimmer?
To wind a Ryobi line trimmer, follow these steps:
1. Insert the line into the hole on the spool.
2. Wind the line in the direction shown on the spool.
3. Secure the line in the notch.
4. Reassemble the spool and trimmer head.
5. Your Ryobi trimmer is now ready for use.
How To Change Ryobi Line Trimmer Spool?
To change the spool on your Ryobi line trimmer, first make sure it is turned off and unplugged. Remove the old spool by pressing the release button and pulling it out. Insert the new spool by aligning it with the arrows and pressing it in until it clicks.
How To Unlock Ryobi Trimmer Head?
To unlock a Ryobi trimmer head, locate the two small holes on the side. Insert a screwdriver or pin into the holes and twist counterclockwise to release the head. Pull it off to access the spool for line replacement.
Conclusion
Restringing a Ryobi trimmer is a straightforward process that can be easily mastered. By following the step-by-step guide, you can ensure that your trimmer is always ready for action.
Regular maintenance and restringing will prolong the life of your trimmer and keep your yard looking neat and tidy.