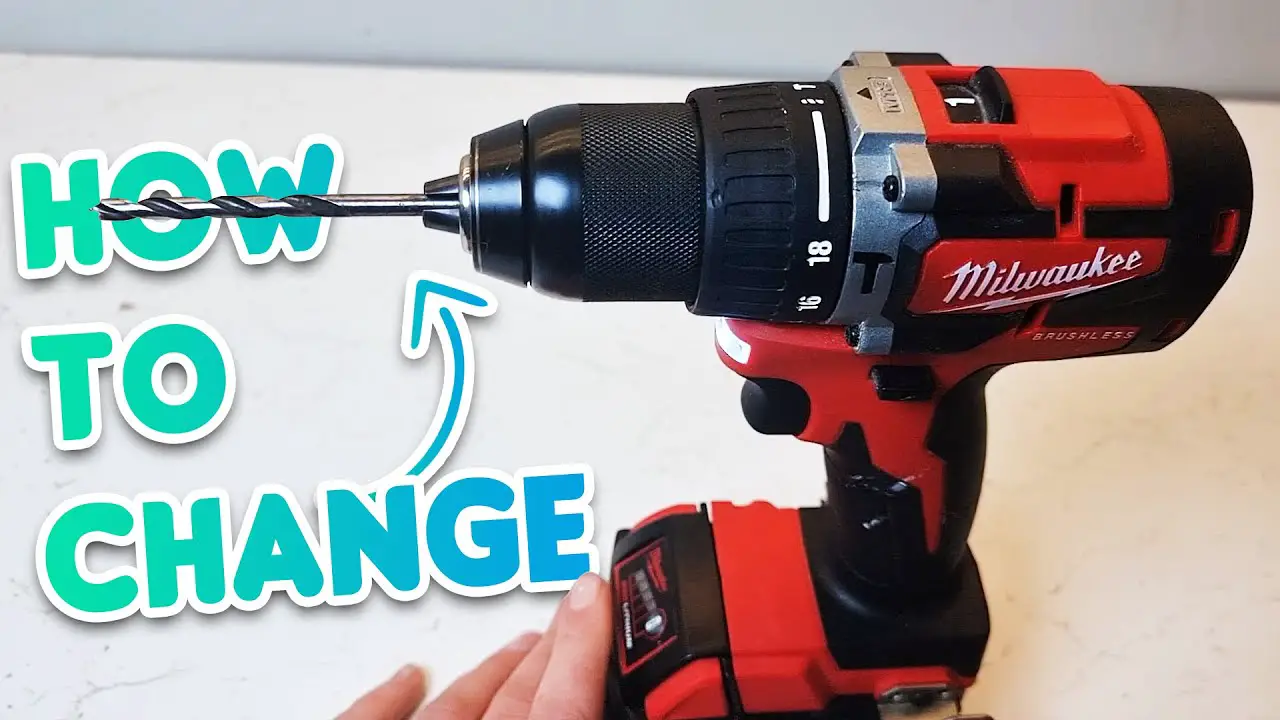
To change a Milwaukee drill bit, locate the chuck key and insert it into the chuck. Tighten or loosen to remove the old bit and insert the new one.
Milwaukee drills are versatile tools commonly used for various DIY projects or professional tasks. Changing the drill bit is a simple process that can be done quickly with the right technique. In this guide, we will walk you through the step-by-step process of changing a drill bit on a Milwaukee drill.
By following these instructions, you can easily switch out bits to suit different tasks and maintain the efficiency of your drill. Let’s dive in and learn how to change a Milwaukee drill bit effectively.
Contents
Understanding Milwaukee Drill Bit System
Learn how to easily change a Milwaukee drill bit with the Milwaukee Drill Bit System. Follow the simple step-by-step process to swap out your drill bits and make your projects more efficient. With this user-friendly system, you can seamlessly switch between different drill bits to suit your needs.
Milwaukee drill bits are known for their durability and precision. However, changing a drill bit can be daunting for beginners. Understanding the Milwaukee drill bit system is key to changing your drill bits seamlessly.
Key Components Of Milwaukee Drill Bit
Milwaukee drill bits have two key components: the shank and the tip. The shank is the part of the drill bit that fits into the drill’s chuck. The tip is the part of the drill bit that does the actual drilling.
Compatibility With Different Models
Before changing the drill bit, it’s important to ensure compatibility with your drill model. Milwaukee drill bits are compatible with a wide range of Milwaukee drills, including the M18 FUEL™, M12 FUEL™, and M18™. Make sure to check the drill’s user manual for compatibility information.
Changing Milwaukee Drill Bits
To change a Milwaukee drill bit, follow these simple steps:
- Switch off the drill and unplug it from the power source.
- Release the current drill bit by loosening the chuck with the chuck key or by turning the chuck counterclockwise.
- Insert the new Milwaukee drill bit into the chuck and tighten it by turning the chuck clockwise.
- Check that the drill bit is secure before using the drill.
Now that you understand the key components of the Milwaukee drill bit system and how to change a Milwaukee drill bit, you can confidently tackle your DIY projects. Remember to always prioritize safety and refer to the drill’s user manual for guidance.
Essential Tools For Drill Bit Change
When it comes to changing a drill bit on a Milwaukee drill, having the essential tools at your disposal can make the process efficient and hassle-free. Whether you are a DIY enthusiast or a professional, knowing the right tools for drill bit change is crucial.
This section will outline the essential tools required for changing drill bits, including the types of chuck keys and additional equipment for efficiency.
Types Of Chuck Key
When changing a drill bit, the chuck key is an essential tool for securing the bit in place. There are primarily two types of chuck keys:
- Standard Chuck Key: This type of chuck key is commonly used and features a traditional design for tightening and loosening the chuck.
- Keyless Chuck: Keyless chucks eliminate the need for a chuck key, allowing for quick and convenient bit changes without the hassle of locating the chuck key.
Additional Equipment For Efficiency
In addition to the chuck key, there are other tools and equipment that can enhance the efficiency of changing drill bits. These include:
- Work Gloves: Protect your hands with durable work gloves to ensure a secure grip and prevent injuries during the bit change process.
- Drill Bit Set: Having a variety of drill bits in different sizes and types ensures that you have the right bit for any drilling task.
- Drill Bit Lubricant: Using a lubricant can prolong the life of your drill bits and reduce friction during drilling, leading to smoother and more precise drilling operations.
- Clean Cloth: Keeping a clean cloth handy allows you to wipe down the chuck and drill bit, removing any debris or dust that may affect the drilling performance.
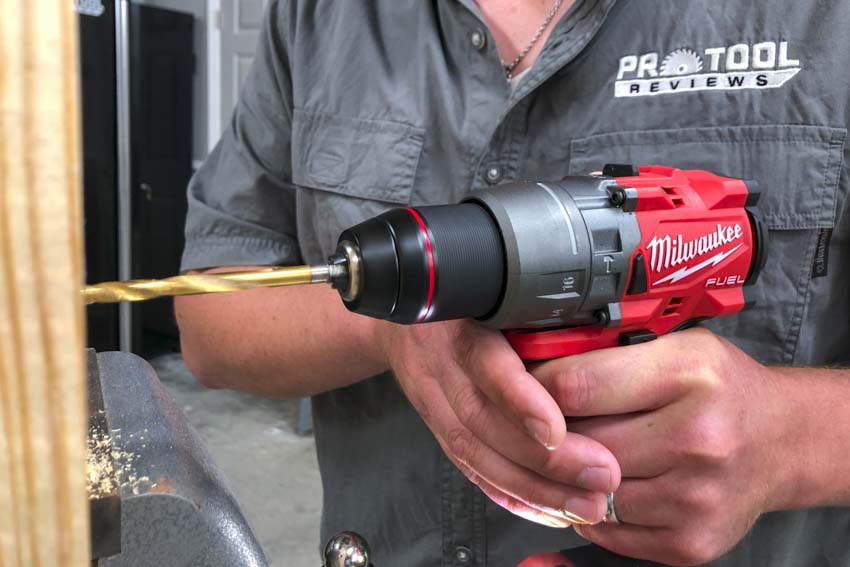
Step-by-step Guide For Changing Drill Bit
Changing a drill bit on a Milwaukee drill is a simple and essential skill for any DIY enthusiast or professional. With the right steps, you can quickly and easily switch out bits to tackle a variety of tasks.
In this guide, we’ll walk you through the process, step by step, so you can confidently change the drill bit on your Milwaukee drill whenever the need arises.
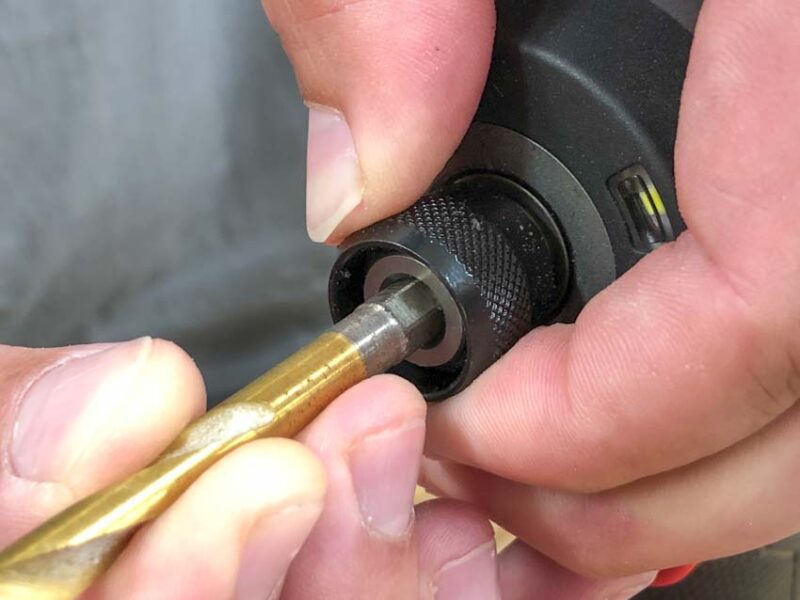
Removing The Existing Bit
To begin, ensure the drill is turned off and unplugged from the power source. Loosen the chuck by rotating it counterclockwise.
Once the chuck is loose, remove the existing drill bit by pulling it out from the chuck. Be careful when handling the bit to avoid any injuries. Dispose of the old bit safely if it’s worn out or damaged.
Inserting A New Bit
Now, it’s time to insert the new drill bit. Select the appropriate bit for the task at hand and align it with the jaws of the chuck.
Once aligned, insert the bit into the chuck and tighten the chuck securely by rotating it clockwise. Ensure the bit is held firmly in place before proceeding with your drilling tasks.
Tips For Quick And Efficient Swaps
Discover quick and efficient tips for changing a Milwaukee drill bit effortlessly. Follow these simple steps to swap out drill bits with ease for seamless DIY projects. Master the art of swapping drill bits swiftly and effectively with these expert tips.
When you’re in the middle of a project, the last thing you want is to waste time struggling to change a drill bit. Fortunately, with a few simple tips, you can quickly and efficiently swap out bits on your Milwaukee drill. Here are some key factors to keep in mind:
Maintaining Chuck Cleanliness
Before you start, it’s important to make sure your chuck is clean and free of debris. A dirty or clogged chuck can make it difficult to insert or remove bits, slowing down the process and potentially damaging your drill. To clean the chuck, simply wipe it down with a dry cloth or use compressed air to blow away any dust or debris.
Ensuring Proper Bit Alignment
Proper alignment is crucial for a smooth and easy bit swap. When inserting a new bit, be sure to align the flat sides of the shank with the corresponding flat sides of the chuck.
This will ensure a secure fit and prevent the bit from slipping or wobbling during use. To align the bit, hold it steady and firmly push it into the chuck until it clicks into place. Then, give it a quick tug to make sure it’s securely seated.
Using The Right Method
Finally, it’s important to use the right method for changing your Milwaukee drill bit. There are two main methods: one-handed and two-handed. The one-handed method is faster but requires a bit more dexterity, while the two-handed method is slower but more secure.
To use the one-handed method, simply hold the chuck with one hand while turning the drill with the other. To use the two-handed method, hold the chuck with one hand and use the other hand to turn the chuck key.
Whichever method you choose, be sure to follow the manufacturer’s instructions and use the right tools for the job. By following these tips, you can quickly and easily swap out bits on your Milwaukee drill, saving time and hassle on your next project.
Remember to keep your chuck clean, align your bits properly, and use the right method for a smooth and efficient swap every time.
Troubleshooting Common Issues
When it comes to using a Milwaukee drill, changing the drill bit is a routine task. However, you may encounter common issues that require troubleshooting. Understanding how to address these issues can save you time and frustration. Let’s delve into troubleshooting common issues when changing a Milwaukee drill bit.
Stuck Bits And Solutions
If you find the drill bit stuck in the chuck, there are a few solutions to consider:
- Apply Lubrication: Use a lubricant on the stuck area to loosen the bit.
- Tap Gently: Tap the chuck lightly with a hammer to dislodge the stuck bit.
- Use Pliers: If tapping doesn’t work, use pliers to carefully pull out the stuck bit.
Dealing With Chuck Malfunctions
If you encounter issues with the chuck, follow these steps:
- Check Alignment: Ensure the chuck is aligned properly before inserting the bit.
- Clean the Chuck: Remove any debris or dust from the chuck to prevent malfunctions.
- Inspect the Jaws: Examine the chuck jaws for any damage or irregularities that may hinder bit insertion.

Safety Measures And Best Practices
To change a Milwaukee drill bit safely, start by ensuring the drill is turned off and unplugged. Use the chuck key to loosen the chuck, remove the old bit, and insert the new one securely. Tighten the chuck with the key and test the drill before use.
Protective Gear And Precautions
When changing a drill bit, always wear safety goggles and gloves to protect your eyes and hands.
Make sure to disconnect the drill from the power source before attempting to change the bit.
Preventive Maintenance For Drill And Bits
Regularly clean the drill chuck and lubricate it to ensure smooth operation.
Inspect your drill bits for damage or wear before each use to prevent accidents.
Frequently Asked Questions
How Do You Change A Drill Bit On A Milwaukee Drill?
To change a drill bit on a Milwaukee drill, simply loosen the chuck, remove the current bit, insert the new bit, and tighten the chuck securely.
How To Unlock A Milwaukee Drill?
To unlock a Milwaukee drill, locate the chuck key, insert it into the chuck, and turn it counterclockwise.
How Do You Release A Drill Bit?
To release a drill bit, hold the chuck and turn it counterclockwise. This will loosen the bit, allowing you to remove it easily.
How Do You Release A Milwaukee Sds Drill Bit?
To release a Milwaukee SDS drill bit, press and hold the chuck collar, then pull the bit out.
Conclusion
Ready to tackle your next DIY project with confidence? Changing a Milwaukee drill bit is simple! Follow these steps and keep your tools in top condition.
Remember, regular maintenance is key to a successful project. Keep exploring, stay informed, and enjoy your handy work!