To take apart a Dewalt impact driver, first, unscrew the outer casing using a screwdriver. Then, carefully detach the internal components by following the manufacturer’s guidelines.
Taking apart your Dewalt impact driver can be a simple process if done correctly. By disassembling the tool, you can inspect the components for any signs of wear and tear or damage and perform necessary maintenance.
This guide will walk you through the steps required to safely and effectively dismantle your Dewalt impact driver.
Let’s dive into the process of disassembling your impact driver to keep it in optimal working condition. Learning how to take apart your Dewalt impact driver can save you time and money in the long run.
Contents
Tools Required
To disassemble a Dewalt Impact Driver, you will need a few essential and optional tools. Having the right tools on hand is crucial to ensure a smooth and efficient process.
Below, we will list the essential tools that are necessary for the disassembly, as well as some optional tools that can make the job easier and more convenient.
Essential Tools
- Screwdriver set
- Impact driver bit set
- Hex key set
- Needle-nose pliers
- Multi-bit screwdriver
- Hammer
Optional Tools
- Impact wrench
- Magnetic parts tray
- Rubber mallet
- Small pry bar
- Wire brush
- Impact driver lubricant
Step 1: Preparation
In the first step of taking apart a Dewalt Impact Driver, preparation is key. Ensure you have the necessary tools and a clean workspace before beginning the disassembly process.
Gathering Necessary Tools
Gather all the tools you’ll need, including screwdrivers, pliers, and safety goggles.
Finding A Suitable Workspace
Locate a clean and well-lit workspace with enough room to work comfortably.
Step 2: Removing The Battery
Once you have located the impact driver’s battery, it’s time to remove it. Here’s how you can do it:
Locating The Battery Release Button
The first step in removing the battery of your Dewalt impact driver is to locate the battery release button. This button is typically located on the back of the driver, close to the handle.
It is designed to allow you to easily remove and install the battery as needed.
Taking Out The Battery
Now that you have located the battery release button, it’s time to take out the battery.
Follow these easy steps:
- Press the battery release button firmly with your thumb or finger to disengage the battery.
- Once released, pull the battery straight out of the impact driver, making sure to hold it firmly.
When removing the battery, it’s important to ensure a secure grip to prevent it from accidentally falling. Taking proper precautionary measures will help you avoid any potential damage to the battery or the impact driver.
By following these simple steps, you can easily remove the battery from your Dewalt impact driver. This will give you the flexibility to replace and recharge the battery whenever necessary, ensuring your impact driver is always ready for use.
In this step, we learned how to remove the battery from a Dewalt impact driver. By locating the battery release button and following the steps to take out the battery, you can easily ensure the smooth functioning of your impact driver.
With the battery removed, you have the flexibility to replace or recharge it as needed, keeping your impact driver ready for any project.
Step 3: Removing Outer Casing
After identifying all the screws and fastenings, the next step is to carefully remove the outer casing of your Dewalt impact driver. This is an important stage in the disassembly process and requires precision to avoid damaging the internal components.
Identifying Screws And Fastenings
Before proceeding with the disassembly, take a close look at the impact driver to locate all the screws and fastenings that secure the outer casing. These may include Phillips head screws, Torx screws, or other types of fasteners.
Using The Right Tools To Unscrew
Once you have identified the screws and fastenings, ensure you have the appropriate tools for unscrewing them.
Depending on the type of screws, you may need a Phillips head screwdriver, a Torx screwdriver, or other specialized tools. Using the correct tools is essential to prevent stripping the screws and causing damage.
Step 4: Accessing Interior Components
Separating The Housing Halves
Gently pry apart the two halves of the impact driver housing using a flat-head screwdriver.
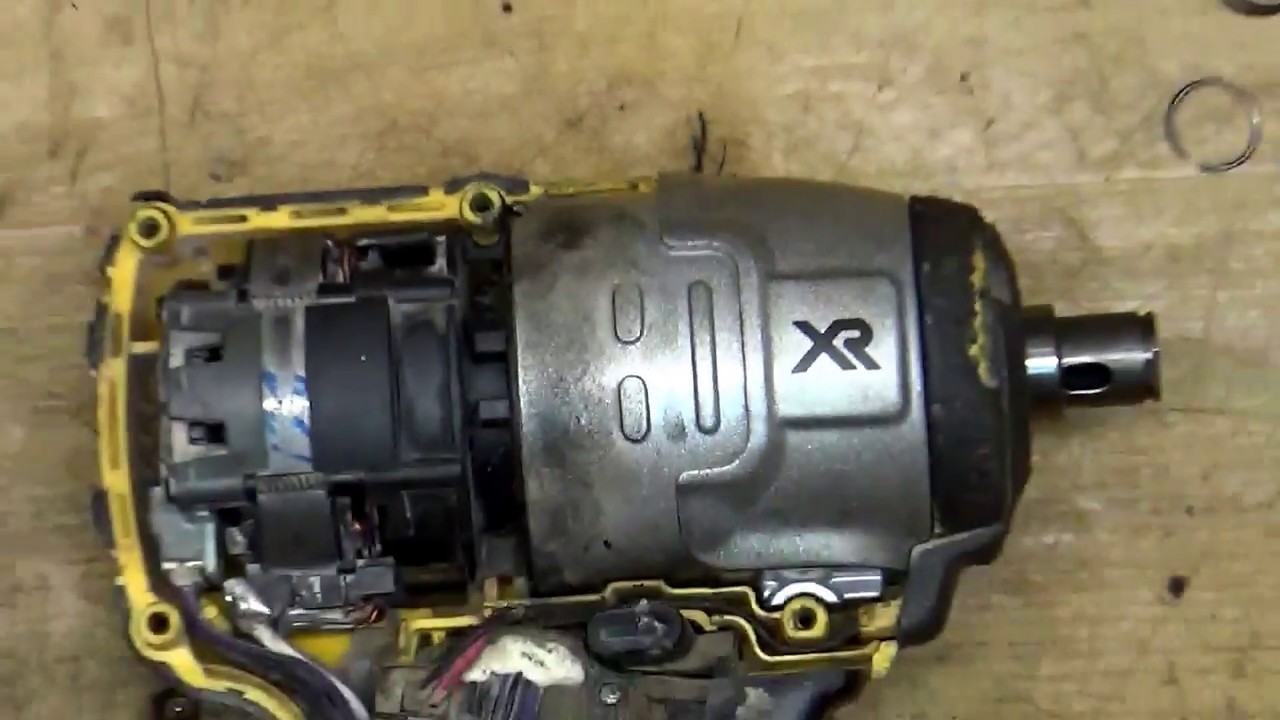
Identifying Key Interior Components
Once the housing halves are separated, look for the motor, gearbox, and electronic components inside.
Step 5: Dealing With Internal Mechanism
Understanding Gear Mechanism
Before taking apart the Dewalt Impact Driver, it’s essential to understand the gear mechanism.
The gear train is a crucial part of the internal workings of the impact driver, as it transfers the rotational force from the motor to the impacting mechanism.
Understanding how the gears interlock and operate is necessary before proceeding with disassembly.
Loosening And Removing Internal Components
Once you have a good grasp of the gear mechanism, you can move on to loosening and removing the internal components. Start by carefully unscrewing and removing the housing to gain access to the internal mechanism.
Then, systematically disassemble and remove the components, such as the anvil, gearbox, and motor assembly, ensuring that each part is carefully noted and organized for reassembly.

Frequently Asked Questions
How Do You Remove The Head From A Dewalt Impact Driver?
To remove the head from a Dewalt impact driver, simply unscrew the bolt securing the head using the appropriate sized wrench or socket. Make sure to hold onto the handle firmly while doing so.
How To Take The Chuck Off A Dewalt Impact Driver?
To remove chuck on Dewalt impact driver, first, loosen chuck by turning it counterclockwise. Use chuck key to fully remove it.
How Do I Remove An Impact Driver Bit?
To remove an impact driver bit, pull the collar back and slide the bit out. Avoid yanking or twisting the bit. Always wear safety goggles when handling tools.
How Do I Change The Spring On A Dewalt Impact Driver?
To change the spring on a DeWalt impact driver, follow these steps:
1. Remove the old spring by unscrewing the cover plate.
2. Detach the spring from the drive assembly.
3. Insert the new spring into the drive assembly.
4. Secure the cover plate back in place.
5. Test the impact driver to ensure the spring is working properly.
Conclusion
In wrapping up, dismantling a Dewalt Impact Driver can be straightforward with the right steps. Remember to handle each part carefully to avoid any damage.
Make sure to refer to the manufacturer’s manual for further guidance. By following these tips, you can effectively disassemble your impact driver with ease.