To restring an Echo SRM-225, first, remove the spool and old line. Then, wind the new line onto the spool, following the arrow direction.
Restringing an Echo SRM-225 is a simple process that can be done in just a few minutes. With the right tools and a bit of know-how, you can have your trimmer up and running smoothly in no time.
In this guide, we will walk you through the steps to restring an Echo SRM-225 trimmer, so you can get back to maintaining your yard without any hassle.
Whether you’re a seasoned landscaper or a DIY enthusiast, learning how to restring your trimmer can save you time and money in the long run. Let’s dive in and get your Echo SRM-225 back in action.
Contents
- Introduction To Echo Srm-225 Maintenance
- Safety First: Preparing For The Task
- Accessing The Trimmer Head
- Selecting The Right Trimmer Line
- The Restringing Process
- Reassembling The Trimmer Head
- Testing The Trimmer Post-restringing
- Troubleshooting Common Restringing Issues
- Maintenance Tips For Prolonged Trimmer Life
- Conclusion: The Benefits Of Diy Restringing
- Frequently Asked Questions
- Conclusion
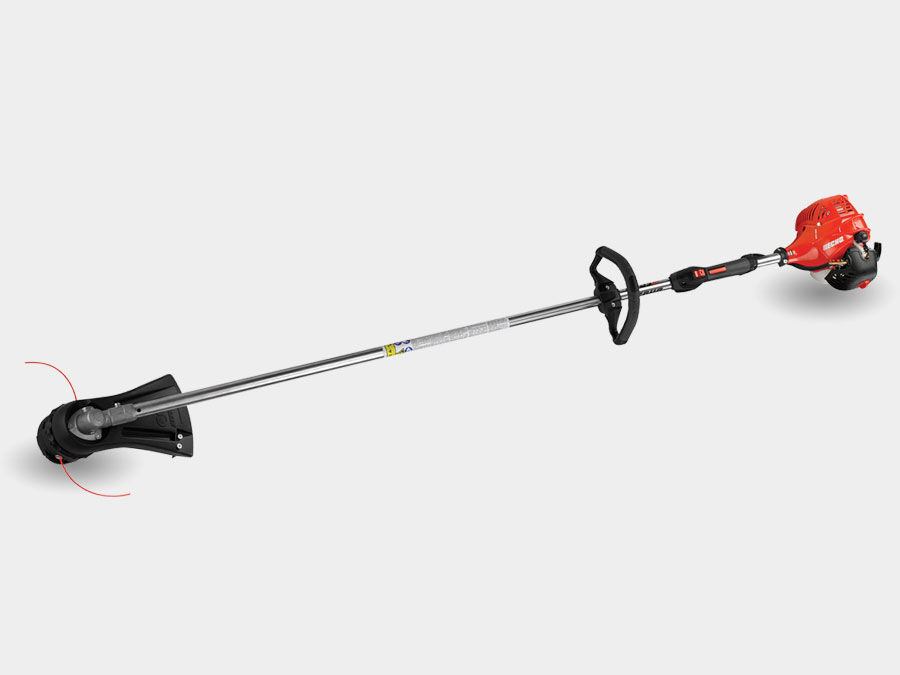
Introduction To Echo Srm-225 Maintenance
To maintain your Echo SRM-225, restringing it is essential. Follow these simple steps to restring your Echo SRM-225 effectively and keep it running smoothly. Regular maintenance ensures optimal performance and longevity of your equipment.
Importance Of Regular Restringing
Tools Needed For The Job
The Echo SRM-225 is a powerful tool that requires proper maintenance to function effectively. Regular restringing is crucial for ensuring optimal performance. It helps prevent tangling and enhances cutting efficiency.
Importance Of Regular Restringing
Tools Needed For The Job
To restring your Echo SRM-225, you will need the following tools:
1. Replacement trimmer line
2. Safety gloves
3. Eye protection
4. Scissors or wire cutters Ensure you have these tools ready before starting the restringing process to ensure a smooth maintenance experience.
Safety First: Preparing For The Task
Prepare for the task of restringing an Echo SRM-225 by prioritizing safety. Start by turning off the trimmer and disconnecting the spark plug. Wear protective gear and carefully follow the manufacturer’s instructions to avoid accidents.
Restringing an Echo SRM-225 trimmer can be a simple task if done correctly. However, it is important to prioritize safety when preparing for the job. Here are some essential steps you should follow before starting to restring your trimmer.
Powering Down The Trimmer
The first step is to power down the trimmer. Make sure the engine is turned off and the spark plug is disconnected. To disconnect the spark plug, remove the rubber boot from the spark plug and then pull the spark plug wire off the plug. This will ensure that the trimmer cannot accidentally start while you are working on it.
Wearing Proper Protective Gear
The second step is to wear proper protective gear. You should wear safety glasses to protect your eyes from flying debris, gloves to protect your hands, and long pants to protect your legs. It is also recommended to wear earplugs to protect your hearing from the loud noise of the trimmer.
Other Safety Precautions
In addition to powering down the trimmer and wearing protective gear, there are a few other safety precautions you should follow. First, make sure you are working on a flat surface to prevent the trimmer from tipping over.
Second, do not touch the cutting head or the trimmer line while the engine is running. Third, keep the trimmer away from children and pets. Following these safety precautions will ensure that you are ready to restring your Echo SRM-225 trimmer safely and effectively.
Accessing The Trimmer Head
Accessing the Trimmer Head on your Echo SRM-225 is an essential step in the restringing process. By following these simple steps, you can easily access the trimmer head and prepare it for the restringing procedure.
Removing The Spool Retainer
To access the trimmer head, start by removing the spool retainer. Locate the tabs on the sides of the spool retainer and press them in simultaneously to release the retainer. Once the retainer is released, lift it off the trimmer head assembly and set it aside in a safe place.
Taking Out The Old Line
After removing the spool retainer, take out the old line from the spool. Pull the remaining line from the spool and discard it properly. Ensure that all remnants of the old line are removed from the spool to prepare it for the restringing process.
Selecting The Right Trimmer Line
When it comes to restringing your Echo SRM-225 trimmer, selecting the right trimmer line is crucial for achieving optimal cutting performance. Choosing the correct trimmer line ensures efficient trimming and a cleaner, more professional-looking lawn.
Understanding Line Thickness
Line thickness plays a key role in determining the cutting ability of your trimmer. Thicker lines are suitable for heavier grass and weeds, while thinner lines are ideal for lighter, more delicate tasks.
Types Of Trimmer Line
There are various types of trimmer lines available, each designed for specific cutting needs. From round lines for general use to twisted lines for tougher vegetation, selecting the right type is essential for achieving the best results.
The Restringing Process
When it comes to maintaining your Echo SRM-225 trimmer, knowing how to restring it properly is crucial. The restringing process involves a few key steps that, when done correctly, ensure smooth and efficient operation of your trimmer. Let’s take a closer look at the essential steps involved in the restringing process.
Feeding The Line Into The Head
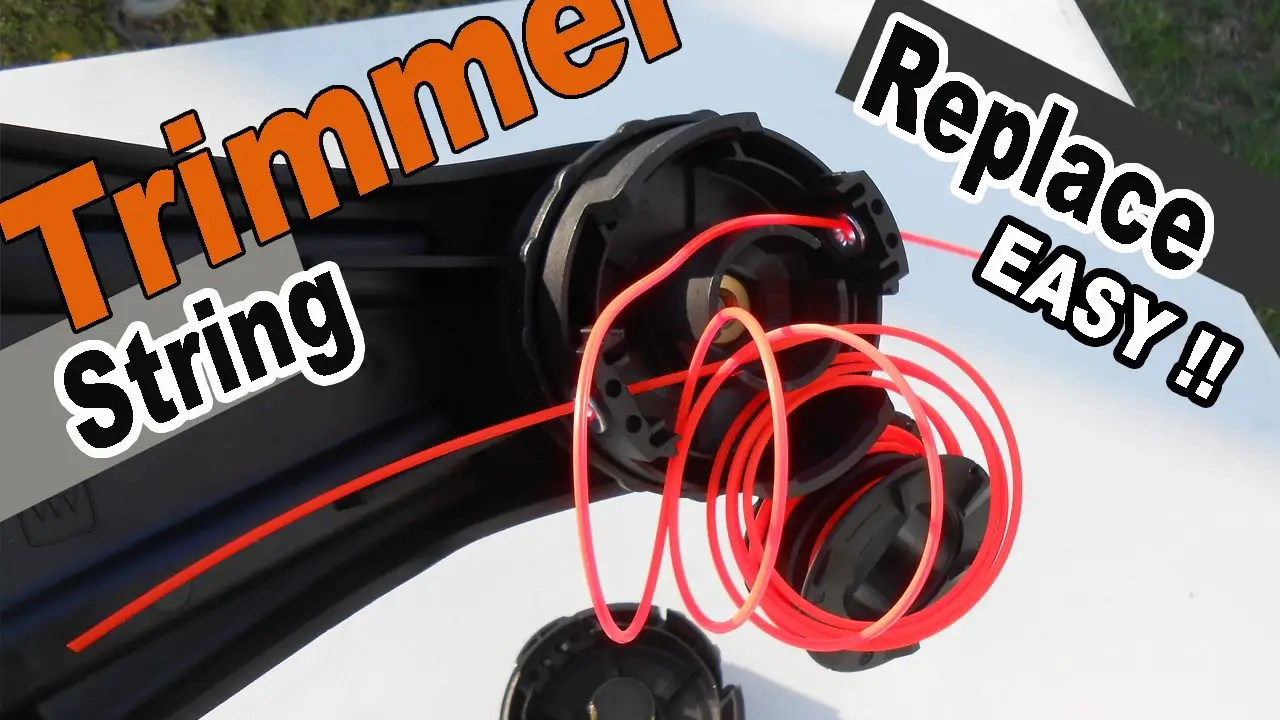
To begin the restringing process, you’ll need to feed the line into the trimmer head. Start by removing the spool from the trimmer head and cutting a length of trimmer line to the recommended size.
Then, insert the ends of the line into the small holes on the spool, ensuring that the line is securely in place. Next, wind the line evenly onto the spool, following the directional arrows to ensure the correct winding direction.
Winding The Line Evenly
Winding the line evenly onto the spool is essential for optimal trimmer performance. Ensure that the line is wound tightly and evenly, without any overlapping or gaps.
This will help prevent tangles and ensure a consistent feed of line during operation. Once the spool is fully wound, trim any excess line to the appropriate length, and reassemble the spool onto the trimmer head, making sure it is securely in place.
Reassembling The Trimmer Head
Once the spool has been reloaded with new trimmer line, it’s time to reassemble the trimmer head of your Echo SRM-225. Follow the steps below to ensure the trimmer head is reassembled correctly.
Securing The Spool
- Insert the spool back into the trimmer head, ensuring it fits snugly in place.
- Rotate the spool until it aligns with the slots on the trimmer head.
- Ensure the spool is securely in place and the trimmer line is properly aligned.
Attaching The Retainer
- Place the retainer back on top of the spool, lining up the retainer tabs with the slots on the trimmer head.
- Press down firmly on the retainer to secure it in place.
- Give the trimmer head a gentle tug to ensure the retainer is securely attached.
Testing The Trimmer Post-restringing
After restringing the Echo SRM-225 trimmer, testing it is crucial for optimal performance. Ensure the line is tightly wound, and the spool rotates smoothly to avoid issues during operation. Conduct a test run to confirm the trimmer is cutting effectively with the new string.
Testing the Trimmer Post-Restringing: Once you have successfully restrung your Echo SRM-225 trimmer, it’s important to perform a few safety checks and tests to ensure that the trimmer is working properly.
In this section, we will guide you through the process of testing the trimmer post-restringing, including safety checks before use and initial start-up and operational tests.
Safety Checks Before Use
Before you start using the trimmer, make sure that you have performed the following safety checks:
- Check the trimmer head for any damage or cracks.
- Ensure that the cutting attachment is securely attached to the trimmer head.
- Check the fuel tank for any leaks or damage.
- Inspect the air filter and clean or replace it if necessary.
- Check the spark plug for any damage and replace it if necessary.
Initial Start-up And Operational Test
Once you have performed the safety checks, it’s time to start up the trimmer and test its operation. Follow these steps:
- Fill the fuel tank with fresh fuel and check the oil level.
- Prime the engine by pressing the primer bulb several times until fuel is visible in the bulb.
- Set the choke to the “cold start” position.
- Pull the starter cord until the engine starts.
- Let the engine warm up for a few minutes, then move the choke to the “run” position.
- Test the trimmer by cutting a few blades of grass or weeds. Ensure that the trimmer line is feeding correctly and cutting smoothly.
- If the trimmer is not operating properly, turn off the engine and troubleshoot the problem.
By following these safety checks and tests, you can ensure that your Echo SRM-225 trimmer is working properly and is safe to use. Always remember to wear appropriate safety gear, including eye and ear protection, when operating the trimmer.

Troubleshooting Common Restringing Issues
To troubleshoot common restringing issues with your Echo SRM-225, ensure the line is wound tightly and correctly on the trimmer head. Verify the line is the appropriate size and type for your trimmer to avoid tangling and ensure smooth operation.
Line Feeding Problems
One common issue when restringing an Echo SRM-225 is experiencing line feeding problems. Ensure the trimmer head is properly assembled to prevent this issue.
Spool Jamming During Use
If you encounter spool jamming during use, check for tangled or blocked line that may be causing the jam. Carefully remove any obstructions before continuing.
Maintenance Tips For Prolonged Trimmer Life
To prolong your Echo SRM-225 trimmer’s lifespan, restring it regularly with high-quality trimmer line. Follow these maintenance tips for optimal performance and durability. Keep your trimmer clean and well-lubricated to ensure smooth operation and prevent premature wear and tear.
Regular Cleaning
Ensure to clean the trimmer after each use to prevent debris buildup.
Use a damp cloth to wipe the exterior and remove any dirt or grass.
Inspect the air filter and clean or replace it regularly for optimal performance.
Regular cleaning aids in maintaining the trimmer’s efficiency and longevity.
Line Storage Recommendations
Store the trimmer in a dry and cool place to prevent rust or corrosion.
Keep the trimmer in a secure location away from moisture and direct sunlight.
Proper line storage ensures the trimmer remains in top condition for longer.

Conclusion: The Benefits Of Diy Restringing
Restringing your Echo SRM-225 by yourself can save you money and time. It also allows you to customize your string preference and ensures that your tool is in top condition. With the right tools and a little patience, you can easily restring your Echo SRM-225.
Cost Savings
Restringing your Echo SRM-225 trimmer yourself can lead to significant cost savings. You won’t have to pay for labor costs associated with professional restringing services.
Skill Building
Engaging in DIY restringing enhances your mechanical skills and boosts your confidence. It’s a hands-on way to learn about your equipment.
Frequently Asked Questions
How To Load String In Echo Srm 225?
To load the string in an Echo SRM-225, follow these steps:
1. Turn off the trimmer and disconnect the spark plug.
2. Remove the spool and line from the trimmer head.
3. Wind the new string onto the spool, following the arrows.
4. Reassemble the trimmer head and reconnect the spark plug.
What String Does An Echo Srm 225 Use?
The Echo SRM 225 uses a 0. 095-inch string. This size is suitable for cutting grass and light brush.
How To Reload Echo String Trimmer?
To reload an Echo string trimmer, follow these steps:
1. Turn off the trimmer and disconnect the spark plug.
2. Remove the trimmer head cover and spool.
3. Wind new trimmer line onto the spool.
4. Reassemble the trimmer head and reconnect the spark plug.
How To Restring An Ego String Trimmer?
To restring an Ego string trimmer, follow these steps:
1. Turn off the trimmer and disconnect the power source.
2. Remove the spool from the trimmer head.
3. Wind the new trimmer line onto the spool.
4. Reassemble the spool and trimmer head.
5. Trim any excess line, and you’re done!
Conclusion
To sum up, restringing an Echo SRM-225 is a simple task with the right tools and guidance. By following the step-by-step instructions outlined in this blog post, you can ensure your trimmer is operating at its best. Keep your equipment well-maintained for optimal performance and longevity.