To glue a mirror to a wall, use a construction adhesive specifically designed for mirrors. Apply adhesive to the back of the mirror in a zigzag pattern and press it firmly against the wall for at least 24 hours before removing any support.
It is important to ensure the wall is clean and dry before applying the adhesive to ensure a strong bond. Adding a mirror to a room can make it appear larger and brighter, but it is important to securely attach it to the wall to prevent it from falling and breaking. When selecting an adhesive, be sure to read the label to confirm it is suitable for use with mirrors.
In addition, consider the weight of the mirror and select an adhesive with a strong enough hold to support it. With the proper adhesive and technique, you can easily glue a mirror to a wall and enjoy its benefits for years to come.
Contents
- Introduction To Mirror Installation
- Essential Tools And Materials
- Preparing The Wall Surface
- Mirror Preparation Steps
- Applying The Adhesive
- Mounting The Mirror
- Curing Time And Conditions
- Final Touches And Cleaning
- Safety Precautions
- Maintenance Tips
- Troubleshooting Common Problems
- Alternatives To Gluing: Other Mounting Methods
- Enjoying Your Newly Mounted Mirror
- Frequently Asked Questions
- Conclusion
Introduction To Mirror Installation
Discover the art of mirror installation with a simple guide on how to securely glue a mirror to your wall. Follow these easy steps for a seamless and stylish mirror mounting solution.
Importance Of Proper Technique
Using the correct technique ensures mirror stability and safety.
Adhering to proper methods prevents damage and ensures longevity.
Types Of Mirrors For Wall Attachment
Various types include framed, frameless, and adhesive-backed mirrors.
Each type requires specific attachment methods for secure installation.
Essential Tools And Materials
When gluing a mirror to a wall, having the right tools and materials is crucial for ensuring a secure and long-lasting bond. Let’s explore the essential items you’ll need to successfully complete this project.
Choosing The Right Adhesive
Using the appropriate adhesive is vital for securing a mirror to a wall. Mirror adhesive is specifically designed for this purpose, offering strong adhesion while preventing damage to the mirror’s backing. It’s important to ensure the adhesive is suitable for the type and weight of the mirror being installed.
Additional Supplies Needed
Aside from the mirror adhesive, several additional supplies are necessary to complete the installation. These include a caulk gun for dispensing the adhesive, a cleaning solution for preparing the wall and mirror surfaces, and protective gloves to ensure safe handling of the mirror and adhesive.
Preparing The Wall Surface
To ensure a secure attachment, it’s crucial to properly prepare the wall surface before gluing a mirror. This step not only promotes adhesion but also helps in achieving a seamless and long-lasting finish. The following sections outline the key steps in preparing the wall surface for attaching a mirror.
Cleaning And Drying
Start by cleaning the wall thoroughly using a mild detergent and water solution. Remove any dust, dirt, or grease to create a clean surface for the adhesive to bond effectively. Ensure the wall is completely dry before proceeding.
Assessing Wall Material
Identify the type of wall material you are working with, whether it’s drywall, plaster, concrete, or another surface. Understanding the wall material will help in selecting the appropriate adhesive for a strong and durable bond.
Mirror Preparation Steps
Before you begin the process of gluing a mirror to the wall, it is crucial to properly prepare the mirror. This ensures a secure and long-lasting bond.
In this section, we will outline the essential mirror preparation steps, including measuring and marking, as well as applying a protective seal.
Measuring And Marking
Accurate measurements are key to successfully mounting a mirror on the wall. Before proceeding, gather a measuring tape, pencil, and level. Follow these steps:
- Measure the dimensions of the mirror, noting the width, height, and thickness.
- Using a pencil, mark the desired location on the wall where you want to hang the mirror. Take into consideration the mirror’s dimensions and the surrounding space.
- Use a level to ensure the markings are straight and aligned. This step is crucial for achieving a visually appealing result.
Applying A Protective Seal
Applying a protective seal to the back of the mirror helps prevent moisture and humidity from damaging the reflective surface. Here’s how to apply a protective seal:
- Clean the back surface of the mirror using a lint-free cloth and a mild cleaning solution. Ensure it is completely dry before proceeding.
- Apply a thin layer of mirror adhesive or silicone caulk along the edges of the mirror. This will create a barrier between the mirror and the wall, protecting it from moisture.
- Spread the adhesive or caulk evenly using a putty knife or a similar tool. Make sure the seal is smooth and free of any lumps or bumps.
- Allow the protective seal to dry completely as per the manufacturer’s instructions. This typically takes a few hours.
By following these mirror preparation steps, you are setting the foundation for a successful mirror installation.
Taking the time to measure accurately and apply a protective seal ensures that your mirror will be securely attached to the wall, providing both functionality and aesthetic appeal to your space.
Applying The Adhesive
When it comes to hanging a mirror on a wall, applying the adhesive is a crucial step. This is what will hold the mirror in place and keep it from falling off.
Selecting the appropriate technique, ensuring even distribution, and allowing the adhesive to set properly are all essential for a successful mirror installation.
Selecting The Appropriate Technique
There are a few different types of adhesive that can be used for hanging a mirror on a wall. The most common options are silicone adhesive, construction adhesive, and mirror adhesive. Silicone adhesive is the easiest to work with, but may not be strong enough for larger or heavier mirrors.
Construction adhesive is stronger, but can be messier and harder to remove if needed. Mirror adhesive is specifically designed for this purpose and is the strongest option, but can also be the most expensive.
Ensuring Even Distribution
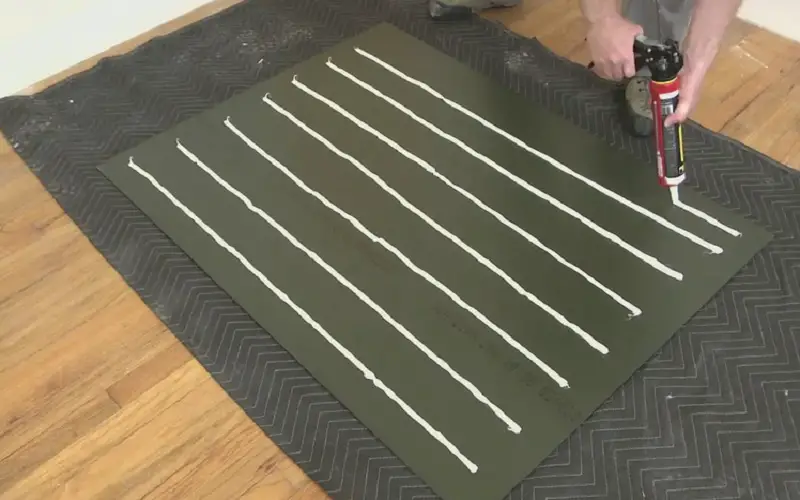
Once you have selected your adhesive, it is important to ensure even distribution. Apply a small amount of adhesive to the back of the mirror and spread it evenly with a putty knife or scraper.
Be sure to cover the entire back of the mirror to ensure that it is held securely. If you are using a liquid adhesive, be sure to follow the manufacturer’s instructions for application.
Next, apply the adhesive to the wall where the mirror will be hung. Again, be sure to spread the adhesive evenly and cover the entire area where the mirror will be placed. Use a level to ensure that the mirror will be hung straight.
Allowing The Adhesive To Set Properly
Once the adhesive is applied, it is important to allow it to set properly before hanging the mirror. This can take anywhere from a few hours to a full day depending on the type of adhesive used and the size and weight of the mirror. Be sure to follow the manufacturer’s instructions for drying time.
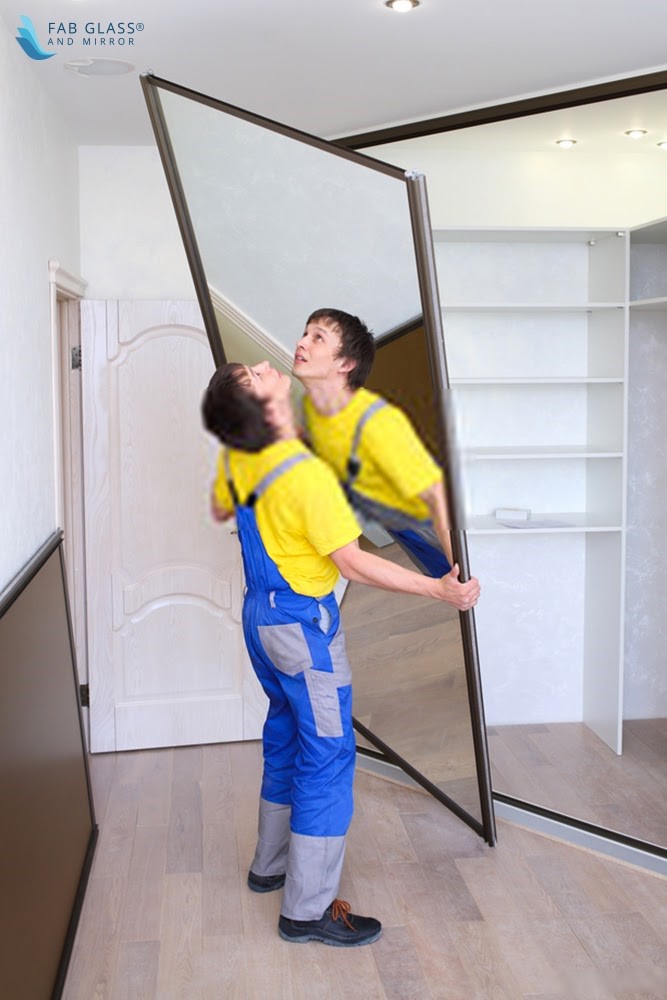
Once the adhesive has set, carefully hang the mirror on the wall. Use caution when handling the mirror and be sure to have someone assist you if needed. Once the mirror is in place, allow the adhesive to dry completely before removing any supports or hanging any additional items.
Mounting The Mirror
Attach the mirror to the wall by using a strong adhesive specifically designed for mirrors. Clean the wall and the back of the mirror thoroughly before applying the glue to ensure a secure bond. Measure and mark the position carefully before pressing the mirror firmly onto the wall.
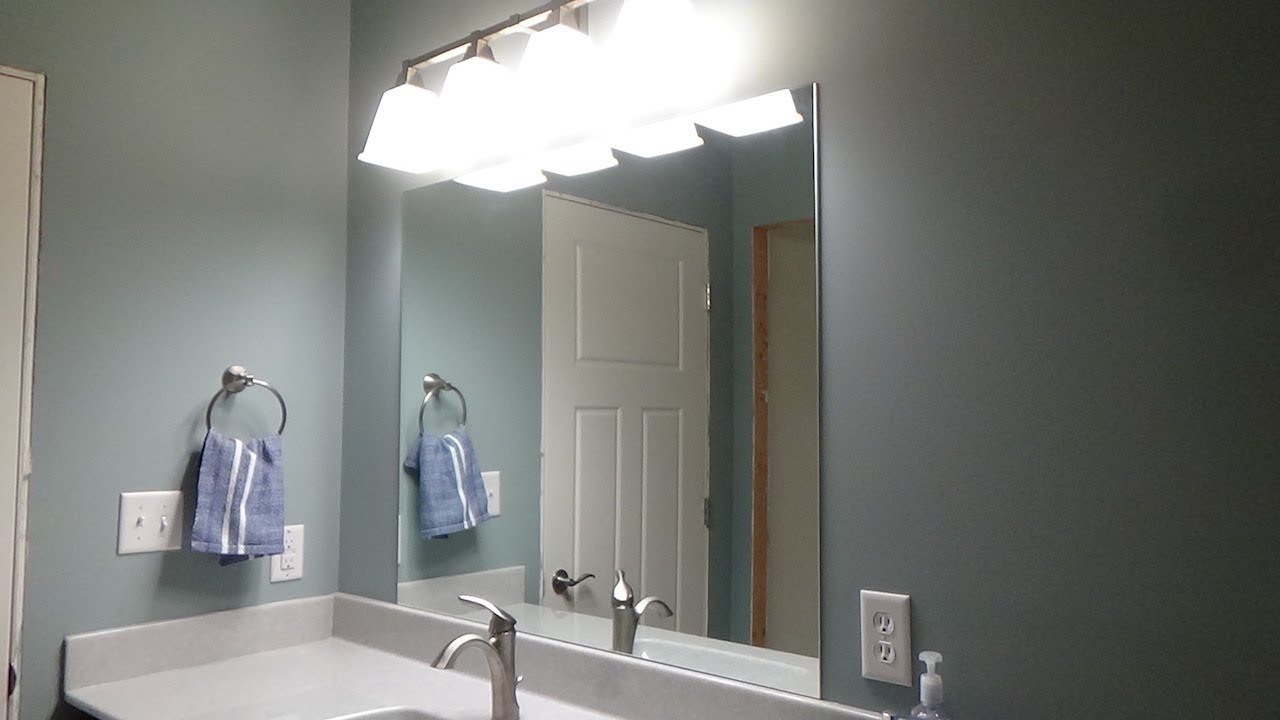
Mounting a mirror on a wall requires careful positioning and leveling to ensure a secure and aesthetically pleasing installation. By following these steps, you can confidently attach your mirror and create a stunning focal point in any room.
Positioning And Leveling
To begin, determine the desired location for your mirror on the wall. Consider the height and placement in relation to other furniture or fixtures in the room. Once you have chosen the spot, use a measuring tape to mark the exact position.
- Measure the width and height of the mirror, and transfer these measurements onto the wall using a pencil.
- Use a level to ensure the markings are perfectly horizontal and vertical. Adjust as needed to achieve a balanced appearance.
- If you are mounting a large mirror, consider using a stud finder to locate the wall studs. This will provide additional support and stability.
Pressing Firmly And Securely
After positioning and leveling the mirror, it’s time to attach it to the wall securely. Follow these steps to ensure a strong bond that will withstand daily use.
- Apply a high-quality mirror adhesive or construction adhesive to the back of the mirror. Use a notched trowel to create an even layer of adhesive.
- Position the mirror carefully against the wall, aligning it with the marked measurements.
- Begin pressing the mirror firmly against the wall, starting from the center and working your way outward. This will help eliminate any air bubbles and ensure a tight bond.
- Use a level to double-check the mirror’s alignment while pressing it against the wall. Make any necessary adjustments to achieve a perfectly straight position.
- Once the mirror is securely in place, use masking tape to hold it against the wall while the adhesive dries. Leave the tape in place for the recommended drying time specified by the adhesive manufacturer.
By following these steps and taking the necessary precautions, you can successfully mount a mirror on your wall.
Remember to always read and follow the instructions provided by the mirror and adhesive manufacturers for the best results. Enjoy your beautifully installed mirror and the enhanced aesthetic it brings to your space.
Curing Time And Conditions
Understanding the curing time and conditions for gluing a mirror to a wall is crucial for ensuring a successful and long-lasting bond. Proper curing time and conditions will help to achieve the best results and prevent any potential issues in the future.
Understanding Cure Time
Cure time refers to the duration required for the adhesive to reach its full strength and bond the mirror securely to the wall. Different adhesives have varying cure times, ranging from a few hours to several days. It’s essential to refer to the manufacturer’s guidelines to determine the specific cure time for the adhesive you are using.
Maintaining Optimal Environment
To facilitate proper curing, it’s essential to maintain an optimal environment during the curing process. This includes ensuring adequate ventilation to allow for proper air circulation. Additionally, maintaining consistent temperature and humidity levels within the recommended range is crucial for achieving the best results.
Final Touches And Cleaning
Once the mirror is firmly in place, it’s time to attend to the final touches and ensure the mirror surface is clean and sparkling. This stage is crucial for achieving a professional and polished look for your mirror installation. Here’s how to complete the process with finesse.
Removing Excess Adhesive
Carefully check around the edges of the mirror for any excess adhesive that may have squeezed out during the installation process. Use a razor blade to gently scrape away any visible adhesive, taking care not to scratch the mirror.
Work slowly and methodically, ensuring that the adhesive is completely removed without causing damage to the mirror or wall. Wipe away any residue with a clean, dry cloth.
Polishing The Mirror Surface
After removing the excess adhesive, it’s time to polish the mirror surface to achieve a flawless finish. Spray a small amount of glass cleaner onto a soft cloth and gently wipe the entire surface of the mirror.
Be sure to reach the edges and corners to remove any remaining smudges or marks. Buff the mirror with a dry, lint-free cloth to reveal a pristine, streak-free surface.
Safety Precautions
To securely glue a mirror to a wall, start by cleaning both surfaces thoroughly. Apply adhesive in small, even dots or lines on the back of the mirror. Press firmly onto the wall and use support until fully set for a safe and secure attachment.
Handling Heavy Mirrors
When it comes to gluing a mirror to the wall, safety should always be a top priority. This is especially true when dealing with heavy mirrors that require extra precautions.
To ensure the process goes smoothly and without any accidents, follow these safety guidelines:
- Wear protective gloves and safety glasses to safeguard yourself from any potential injuries.
- Enlist the help of a friend or family member to assist you in lifting and positioning the mirror. Remember, two pairs of hands are better than one!
- Clear the area where you will be working, removing any obstacles or fragile items that could be knocked over during the installation process.
- Measure the mirror and the wall space accurately to ensure a proper fit. This will help prevent any unnecessary strain or stress on the mirror during installation.
- Use a sturdy ladder or step stool to reach higher spots on the wall, ensuring stability and balance at all times.
Preventing Accidents During Installation
Now that you know how to handle heavy mirrors, it’s equally important to take precautions to prevent accidents during the installation process.
These safety measures will help you avoid any mishaps and ensure a successful mirror installation:
- Choose the appropriate adhesive for your mirror, following the manufacturer’s instructions carefully. Using the wrong adhesive can compromise the mirror’s stability and increase the risk of accidents.
- Clean the wall surface thoroughly before applying the adhesive. Remove any dust, dirt, or grease that could interfere with the bonding process.
- Apply the adhesive to the back of the mirror in small, even dots or lines, ensuring complete coverage without excess. This will provide a secure bond while minimizing the risk of the mirror sliding or falling off the wall.
- Position the mirror carefully, aligning it with your measurements and desired placement. Avoid applying excessive pressure or force during this step, as it could damage the mirror or compromise the adhesive’s effectiveness.
- Allow the adhesive to cure according to the manufacturer’s instructions before removing any temporary supports or hooks. Rushing this step can result in the mirror becoming loose or unstable.
Maintenance Tips
To glue a mirror to a wall, first, clean the wall and the back of the mirror with rubbing alcohol. Apply mirror adhesive to the back of the mirror, then press it firmly against the wall. Use masking tape to hold the mirror in place until the adhesive dries completely.
Regular Inspection And Cleaning
To ensure that the mirror stays securely attached to the wall, it’s important to inspect it regularly for any signs of damage or loosening. Use a soft cloth to wipe down the surface of the mirror and check for any cracks or chips. If you notice any issues, address them immediately to prevent further damage.
Addressing Potential Issues
If you notice that the mirror is starting to loosen from the wall, there are a few steps you can take to address the issue. First, remove any dirt or debris from the surface of the mirror and the wall.
Then, apply a small amount of glue to the back of the mirror and press it firmly against the wall. Hold it in place for several minutes to allow the glue to dry.
Cleaning The Mirror
To keep your mirror looking its best, it’s important to clean it regularly. Use a soft cloth or sponge to wipe down the surface of the mirror with a gentle cleaning solution. Avoid using harsh chemicals or abrasive materials that could scratch the surface of the mirror.
By following these maintenance tips, you can ensure that your mirror stays securely attached to the wall and looks its best for years to come.
Regular inspection and cleaning, addressing potential issues, and proper cleaning techniques are all essential for maintaining the integrity and appearance of your mirror.
Troubleshooting Common Problems
While gluing a mirror to the wall can be a straightforward process, there are some common problems that may arise. By being aware of these issues and knowing how to address them, you can ensure a successful mirror installation that will last for years to come.
Dealing With Adhesive Failures
One of the most frustrating issues when gluing a mirror to the wall is adhesive failure. If you find that your mirror is not sticking securely to the wall, there are a few steps you can take to address this problem:
- Check the adhesive: First, ensure that you are using a high-quality mirror adhesive that is suitable for your wall surface. Double-check the manufacturer’s instructions to make sure you are using the adhesive correctly.
- Clean the surface: Before applying the adhesive, thoroughly clean the wall surface and the back of the mirror. Any dirt, dust, or grease can prevent the adhesive from bonding properly.
- Apply pressure: After applying the adhesive to the back of the mirror, firmly press it against the wall. Use a level to ensure it is straight, and apply constant pressure for the recommended amount of time to allow the adhesive to set.
- Consider alternative adhesives: If the adhesive continues to fail, you may need to explore other options such as mirror clips or brackets to secure the mirror to the wall.
Correcting Misalignment Post-installation
If you have successfully glued your mirror to the wall but notice that it is misaligned, don’t worry. Correcting misalignment is possible with these steps:
- Remove the mirror: Carefully detach the mirror from the wall by using a putty knife or a thin, flat object to gently pry it off.
- Reapply adhesive: Clean the wall surface and the back of the mirror, then apply fresh adhesive according to the manufacturer’s instructions.
- Align the mirror: Before pressing the mirror back onto the wall, use a level to ensure proper alignment. Adjust as needed to achieve the desired positioning.
- Secure and hold: Once you are satisfied with the alignment, press the mirror firmly against the wall and hold it in place for the recommended amount of time to allow the adhesive to set.
By following these troubleshooting steps, you can overcome common problems that may arise when gluing a mirror to the wall.
Remember to always read and follow the manufacturer’s instructions for the best results, and don’t hesitate to seek professional assistance if needed.
Alternatives To Gluing: Other Mounting Methods
Mounting a mirror on a wall doesn’t always require glue. There are other methods to consider, such as using brackets, clips, or double-sided tape. These alternatives provide a secure and damage-free way to attach a mirror to a wall.
Using Mechanical Fasteners
One alternative to gluing mirrors to a wall is using mechanical fasteners. These include screws, anchors, and brackets.
Innovative Hanging Techniques
Another method to mount mirrors is through innovative hanging techniques. This involves systems like French cleats or mirror clips.
Enjoying Your Newly Mounted Mirror
Achieve a secure bond by carefully applying mirror adhesive along the wall-mounted brackets. Ensure proper alignment for a flawless finish. Enjoy your newly mounted mirror with confidence and style!
Reflecting On The Installation Process
Mounting a mirror on your wall can be a simple and rewarding project. By following the steps outlined earlier, you can ensure that your mirror is securely in place and ready to enhance your living space.
Remember to measure twice, use the proper adhesive, and take your time during the installation process. This will help prevent any mishaps and ensure that your mirror remains securely mounted for years to come.
Incorporating Mirrors Into Home Decor
Mirrors are not only functional but also serve as stylish additions to home decor. When strategically placed, they can create the illusion of space, reflect natural light, and add an elegant touch to any room.
Consider experimenting with different shapes and sizes to add visual interest to your space. Whether it’s a statement piece in the living room or a decorative accent in the hallway, mirrors can transform the ambiance of your home.
Frequently Asked Questions
What Is The Best Glue To Stick A Mirror To The Wall?
The best glue to stick a mirror to the wall is a strong adhesive specifically designed for mirrors. Look for mirror adhesives at hardware or home improvement stores. Make sure to follow the manufacturer’s instructions for the best results.
Can You Glue Mirror To Painted Wall?
Yes, you can glue a mirror to a painted wall using adhesive specially designed for mirrors.
What Is The Best Way To Attach A Mirror To A Wall?
The best way to attach a mirror to a wall is by using mirror clips or brackets. Make sure to find the studs in the wall for secure attachment. Use a level to ensure the mirror is straight. Then, tighten the screws to hold the mirror in place.
How Do You Glue A Frameless Mirror To The Wall?
To glue a frameless mirror to the wall, use mirror adhesive, apply in dots on the back, and press firmly onto the wall.
Conclusion
Securely attaching a mirror to the wall requires proper preparation and the right adhesive. By following these steps carefully, you can ensure a strong and lasting bond. Remember to prioritize safety and take your time for a successful mirror installation that enhances your space beautifully.