Have you ever found yourself in the middle of a project, only to realize your Ryobi tool battery is dead and you can’t find the charger? You know the frustration—time is ticking, and you’re left wondering how to get your tools back in action.
Imagine if you could charge that battery without its original charger. Sounds intriguing, right? We’re diving into simple yet effective methods to recharge your Ryobi battery, helping you keep your DIY momentum going strong. You’ll discover a few ingenious hacks to power up your tools, ensuring you never have to face project interruptions again.
Keep reading to learn how to turn this common setback into a seamless solution!

Credit: www.tiktok.com
Contents
Safety Precautions
Charging a Ryobi battery without a charger requires caution to avoid damage or accidents. Use insulated tools and work in a dry, safe area. Ensure connections are secure and monitor the battery’s temperature to prevent overheating.
Charging a Ryobi battery without its dedicated charger can be risky. Safety precautions are crucial to avoid accidents or damage. Understanding how to safely handle batteries is key. This section explores essential safety measures to consider.Battery Inspection
Before charging, inspect the battery for damage. Look for cracks or leaks. Damaged batteries can be dangerous. If you notice any issues, do not proceed. Replace the battery instead.Proper Equipment
Use the right tools for charging. Never use homemade chargers or adapters. They can cause fires or explosions. Ensure cables are insulated and in good condition. Always use equipment designed for battery charging.Ventilation
Charge in a well-ventilated area. Batteries can release gases during charging. Good airflow prevents gas buildup. Keep the charging area free from flammable materials.Temperature Control
Avoid charging batteries in extreme temperatures. High heat can cause overheating. Cold temperatures can affect charging efficiency. Aim for a moderate temperature environment.Monitoring
Keep an eye on the battery during charging. Check for unusual sounds or smells. If the battery gets hot, stop charging immediately. Regular monitoring helps prevent accidents.Disconnecting Safely
Once charged, disconnect the battery carefully. Avoid pulling on the cables. Pulling can damage connectors. Always turn off any power source before disconnecting. Following these safety precautions ensures a safer battery charging process. Proper care extends the battery’s life and ensures personal safety.Understanding Ryobi Batteries
Charging Ryobi batteries without a charger involves using alternative methods safely. Explore options like using compatible power sources or DIY solutions. Always prioritize safety and ensure proper connection to avoid damage. Understanding battery types can help find suitable alternatives for effective charging.
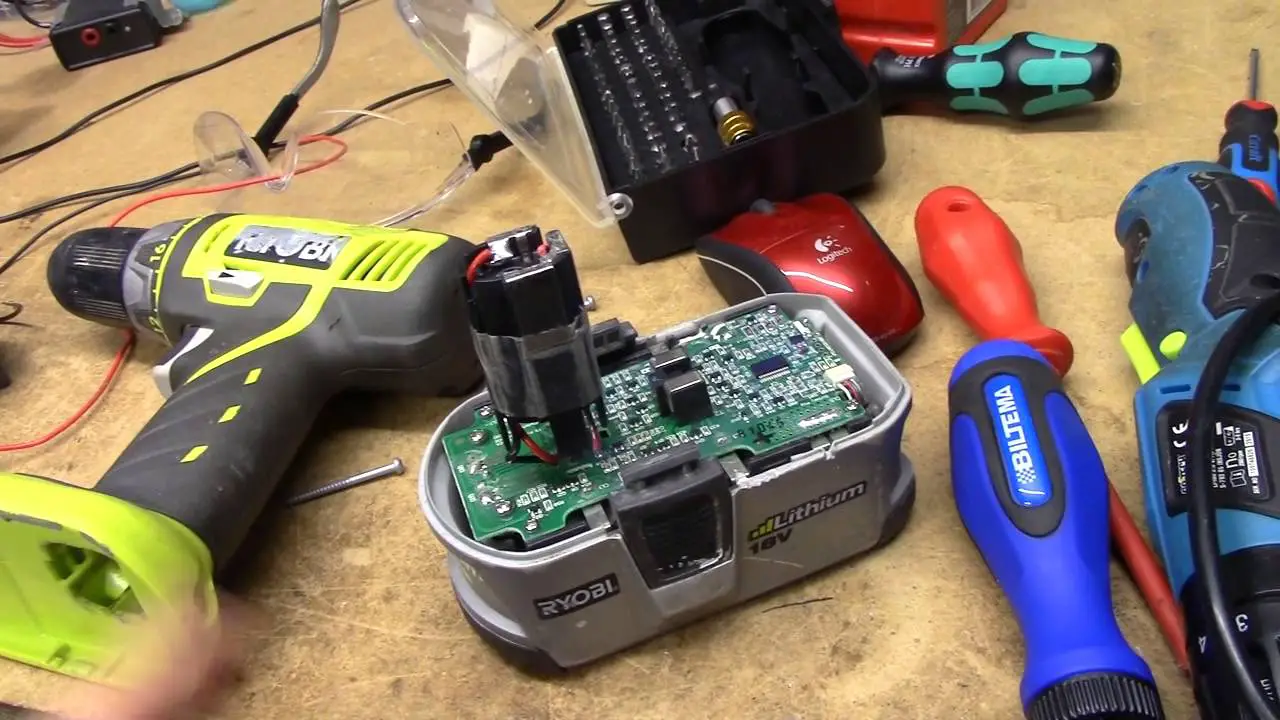
Understanding Ryobi Batteries When you’re in the middle of a project and your Ryobi battery runs out of juice, understanding its fundamentals can save the day. Knowing the specifics about your battery can help you find alternative charging methods when the charger is missing. Let’s dive into the essentials that every Ryobi user should know. ###Battery Types
Ryobi offers a range of battery types, each catering to different needs. The most common types are lithium-ion and nickel-cadmium (NiCad). Lithium-ion batteries are lightweight and hold a charge longer, making them ideal for prolonged tasks. On the other hand, NiCad batteries are more durable and can withstand tougher conditions, though they require more frequent charging. Each type has its unique charging requirements. Are you aware of which battery type your tool uses? This small detail can make a big difference when finding charging alternatives. ###Voltage Specifications
Voltage is crucial to understanding how your Ryobi battery functions. Ryobi batteries come in various voltages, such as 18V, 24V, and 40V. The voltage indicates the power output; higher volts mean more power for demanding tasks. It’s essential to match your battery’s voltage with your tools for optimal performance. Have you ever tried using a low-voltage battery for a high-power tool? The results can be frustrating, with the tool underperforming or not working at all. Knowing your battery’s voltage can guide you in creating DIY charging solutions. This understanding ensures you don’t overload the battery, which can lead to damage or reduced lifespan. Being informed about these aspects of your Ryobi battery can prepare you for moments when a charger is out of reach. With this knowledge in hand, you’ll be ready to tackle any power challenges head-on.Using A Universal Charger
Charging a Ryobi battery without a charger can be done using a universal charger. Ensure compatibility by checking voltage and connection points. Carefully follow instructions to avoid damage and ensure safety while charging.
If you’ve ever faced the challenge of a dead Ryobi battery and no charger in sight, you’re not alone. The good news is that you can use a universal charger to breathe life back into your battery. It’s a handy solution that can save you time and frustration, especially when you’re knee-deep in your latest DIY project and need that power tool running again. Let’s dive into how you can make this work effectively.Selecting The Right Charger
Choosing a universal charger isn’t just about grabbing the first one you see. You need to ensure compatibility with your Ryobi battery’s voltage and type. Look for a charger with adjustable settings, which can cater to different battery specifications. Consider chargers with built-in safety features. These prevent overcharging, which can damage your battery. Your choice should also be easy to use, with clear instructions or a digital display. It’s worth asking yourself: Is my current charger versatile enough for different batteries? If yes, it could be a valuable addition to your toolbox.Connecting The Battery
Once you have your universal charger, the next step is connecting it to the battery. It’s crucial to align the positive and negative terminals correctly. Mixing them up can lead to a malfunction or worse, damage. Ensure the connection is secure. A loose fit might cause interruptions, leading to incomplete charging. Keep an eye on the process and check periodically to avoid overheating. How do you know if it’s charging properly? Look for indicators on the charger, like lights or a digital readout. These will guide you in confirming a successful charge. Charging your Ryobi battery without its specific charger might seem daunting at first. But with the right tools and a bit of patience, you’ll find it’s a straightforward process. Have you ever tried using a universal charger? Share your experience or any tips below!
Credit: www.tiktok.com
Employing A Diy Charging Setup
Have you ever found yourself with a Ryobi battery ready to power your next project, but missing the crucial charger? You’re not alone. Many DIY enthusiasts face this dilemma at some point. Fortunately, there’s a way to breathe life back into your battery using a DIY charging setup. It’s a nifty trick that requires some basic materials and a bit of patience. Before diving into the process, it’s important to consider safety and ensure you have a steady hand. Curious about how to get started?
Materials Needed
To embark on your DIY journey, gather these essential materials:
- Power source: A power adapter with adjustable voltage and amperage.
- Alligator clips: Two clips to connect the battery terminals to the power source.
- Multimeter: To measure voltage and ensure you’re on track.
- Insulated wire: Essential for safe connections.
- Safety gloves: To protect your hands during the process.
With these materials on hand, you’re ready to transform your charging dilemma into a DIY adventure!
Step-by-step Guide
- Prepare your workspace: Choose a well-lit and clutter-free area. Safety is your top priority.
- Inspect the battery: Look for any signs of damage or corrosion. A damaged battery is unsafe to charge.
- Set up the power source: Adjust the voltage to match the battery’s specifications. Usually, Ryobi batteries are around 18 volts.
- Connect alligator clips: Attach the clips to the battery terminals. Red is positive, black is negative.
- Attach insulated wires: Connect the wires from the clips to the power source. Ensure secure connections.
- Monitor with a multimeter: Use the multimeter to check the voltage throughout the process. Keep an eye on the readings.
- Charge cautiously: Power up the setup and allow the battery to charge. Never leave it unattended.
- Test the battery: Once charged, test it in your Ryobi device. Does it power on smoothly?
Charging your battery without a charger can be a lifesaver. Have you tried this method before, or are you planning to give it a shot? Share your thoughts and experiences!
Utilizing A Car Battery
Charging a Ryobi battery without a charger can be done using a car battery. Connect the battery terminals using appropriate wires. Ensure the connections are secure and monitor the battery’s charge level closely.
Looking for a way to charge your Ryobi battery without its charger? You might be surprised to know that you can harness the power of your car battery for this task. This method is not only handy in a pinch but also taps into a resource you already have. Let’s delve into the step-by-step process of utilizing a car battery to charge your Ryobi battery, ensuring you have all the necessary tools and knowledge to get the job done safely. ###Necessary Tools
Before you begin, make sure you have the right tools on hand. Here’s what you’ll need: – Car Battery: Naturally, you need a fully charged car battery. – Jumper Cables: These are essential for connecting the car battery to the Ryobi battery. – Multimeter: Use this to monitor voltage levels to ensure a safe charging process. – Insulated Gloves: Safety first! Protect yourself from electric shocks. Having these tools ready will set you up for a smooth experience. Do you have everything you need? ###Charging Process
With your tools ready, let’s move on to the charging process: 1. Safety Check: Ensure your car is turned off and parked securely. Put on your insulated gloves. 2. Connect the Jumper Cables: Attach one end of the jumper cables to the car battery. Connect the other end to the Ryobi battery terminals. Remember, red is positive, and black is negative. 3. Monitor with Multimeter: Use the multimeter to check the voltage. Make sure it doesn’t exceed the Ryobi battery’s capacity. This prevents overcharging and potential damage. 4. Charging Duration: Allow the Ryobi battery to charge for about 5-10 minutes. Check the battery’s temperature periodically. If it gets too warm, disconnect the cables immediately. 5. Disconnect Safely: Once charged, remove the cables in reverse order. Start with the Ryobi battery and then the car battery. Charging your Ryobi battery with a car battery isn’t just about convenience. It’s about understanding and utilizing available resources efficiently. Have you ever tried this method? If so, what was your experience?Solar Charging Methods
Charging a Ryobi battery using solar power offers an eco-friendly solution. This method is perfect for outdoor enthusiasts and those in remote areas. Harnessing the sun’s energy ensures your tools stay powered anywhere. Let’s explore the steps for solar charging.
Setting Up Solar Panels
Begin by choosing the right solar panels for your needs. Ensure they have a suitable voltage output. Place the panels in a sunny location. Angle them towards the sun for maximum efficiency. Check connections for any damage or wear. Secure the panels firmly to avoid movement.
Use a charge controller to regulate energy flow. This prevents overcharging the battery. Connect the controller to the panels following the manufacturer’s guidelines. Safety checks are crucial. Always ensure connections are tight and secure.
Connecting To Ryobi Battery
After setting up solar panels, connect them to the battery. You’ll need a compatible adapter for the connection. Ensure the adapter fits the battery’s terminals snugly. Start by connecting the positive terminal, then the negative.
Monitor the battery charge level closely. Use a voltmeter for accurate readings. Charging may take longer than using a traditional charger. Patience is key. Once charged, disconnect the battery from the solar setup. Store the battery safely to maintain its charge.
Monitoring Battery Health
Monitoring your Ryobi battery’s health is crucial for maintaining its efficiency and prolonging its lifespan. Without a charger, you might find yourself improvising methods to power up your battery, but how do you know you’re doing it right? Understanding the signs of overcharging and knowing how to keep your battery in top shape is key. Let’s dive into these aspects to ensure you’re not just charging, but charging smart.
Signs Of Overcharging
Overcharging can lead to irreversible damage to your Ryobi battery. But how can you tell if it’s happening? One clear sign is excessive heat. If your battery feels unusually hot, it could be a red flag. Heat indicates the battery is absorbing more energy than it can handle, leading to potential damage.
Another sign is swelling or bulging in the battery casing. This physical change occurs when the internal components are stressed beyond their limits. If you notice your battery is not fitting snugly in its slot anymore, it might be time to reassess your charging method.
A decrease in battery performance can also hint at overcharging. If your battery seems to drain faster than usual, it might be a result of overcharging. Keep an eye on how long your battery lasts after each charge.
Maintaining Battery Efficiency
Maintaining efficiency is all about the right balance. When charging without a charger, consider using a timer to monitor charge duration. This helps prevent overcharging and keeps your battery healthy.
Regularly check the battery’s voltage using a voltmeter. A healthy Ryobi battery should maintain a stable voltage. If you notice fluctuations, it might be time to evaluate your charging method.
Store your battery in a cool, dry place when not in use. Environmental factors can affect battery health. Avoid leaving it in direct sunlight or damp areas to preserve its efficiency.
Is your battery showing signs of inefficiency after DIY charging? It might be worth investing in a genuine Ryobi charger. Sometimes the best way to care for your battery is through proper equipment.

Credit: www.youtube.com
Frequently Asked Questions
Can I Charge A Ryobi Battery Without A Charger?
Yes, you can charge a Ryobi battery without its official charger using alternative methods. One option is using a compatible battery charging station. Another method is employing a DIY approach with wires and a power source. Ensure you follow safety precautions to avoid damaging the battery.
What Is The Safest Alternative Charging Method?
Using a compatible battery charging station is the safest alternative method. These stations are designed to handle various battery types safely. They ensure proper voltage and current levels, reducing the risk of battery damage. Always check compatibility and follow the manufacturer’s instructions for optimal results.
Can I Use A Car Battery To Charge It?
Yes, you can use a car battery with caution. Using jumper cables, connect the Ryobi battery to the car battery. Ensure proper polarity to avoid damage. Monitor the charging process closely. This method is risky and should be a last resort.
Always prioritize safety and consult experts if unsure.
How Long Does It Take To Charge?
Charging time varies based on the method used. Using a compatible charging station, it typically takes a few hours. If employing DIY methods, monitor closely to prevent overcharging. Always check the battery’s manual for specific charging instructions to ensure optimal performance and longevity.
Conclusion
Charging Ryobi batteries without a charger is a useful skill. It helps when the charger is lost or broken. Always ensure safety first. Use tools and methods that are safe and tested. Knowledge is power, especially with DIY tasks. This guide offers simple solutions.
Follow each step with care. Double-check connections and tools used. Protect your battery’s lifespan with proper handling. With patience and attention, you can charge your battery safely. Your Ryobi tools will be ready to use again. Stay safe and enjoy your projects.