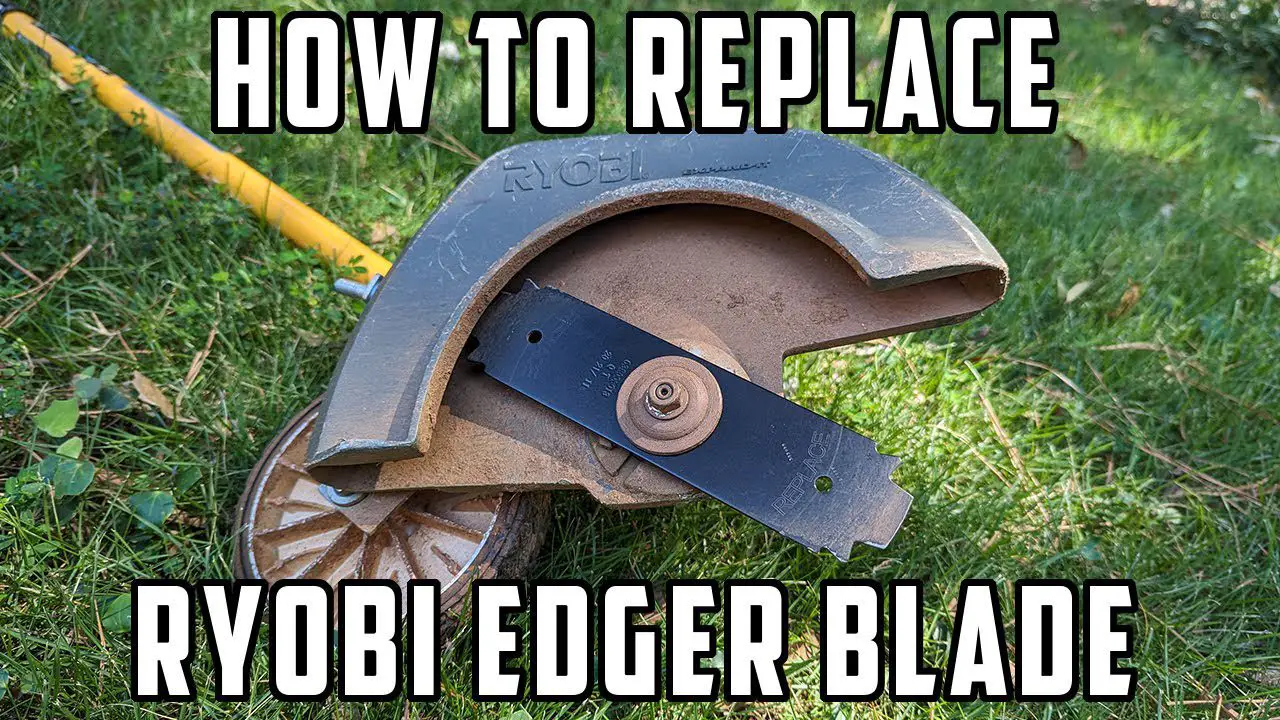
Have you ever found your Ryobi edger struggling to give you those crisp, clean lines along your lawn’s edges? You might be wondering why your yard doesn’t look as polished as it used to.
The answer often lies in a worn-out blade. Imagine achieving a perfectly edged lawn that instantly boosts your home’s curb appeal. A simple blade change can make all the difference, transforming your outdoor space with ease. In this guide, you’ll learn the quick and hassle-free steps to change your Ryobi edger blade.
We’ll break it down into manageable parts so you can get back to enjoying that freshly manicured look. Ready to discover how simple it can be? Let’s dive in and unleash the full potential of your Ryobi edger!
Credit: www.homedepot.com
Contents
Tools Needed
Changing a Ryobi edger blade requires a wrench, new blade, and safety gloves. Ensure the edger is off and unplugged before starting. These tools ensure a smooth and safe blade replacement.
Changing the blade on your Ryobi edger can seem daunting at first, but with the right tools, it becomes a straightforward task. The right tools not only make the job easier but also ensure your safety. Imagine attempting to change a blade without the proper equipment—frustration mounts, and the risk of injury increases. So, what exactly do you need to get started?1. Socket Wrench
A socket wrench is essential for loosening and tightening the nuts that hold the blade in place. It provides the leverage needed to safely remove the blade without much effort. Choose a socket that fits snugly to avoid stripping the nuts.2. Pair Of Gloves
Safety should always come first. A sturdy pair of gloves will protect your hands from sharp edges and unexpected slips. They also provide a better grip when handling the tools and blade.3. Safety Goggles
Always wear safety goggles to protect your eyes from any debris that may fly up during the process. This simple precaution can prevent serious injuries. It’s better to be safe than sorry, especially if you’re working outdoors.4. Replacement Blade
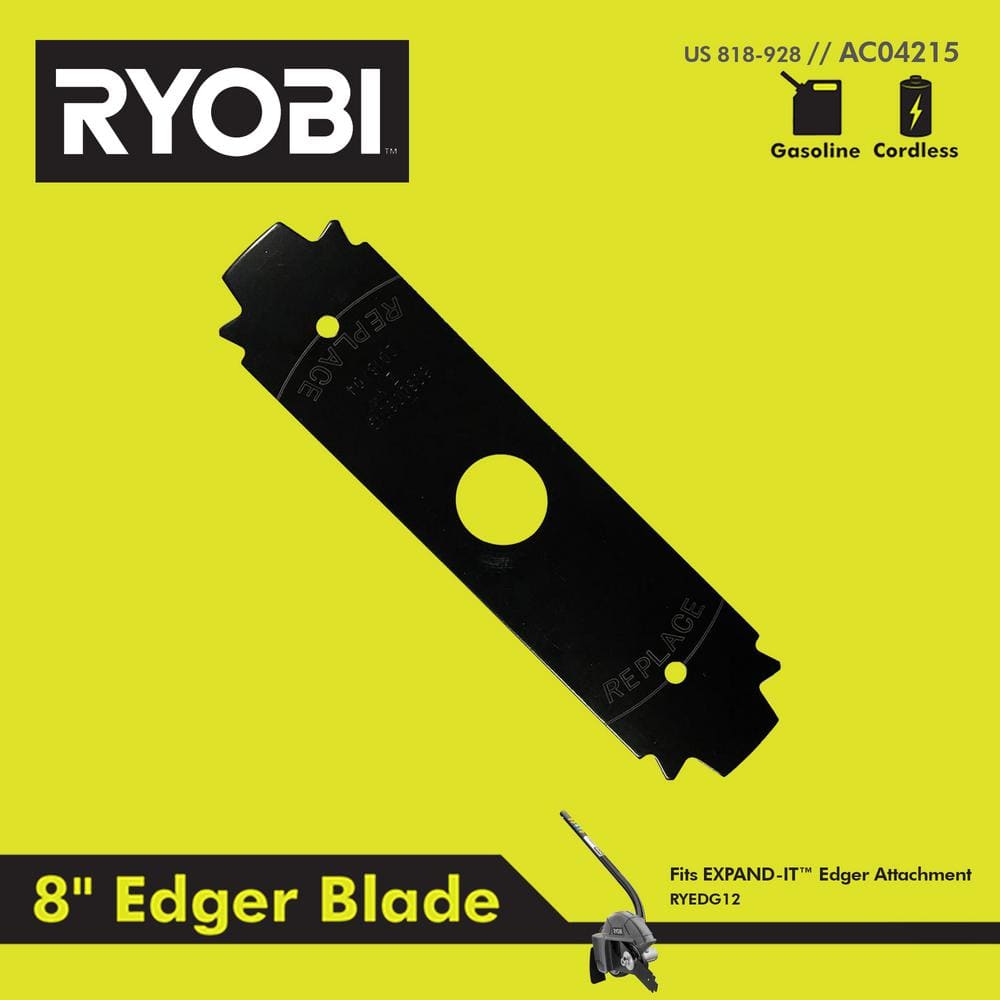
Ensure you have the correct replacement blade ready. Check your Ryobi edger’s manual for the exact specifications. Having the right blade ensures optimal performance and longevity of your edger.5. Clean Cloth Or Rag
A clean cloth or rag is handy for wiping down the blade housing and removing any dirt or grass buildup. Keeping the area clean ensures a smooth installation of the new blade. It also gives you a clearer view of what you’re working on. Using the correct tools makes the blade-changing process not only easy but also safe. Have you ever tried using makeshift tools for a task, only to find it taking longer and feeling more frustrating? Investing in the right tools pays off in the long run. Plus, it adds to your sense of accomplishment when you see your edger running smoothly.Safety Precautions
Changing the blade on your Ryobi edger can be straightforward. But safety should always come first. Proper precautions prevent injuries and ensure a smooth process. Read on for essential safety tips.
Wear Protective Gear
Always wear gloves when handling the edger blade. Gloves protect your hands from sharp edges. Safety glasses shield your eyes from debris. These simple items reduce risks significantly.
Disconnect The Power Source
Ensure the edger is unplugged before starting. If it’s battery-operated, remove the battery. This prevents accidental starts. A powered edger can cause serious harm.
Use The Right Tools
Make sure you have the right tools for the job. A wrench might be necessary to loosen the blade. Using the wrong tools can lead to slips or damage. Proper tools ensure a secure fit.
Secure The Edger Firmly
Place the edger on a stable surface. Make sure it won’t move while you work. A wobbling edger can be dangerous. Stability helps maintain control during the blade change.
Inspect The New Blade
Check the new blade for any defects. A damaged blade can break easily. This inspection ensures you’re using safe equipment. Always choose high-quality blades for better performance.
Removing The Old Blade
Changing the blade on your Ryobi edger is necessary for efficiency. The first step is removing the old blade. This requires careful handling to ensure safety and ease. Follow these steps to make the process simple and quick.
Unplugging The Edger
Safety is a priority. Always unplug the edger before starting. This prevents accidental startups. Ensure the cord is far from the work area.
Double-check to see the edger is off. This reduces any risk of injury. A quick look can save trouble later.
Loosening The Blade Nut
Locate the blade nut. It’s near the blade’s center. Use a wrench to loosen it. Turn the wrench counterclockwise. This will release the blade.
If the nut is stubborn, apply some lubricant. This helps ease the process. Use gentle force to avoid damaging parts.
Once loosened, remove the nut carefully. Keep it safe, you’ll need it later. The blade is now ready to be replaced.

Credit: www.homedepot.com
Installing The New Blade
Changing the blade on your Ryobi edger enhances performance. Follow these simple steps to install the new blade efficiently. Proper installation ensures safety and effectiveness during use.
Positioning The Blade
Hold the new blade near the edger head. Align the blade with the mounting hole on the spindle. Ensure the blade fits snugly against the surface. The blade’s edges should face the ground. This ensures proper cutting action.
Securing The Blade Nut
Place the blade nut over the spindle. Use your hand to tighten it initially. Ensure the blade stays aligned as you tighten. Use a wrench for a firmer grip. Turn the wrench clockwise until the nut is secure. Do not over-tighten to avoid damage. Check the blade’s stability by gently moving it. It should not wobble or shift.
Testing The Edger
Changing the Ryobi edger blade requires basic tools and a few simple steps. First, ensure the edger is unplugged for safety. Remove the old blade by loosening the nut with a wrench, then securely attach the new blade. Always check the alignment before using the edger again.
Testing the edger after replacing the Ryobi edger blade is an essential step to ensure everything is functioning smoothly. Picture this: You’ve just spent time and effort changing the blade, and now it’s time to see if your hard work pays off. Many individuals overlook the importance of testing, but it can save you time and avoid future headaches. Let’s dive into the simple yet crucial steps to ensure your edger is ready to tackle the garden.Check For Stability
Start by checking the stability of the edger. Make sure all components are tightly secured and the blade is firmly in place. A loosely attached blade can cause damage or even become a safety hazard. It’s always a good idea to give the edger a gentle shake to confirm that everything is snug.Test The Blade Rotation
Once stability is confirmed, turn on the edger to test the blade rotation. Observe the blade as it spins. Does it rotate smoothly? A jerky or uneven rotation may indicate a problem with the installation. Your blade should be spinning in a consistent, circular motion without any hiccups.Evaluate The Cutting Performance
Take your edger for a spin on a patch of grass or along the edge of your driveway. Pay attention to how effectively the blade cuts through the grass. If you notice uneven cuts or missed spots, the blade might need readjustment. A sharp, new blade should provide clean cuts with minimal effort.Listen For Unusual Sounds
While testing, keep an ear out for any unusual sounds like grinding or rattling. These sounds can be indicators of issues with the blade or other components. The edger should operate quietly and smoothly, allowing you to focus on precision rather than noise.Consider Your Safety
Never forget safety. Ensure you are wearing proper protective gear such as gloves and goggles. If the edger behaves unpredictably, stop immediately. Your safety is paramount, and it’s better to troubleshoot calmly than risk injury. Testing the edger isn’t just about functionality; it’s about confidence in your tool. Remember, a well-maintained edger not only boosts your gardening efficiency but also adds a touch of pride to your work. So, what’s your strategy to ensure your tools always perform at their best?
Credit: www.youtube.com
Maintenance Tips
Regular maintenance of your Ryobi edger ensures its longevity and performance. Changing the blade is a key part of this process. Proper care will help avoid unexpected downtime and ensure a clean cut every time. Following simple tips can make the task easier and safer.
Inspect The Blade Regularly
Check the blade for wear and damage before each use. A dull or damaged blade reduces efficiency. Look for chips or bent edges. Replace the blade if any issues are found. Regular inspection helps prevent accidents.
Keep The Edger Clean
Wipe down the edger after every use. Remove dirt and grass clippings. A clean edger runs smoothly and lasts longer. Avoid water exposure as it can cause rust. Use a dry cloth for cleaning.
Lubricate Moving Parts
Apply oil to moving parts regularly. This reduces friction and prevents rust. Use a light machine oil for best results. Follow the manufacturer’s guidelines for lubrication intervals.
Secure The Blade Properly
Ensure the blade is tightly secured. Loose blades can fly off and cause injury. Double-check the tightness after installation. Use proper tools to tighten the bolts.
Store Safely
Store your edger in a dry place. Avoid damp areas to prevent rust. Use a cover to protect it from dust. Proper storage extends the life of your tool.
Frequently Asked Questions
How Do I Know When To Change My Ryobi Edger Blade?
You should change your Ryobi edger blade when it becomes dull or chipped. A dull blade makes edging less efficient and may damage your lawn. Regularly inspect the blade for signs of wear or damage. If your edger struggles to cut cleanly, it’s time for a replacement.
What Tools Do I Need To Replace The Blade?
To replace the Ryobi edger blade, you’ll need a wrench or socket set to loosen the blade nut. Ensure you have a replacement blade compatible with your Ryobi edger model. Always wear protective gloves during the process to avoid injuries.
How Often Should I Change My Edger Blade?
Change your Ryobi edger blade every 25 to 50 hours of use. This frequency ensures optimal performance and clean cuts. However, if you notice decreased cutting efficiency or visible wear, replace it sooner. Regular maintenance prolongs the lifespan of your edger.
Can I Sharpen A Ryobi Edger Blade?
Yes, you can sharpen a Ryobi edger blade, but it’s often easier to replace it. Sharpening requires a file or grinder and can be time-consuming. A new blade ensures precise cutting and saves time. Always prioritize safety and consult the manual before sharpening.
Conclusion
Changing a Ryobi edger blade is simple with the right steps. Follow the guide to ensure a smooth replacement process. Regular maintenance keeps your edger efficient and extends its life. Remember to handle blades carefully to avoid injuries. Always check the blade’s sharpness before use.
A sharp blade makes edging quick and easy. Gather all necessary tools before starting for efficiency. With practice, blade changes become quicker. Keep your edger ready for action. Enjoy clean edges and a well-groomed lawn. Happy gardening!