To change a Dewalt table saw blade, unplug the saw and use the wrench to loosen the arbor nut. Slide off the old blade, replace it with the new one, and tighten the nut securely.
Changing the blade on your Dewalt table saw is a straightforward process that can be done easily with proper safety precautions. Whether you are a beginner or a seasoned DIY enthusiast, knowing how to change the blade on your table saw is a valuable skill.
In this guide, we will walk you through the simple steps to safely and efficiently swap out the blade on your Dewalt table saw.
By following these steps, you can ensure that your table saw is always equipped with a sharp and properly functioning blade for your woodworking projects.

Contents
Getting Started
Learn how to easily change the blade on your Dewalt table saw with step-by-step instructions. Take your woodworking skills to the next level by mastering this simple but essential task. Get started today and keep your saw performing at its best.
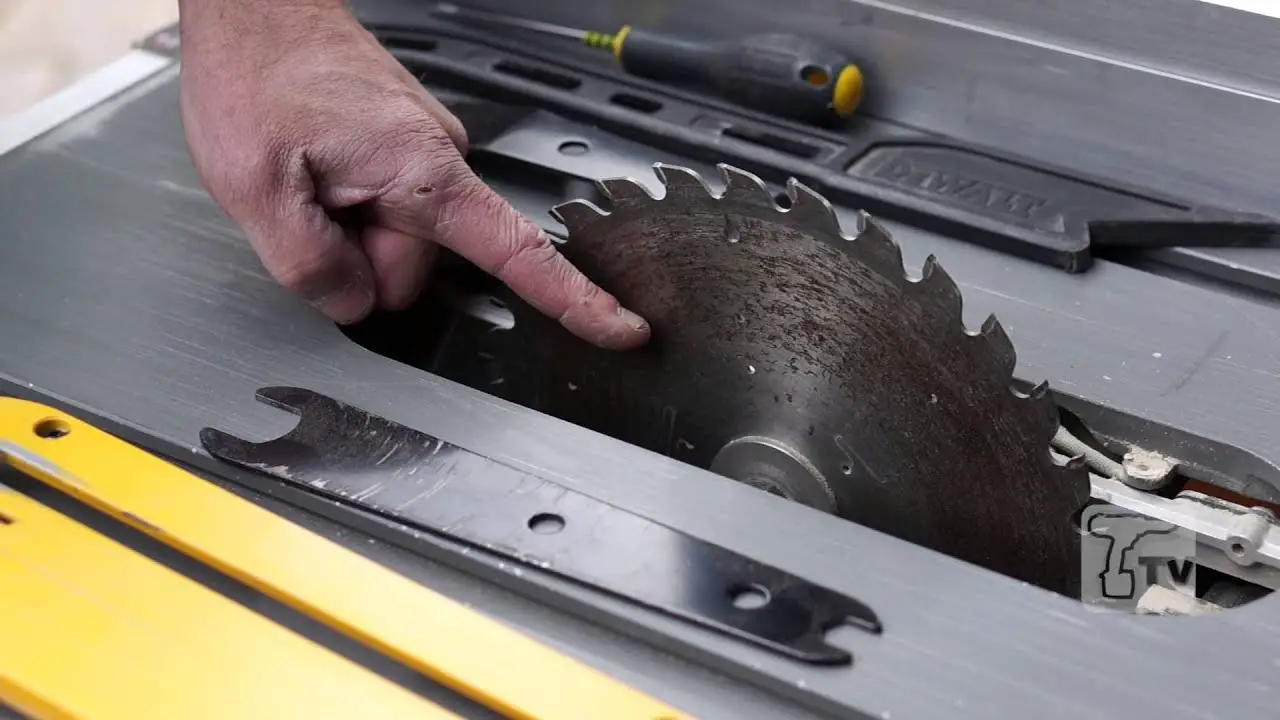
Removing The Old Blade
When changing the blade on your Dewalt table saw, the first step is to disconnect the power to ensure safety.
Disconnecting Power
- Locate the power switch and turn it off.
- Unplug the saw from the electrical outlet.
Removing The Blade Guard
- Unlock the blade guard by turning the knob or releasing the lever.
- Lift the guard and carefully remove it from the saw.
Loosening The Blade Bolt
- Using a wrench, turn the blade bolt counterclockwise to loosen it.
- Remove the bolt and the washer securing the blade in place.
Installing The New Blade
Looking to change the blade on your Dewalt table saw? Our step-by-step guide will help you seamlessly install the new blade for optimal cutting precision. Follow the instructions for a smooth blade replacement process.
Installing the New Blade Inspecting the New Blade: Before installing the new blade on your Dewalt table saw, it’s important to inspect it thoroughly. Check for any signs of damage or wear, such as chipped teeth or a bent blade body.
A damaged blade can affect the performance of your saw and compromise your safety. If you notice any issues, it’s best to replace the blade with a new one. Aligning the Blade Teeth: Once you have confirmed that the new blade is in good condition, it’s time to align the blade teeth.
Proper alignment ensures smooth and accurate cutting. To align the blade teeth, carefully position the blade so that each tooth is parallel to the miter gauge slot. You can use a combination square or a straight edge to guide you. Make sure that the blade is perfectly aligned before moving on to the next step.
Tightening the Blade Bolt: After aligning the blade teeth, the next step is to tighten the blade bolt. This bolt holds the blade securely in place, preventing any wobbling or movement while cutting.
Ensure that the blade bolt is properly threaded and tightened to the manufacturer’s specifications. You can use a wrench or a socket wrench to tighten the bolt securely. Double-check that the blade is firmly in place before using your Dewalt table saw.
To summarize the steps for installing a new blade on your Dewalt table saw:
1. Inspect the new blade, looking for any signs of damage or wear.
2. Align the blade teeth, ensuring each tooth is parallel to the miter gauge slot.
3. Tighten the blade bolt securely, following the manufacturer’s specifications.
Remember, changing the blade on your table saw is an essential maintenance task that ensures optimal cutting performance.
By following these steps, you can easily and safely install a new blade on your Dewalt table saw, allowing you to tackle your woodworking projects with precision and efficiency.
Blade Adjustment And Testing
When it comes to changing the blade on your Dewalt table saw, it’s essential to properly adjust the blade angle and height, as well as conduct thorough testing to ensure the saw is working safely and effectively. Let’s delve into the crucial steps of blade adjustment and testing.
Adjusting Blade Angle And Height
1. Unlock the blade adjustment lever: Before making any adjustments, ensure that the saw is unplugged and the arbor nut is loosened. Use the blade adjustment lever to change the blade angle as needed.
2. Set the desired blade height: Using the height adjustment wheel, position the blade at the required height. Always refer to the manufacturer’s guidelines for recommended blade height settings for different cutting tasks.
Reconnecting Power And Testing The Saw
1. Reconnect the power: After making the necessary blade adjustments, securely tighten the arbor nut, and plug the saw back in. Ensure that all safety guards are in place before proceeding.
2. Perform a test cut: To validate the effectiveness of the blade adjustment, conduct a test cut on a scrap piece of material. Observe the cut quality and ensure that the saw is operating smoothly and without any unusual vibrations or noises.
Maintenance Tips
Cleaning The Saw Components
Regular cleaning of the Dewalt table saw components can significantly extend the lifespan of your tool.
Here are some essential components that require regular cleaning:
- Saw blade
- Tabletop
- Rip fence
- Miter gauge
- Blade guard
- Dust collection system
Regular Blade Inspection And Replacement
Regular inspection and timely replacement of the saw blade is crucial to ensure optimal performance and safety.
Follow these steps to inspect and replace the blade:
- Unplug the saw and wear protective gloves
- Use a wrench to remove the arbor nut
- Take out the old blade and clean the arbor and flange
- Position the new blade on the arbor, ensuring proper alignment
- Tighten the arbor nut securely
- Give the blade a spin by hand to ensure it’s installed correctly
Frequently Asked Questions
How To Change Blade On Dewalt Saw?
To change the blade on your DeWalt saw, follow these steps:
1. Disconnect the saw from power.
2. Locate the blade lock button or lever.
3. Depress the lock button or engage the lever to secure the blade.
4. Use the supplied wrench to loosen the arbor nut.
5. Remove the old blade and replace it with a new one.
How Do You Remove The Blade Guard On A Dewalt Table Saw?
To remove the blade guard on a DeWalt table saw, locate the lever near the guard and push it down for release.
How To Get Table Saw Blade Off?
To remove a table saw blade:
1. Unplug the saw for safety.
2. Loosen the arbor nut with a wrench.
3. Hold the blade with one hand while turning the nut counterclockwise with the other.
4. Lift the blade off carefully.
How Do You Align The Blade On A Dewalt Table Saw?
To align the blade on a DeWalt table saw, start by unplugging the saw. Then adjust the blade tilt and height to ensure it’s square to the table.
Use a square to check for alignment and make any necessary adjustments to the trunnion or blade alignment mechanism.
Conclusion
As you navigate through changing your Dewalt table saw blade, remember proper safety precautions. Follow each step diligently to ensure a smooth blade replacement process.
With the right tools and approach, you can effortlessly swap out your table saw blade and continue your woodworking projects with ease.