To change the blade on an Echo Edger, first, disconnect the spark plug wire. Then, use a wrench to remove the blade bolt.
Changing the blade on your Echo Edger is a simple process that can be done quickly and easily. Proper maintenance of your equipment ensures optimal performance and longevity.
By following these steps, you can keep your Echo Edger in top condition and achieve clean, precise edging results.
Now, let’s delve into the step-by-step guide on how to effectively change the blade on your Echo Edger for seamless operation and professional-looking landscaping results.

Contents
Introduction To Echo Edger Maintenance
Maintaining your Echo edger is essential for optimal performance. Changing the blade on an Echo edger is a simple process that can be done with just a few basic tools.
By following the manufacturer’s instructions and taking the necessary safety precautions, you can quickly and easily replace the blade on your Echo edger.
Importance Of Blade Maintenance
Blade maintenance is crucial for optimal performance of your Echo Edger.
- Regular maintenance prolongs the lifespan of the edger.
- Keeps the blade sharp for efficient cutting.
- Ensures safety during operation.
Safety First: Preparing For Blade Change
Before changing the blade, follow these safety steps:
- Turn off the edger and let it cool down.
- Wear safety gloves to protect your hands.
- Remove the spark plug to prevent accidental starting.
Identifying The Right Time For A Blade Change
When it’s time to change the blade on your Echo edger, keep an eye out for signs of wear and tear, such as reduced cutting efficiency or jagged edges. Inspect the blade regularly and replace it promptly to ensure optimal performance and safety.
Signs Of Blade Dullness
Blade dullness is indicated by uneven cuts and frayed edges.
Visible nicks or chips on the blade are signs of blunt edges.
Effects Of Wear And Tear On Edging Performance
Dull blades lead to poor cutting, slower edging, and uneven lines.
Blunt edges can cause damage to the grass and reduce efficiency.
Tools And Materials Needed
To change the blade on your Echo Edger, you will need a socket wrench, new blade, work gloves, and safety goggles. Start by disconnecting the spark plug wire, removing the old blade, and then carefully installing the new blade following the manufacturer’s instructions.
Changing the blade on your Echo edger is a straightforward process that requires a few tools and materials. Having the right tools and materials on hand will make the job faster and easier. In this section, we will discuss the essential tools for the job and how to choose the correct replacement blade.
Essential Tools For The Job
Here are the essential tools you will need to change the blade on your Echo edger:
- Socket wrench
- Allen wrench
- Replacement blade
- Safety gloves
- Safety glasses
When selecting a socket wrench, make sure it is the appropriate size for your Echo edger’s blade bolt. An Allen wrench is needed to remove the blade bolt, so choose the correct size for your edger’s bolt. Safety gloves and glasses are a must to protect your hands and eyes from debris and sharp edges.
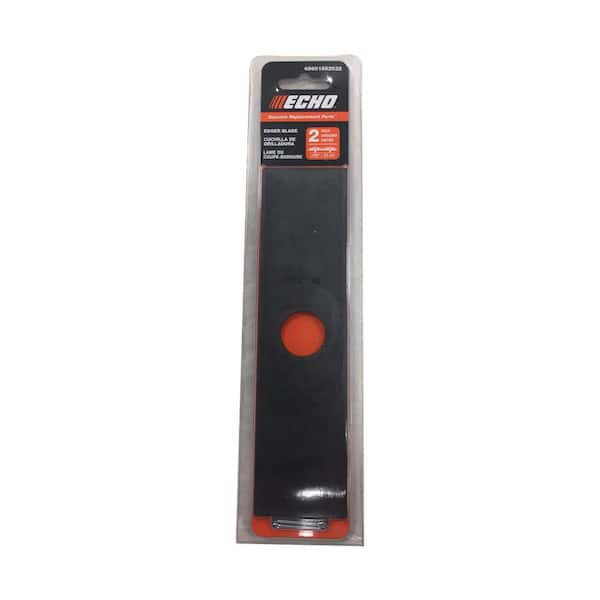
Choosing The Correct Replacement Blade
Choosing the correct replacement blade is crucial to ensure your edger works correctly. Here are the steps to follow when selecting a replacement blade:
- Consult the owner’s manual to determine the correct blade size and type for your Echo edger.
- Choose a blade that is compatible with your edger’s model and is made from high-quality materials.
- Ensure that the blade is sharp and in good condition before installing it.
By following these steps, you can ensure that you select the correct replacement blade that will work correctly with your Echo edger. In conclusion, changing the blade on your Echo edger is a simple process that can be accomplished with the right tools and materials.
Ensure that you have the essential tools and follow the steps to choose the correct replacement blade to ensure your edger works correctly.
Powering Down And Safety Measures
When it comes to changing the blade on your Echo Edger, ensuring safety measures are in place is crucial. This process begins with powering down the edger and using the appropriate personal protective equipment (PPE) to prevent any potential injuries. Let’s walk through the steps to disable the Echo Edger and the essential safety measures to follow.
Disabling The Echo Edger
To begin the blade change process, the Echo Edger must be properly disabled to prevent any accidental starts or movements. Follow these steps to ensure the edger is completely powered down:
- Turn off the engine by switching the ignition to the “Off” position.
- Allow the edger to cool down completely before beginning any maintenance tasks.
- Disconnect the spark plug wire to ensure the edger cannot start unexpectedly.
Personal Protective Equipment
When handling the Echo Edger and changing its blade, it is essential to wear the appropriate personal protective equipment to safeguard yourself from potential hazards. Make sure to wear the following PPE:
- Safety goggles: Protect your eyes from flying debris and potential hazards.
- Gloves: Ensure a secure grip and protect your hands from sharp edges.
- Ear protection: Reduce the impact of loud noise on your ears during the maintenance process.
- Work boots: Provide stability and protection for your feet and toes.
Removing The Old Blade
When it’s time to replace the blade on your Echo edger, it’s important to follow the correct steps to ensure a safe and efficient process. The first step in changing the blade is removing the old one.
This involves unlocking the blade retaining components and handling the old blade with care to avoid any potential injuries. Let’s walk through these steps in detail.
Unlocking The Blade Retaining Components
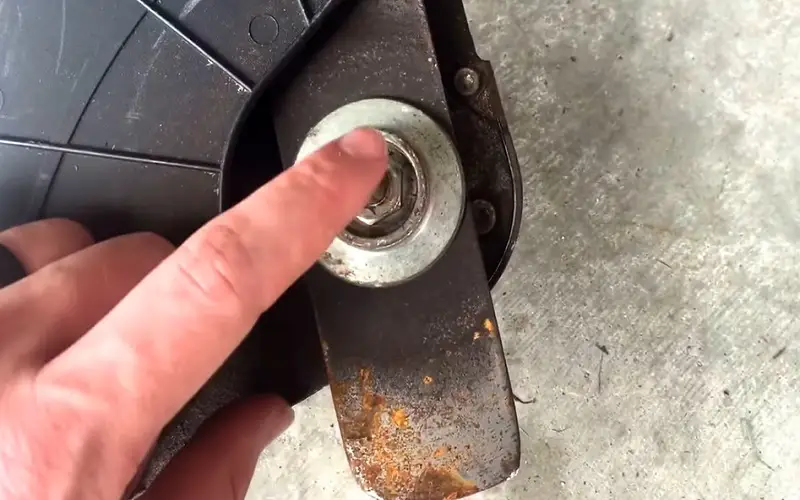
To begin, make sure the edger is turned off and that the spark plug wire is disconnected. Then, locate the blade retaining bolt on the edger. Use a wrench to loosen and remove the bolt carefully.
Once the bolt is removed, the blade retaining components should be unlocked. This will allow you to safely remove the old blade from the edger.
Handling The Old Blade With Care
After unlocking the blade retaining components, it’s crucial to handle the old blade with care. Avoid touching the sharp edges of the blade and use gloves if necessary to protect your hands.
Inspect the blade for any signs of damage or wear, and dispose of it properly according to local regulations. By taking these precautions, you can safely remove the old blade without risking injury.
Installing The New Blade
To change the blade on an Echo Edger, start by turning off the edger and disconnecting the spark plug wire. Use a wrench to loosen the bolt holding the blade in place, then carefully remove the old blade and replace it with the new one.
Secure the new blade by tightening the bolt, reconnect the spark plug wire, and you’re all set to start edging again.
Installing the New Blade on your Echo Edger is not a difficult task, but it requires attention to detail to ensure optimal performance. Here are the steps to follow for a successful installation.
Aligning The New Blade
Before installing the new blade, make sure it is properly aligned. To do this, place the blade on a flat surface and check for any warping or bending. If the blade is not flat, do not install it as it may cause damage to your Echo Edger.
Once you have confirmed that the blade is flat, align it with the blade hole on the Echo Edger. Make sure the blade is centered and flush against the blade hole.
Securing The Blade For Optimal Performance
Once the blade is aligned, it is time to secure it for optimal performance. Use the blade bolt that came with your Echo Edger to fasten the blade onto the Edger. Tighten the bolt until it is snug, but do not over-tighten as this may cause damage to the blade or the Echo Edger.
Finally, check the blade to make sure it is secure and does not wobble. If it does, re-align the blade and re-tighten the bolt. In conclusion, installing a new blade on your Echo Edger is an easy process if you follow these steps carefully.
Make sure to align the blade properly and secure it tightly to ensure optimal performance. By doing so, you can make sure your Echo Edger is always ready to tackle any job you throw its way.
Testing And Troubleshooting
When changing the blade on an Echo edger, it’s essential to follow a systematic testing and troubleshooting process. Start by turning off the edger and carefully removing the old blade.
Check for any signs of wear or damage, and then securely install the new blade, ensuring it’s properly aligned. Afterward, test the edger to ensure the blade is functioning correctly.
Initial Testing Post-installation
After changing the blade on your Echo edger, perform a quick test to ensure proper installation.
- Start the edger and observe the blade in action.
- Listen for any unusual noises that may indicate a problem.
- Check the blade for proper alignment and balance.
Common Issues And How To Resolve Them
Blade Misalignment
If the blade is not aligned correctly, loosen the blade bolts and readjust the position.
Excessive Vibrations
Excessive vibrations can be caused by a loose blade or improper installation.
- Check the blade bolts and tighten if necessary.
- Ensure the blade is securely fastened to the edger.
Blade Wobbling
Wobbling can lead to uneven cutting and potential damage to the equipment.
| Issue | Resolution |
|---|---|
| Inspect the blade for damages | Replace if necessary |
| Check blade bolts | Ensure they are tightened properly |

Maintenance Tips For Longevity
Regular Cleaning And Inspection
Periodically cleaning and inspecting the blade ensures optimal performance and extends its lifespan.
Storage And Care For Edger Blades
Proper storage and care for edger blades prevent corrosion and maintain sharpness for efficient cutting.
Frequently Asked Questions
How To Replace The Blade On An Edger?
To replace the blade on an edger, follow these steps:
1. Turn off the edger and disconnect the spark plug wire.
2. Remove the blade bolt and old blade.
3. Install the new blade and secure it with the bolt.
4. Reconnect the spark plug wire and test the edger.
What Size Socket To Remove Echo Edger Blade?
Use a socket size that fits the bolts on the Echo edger blade. Common sizes are 9/16″ or 5/8″.
How Often Should I Change My Edger Blade?
Change your edger blade every 25-30 hours of use to maintain optimal performance and efficiency.
Are You Supposed To Sharpen Edger Blades?
Yes, you should sharpen edger blades regularly to ensure they cut smoothly and efficiently. Dull blades can damage the grass and cause an uneven cut.
It is recommended to sharpen blades after every 10 hours of use or at the beginning of each mowing season.
Conclusion
Changing the blade on an Echo edger is a simple task that can be completed in just a few easy steps. By following the manufacturer’s guidelines and taking necessary safety precautions, you can maintain the efficiency and performance of your equipment. Regular blade maintenance ensures a clean and precise cut for your landscaping needs.