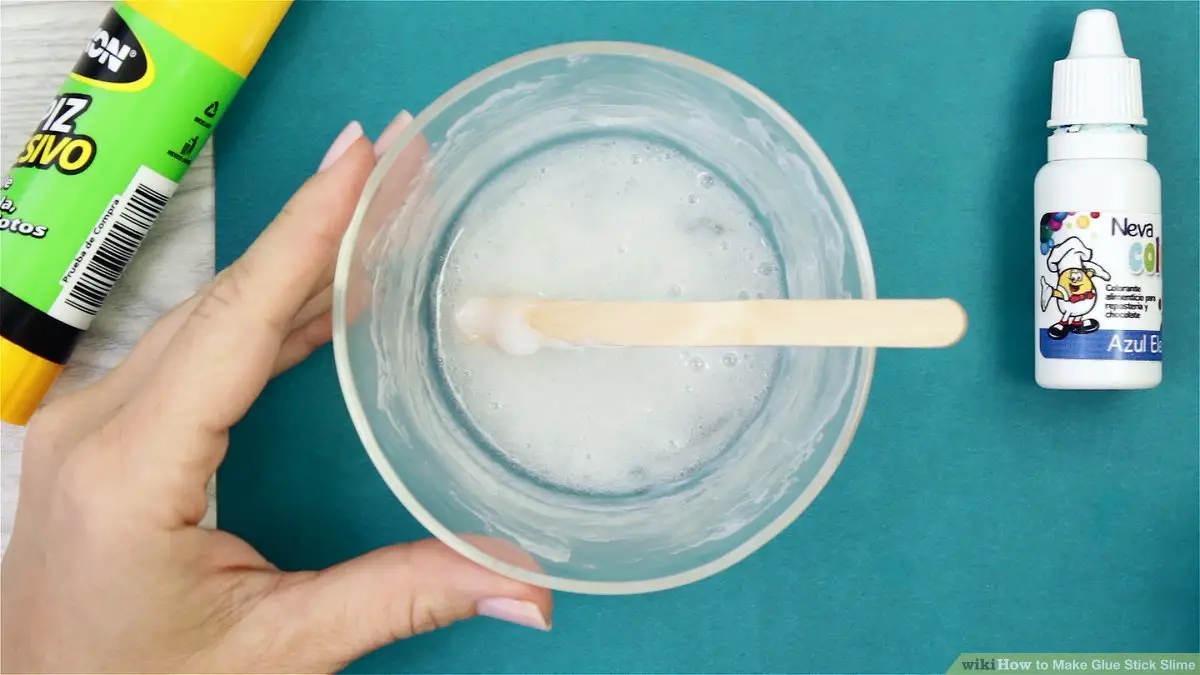
To make slime with a glue stick, cut the glue stick into small pieces, put them in a bowl, and add a small amount of water. Stir the mixture until it reaches a slime-like consistency.
You can also add food coloring for a pop of color. Slime-making can be a fun and creative activity for both kids and adults alike. Using a glue stick is a convenient and mess-free way to create your own slime at home.
With just a few simple steps, you can have a batch of colorful and stretchy slime ready to play with. Let’s explore how you can easily make slime using a glue stick and a few other common household ingredients.
Contents
Introduction To Slime Crafting
Learn the art of slime crafting with a glue stick! Discover how to create your own slime using a glue stick and unleash your creativity with this fun and easy DIY project. No need for complicated ingredients, just grab a glue stick and get ready to have some slimy fun!
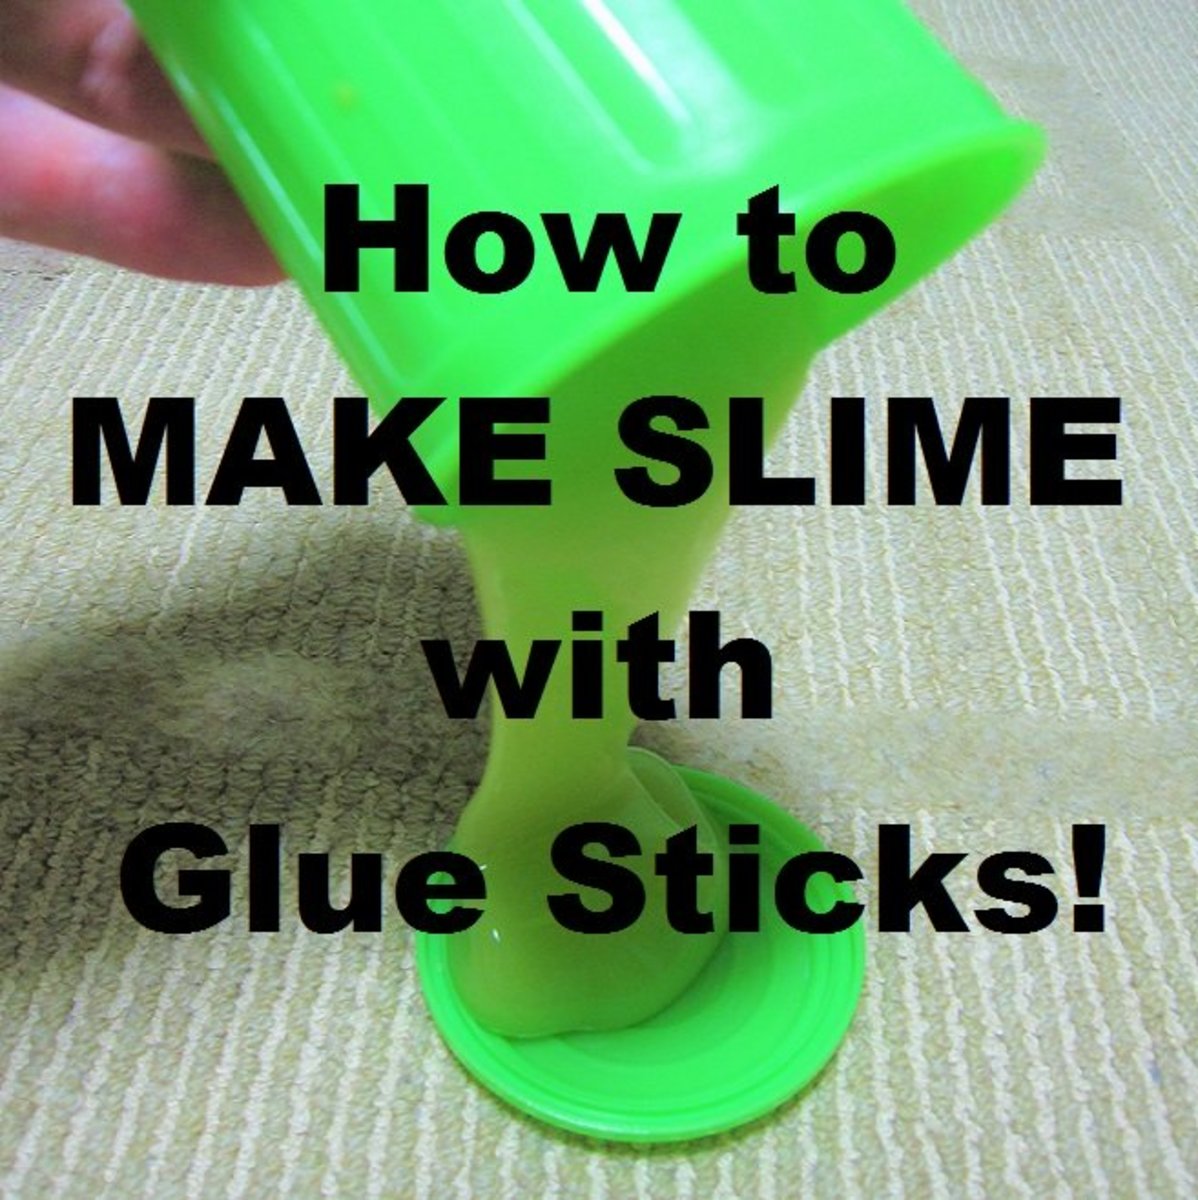
Making slime with a glue stick is a fun and creative DIY project that kids and adults alike enjoy. The process of crafting your own slime allows for personalization and experimentation with different textures and colors.
The Fascination With Slime
Slime has captured the imagination of many due to its stretchy, squishy, and satisfyingly tactile nature. People find joy in kneading and playing with slime, which can be relaxing and stress-relieving.
Benefits Of Diy Slime Projects
Creativity: Crafting slime fosters creativity and imagination in individuals of all ages.
Sensory Play: Slime-making engages the senses, providing a sensory-rich experience.
Educational: It teaches about chemical reactions in a hands-on and enjoyable way.
Stress Relief: Playing with slime can be a calming activity, reducing stress and anxiety levels.

Essential Ingredients For Slime
Crafting slime with a glue stick requires essential ingredients like glue, baking soda, and contact lens solution. Mix the glue stick with these items to create a fun and stretchy slime perfect for sensory play.
Making slime with a glue stick is a fun and easy activity for kids. To create the perfect slime, you’ll need a few essential ingredients. In this section, we will explore the role of glue sticks in slime and the additional components needed to make the perfect slime.
Role Of Glue Sticks In Slime
Glue sticks act as the base for slime, providing the sticky and stretchy texture that kids love. The glue stick’s adhesive properties make it an essential component in creating the perfect slime. It serves as the primary binding agent, allowing other ingredients to mix together effectively.
Additional Components Needed
In addition to glue sticks, you’ll need a few more components to make slime. The following table outlines the essential ingredients for creating slime with a glue stick:
| Ingredient | Description |
|---|---|
| Borax or Contact Lens Solution | Activates the slime and gives it the desired consistency |
| Water | Helps to dilute the glue and other ingredients |
| Food Coloring or Glitter | Provides color and visual appeal to the slime |
Incorporating these additional components along with the glue stick will result in a delightful and colorful slime that kids will enjoy playing with.
Choosing The Right Glue Stick
Choosing the right glue stick is crucial when making slime. The type of glue stick you choose can impact the texture and stretchiness of your slime.
Types Of Glue Sticks
When making slime with a glue stick, it’s important to consider the types available. There are various types such as clear glue sticks, glitter glue sticks, and colored glue sticks.
Safety And Non-toxic Options
- Ensure to opt for non-toxic glue sticks to make safe slime.
- Always check the label for safety information before using.
- Look for washable glue sticks to make cleaning up easier.
Preparation Steps
Before you dive into the fascinating world of making slime with a glue stick, it’s important to prepare yourself and your workspace. By following these simple steps, you’ll be well on your way to creating your own gooey masterpiece.
Gathering Your Supplies
First and foremost, gather all the necessary supplies to make your slime. Here’s a handy checklist to ensure you have everything you need:
| Supplies | Quantity |
|---|---|
| Glue Stick | 1 |
| Baking Soda | 1 teaspoon |
| Water | 1 teaspoon |
| Food Coloring | A few drops |
| Contact Lens Solution | 2 teaspoons |
Make sure you have all these supplies ready before you start, so you don’t have to pause in the middle of the process.
Setting Up Your Workspace
Now that you have your supplies, it’s time to set up your workspace. Follow these steps to create an ideal environment for slime making:
- Cover your work surface with a plastic tablecloth or some old newspaper to protect it from any spills or mess.
- Wash your hands thoroughly to ensure they are clean and free from any dirt or debris.
- Get a mixing bowl and a spoon specifically dedicated to slime making. It’s best not to use your regular kitchen utensils for this activity.
- Choose a well-ventilated area to work in, as some of the ingredients may have a strong odor.
Once you have set up your workspace, you’re ready to begin the exciting process of making slime with a glue stick!
The Slime-making Process
To make slime with a glue stick, start by cutting the glue stick into small pieces. Then, add a few drops of food coloring and mix it with a teaspoon of water. After that, sprinkle some baking soda and mix it well.
Finally, add contact lens solution and mix until the slime forms.
Making slime with a glue stick is an easy and fun activity that you can do at home with your kids. It only requires a few ingredients, and the process is simple enough for children to follow.
In this post, we will guide you through the slime-making process and provide you with some tips to ensure that your slime turns out perfect.
Melting The Glue Stick
The first step in making slime with a glue stick is to melt the glue. To do this, you need to remove the glue stick from its casing and cut it into small pieces.
Then, place the glue pieces into a microwave-safe container and heat them for 10 to 15 seconds. Be careful not to overheat the glue, or it will become too hot to handle. Once the glue is melted, you can add your desired color and mix it thoroughly.
Mixing In The Activator
The next step is to add the activator to the melted glue. The activator is what turns the glue into slime, and you can use a variety of ingredients as activators, such as borax, contact lens solution, or laundry detergent. In this post, we will be using contact lens solution as our activator.
To mix in the activator, add a small amount of contact lens solution to the melted glue and stir it well. Keep adding the contact lens solution in small amounts until the slime starts to come together. You can test the slime by picking it up and stretching it.
If it is too sticky, add a little more contact lens solution. If it is too stiff, add a little more glue and mix it in. Once the slime is the right consistency, knead it with your hands for a few minutes to make it smooth and stretchy.
You can store the slime in an airtight container or a plastic bag to keep it from drying out. In conclusion, making slime with a glue stick is a simple and entertaining activity that anyone can enjoy.
By following these steps and using the right ingredients, you can create colorful and stretchy slime that will provide hours of fun for you and your kids.
Customizing Your Slime
Now that you’ve mastered the basic recipe for making slime with a glue stick, it’s time to take your slime-making skills to the next level by customizing it!
Adding colors, textures, and fun add-ins can transform your slime into a unique sensory experience. In this section, we will explore different ways to customize your slime and make it even more exciting to play with.
Adding Colors And Textures
One of the easiest ways to customize your slime is by adding colors and textures. This allows you to create slime that matches your mood, personality, or even a specific theme.
Here are some simple techniques to experiment with:
- Food Coloring: To add vibrant colors to your slime, simply mix a few drops of food coloring into the glue stick mixture before adding the activator. Start with a small amount and gradually add more until you achieve your desired color.
- Glow-in-the-Dark Pigments: For an extra special touch, try adding glow-in-the-dark pigments to your slime. These pigments absorb light and emit a soft glow, creating a mesmerizing effect in the dark.
- Glitter: If you want to add some sparkle to your slime, consider mixing in glitter. Whether you prefer fine glitter or chunky glitter, the choice is yours! Experiment with different colors and sizes to create dazzling effects.
- Foam Beads: If you’re looking to add texture to your slime, foam beads are a great option. These tiny beads create a crunchy and satisfying texture that can enhance the sensory experience of playing with slime.
Incorporating Fun Add-ins
To take your slime customization to the next level, consider incorporating fun add-ins. These add-ins can add extra sensory elements and make your slime even more enjoyable to play with.
Here are some popular options:
- Scented Oils: Add a delightful aroma to your slime by mixing in scented oils. Choose from a wide variety of scents such as lavender, strawberry, or even bubblegum!
- Confetti: Sprinkle some confetti into your slime for a festive touch. The colorful specks will create a visually appealing effect and add a playful twist to your slime.
- Beads or Sequins: For a touch of elegance, try adding beads or sequins to your slime. These small decorative elements can make your slime look more glamorous and provide a unique tactile experience.
- Charms or Small Toys: Take your slime customization to another level by adding small charms or toys. This can be anything from miniature animals to tiny trinkets, providing a surprise element when playing with your slime.
Remember, the possibilities for customizing your slime are endless. Feel free to mix and match different colors, textures, and add-ins to create your own unique slime creations. Get creative, have fun, and let your imagination run wild!
Troubleshooting Common Issues
When making slime with a glue stick, you may encounter common issues that can affect the texture and consistency of your slime. Troubleshooting these issues is crucial to ensure that your slime turns out just the way you want it.
Here are some tips to help you address and resolve common problems that may arise during the slime-making process.
Dealing With Too Sticky Slime
If your slime turns out too sticky, there are a few simple solutions to help improve its texture. First, try adding a small amount of contact lens solution or saline solution to the slime and knead it thoroughly.
Alternatively, you can dust your hands with cornstarch and continue kneading the slime until it reaches the desired consistency.
Another option is to mix in a small amount of baking soda to reduce the stickiness. Remember to add these ingredients gradually and continue to knead the slime until the stickiness diminishes.
Fixing Slime That Won’t Hold Together
If your slime is not holding together as expected, there are a few methods to help improve its cohesion. One approach is to add a small amount of clear glue to the slime and knead it thoroughly.
Another method is to incorporate a tiny amount of liquid starch into the slime to enhance its binding properties. Additionally, you can try adding a small amount of warm water and knead the slime to encourage it to stick together better.
Ensure that you add these ingredients gradually and continue to knead the slime until it reaches the desired consistency.
Safety And Cleanup Tips
Making slime with a glue stick can be a fun and engaging activity for kids, but it’s important to prioritize safety and efficient cleanup. By following these simple tips, you can ensure that the slime-making process is both safe and hassle-free.
Ensuring Safe Slime Play
- Supervision: Always supervise children during the slime-making process to prevent any accidents or ingestion of non-edible ingredients.
- Use Non-Toxic Ingredients: Ensure that all ingredients, including the glue stick and activator, are non-toxic and safe for children.
- Hand Washing: Encourage children to wash their hands before and after handling the slime to prevent any potential irritation.
- Storage: Store the slime in a sealed container away from pets and younger siblings to prevent any mishaps.
Efficient Slime Cleanup Methods
- Use Warm, Soapy Water: Cleanse hands and surfaces with warm, soapy water to remove any residual slime.
- Vinegar Solution: For stubborn slime remnants, a vinegar and water solution can be effective for cleanup.
- Disposable Wipes: Keep disposable wipes on hand to quickly and conveniently clean up any spills or messes.
- Designated Workspace: Designate a specific area for slime-making to contain any potential mess and simplify cleanup.
Fun Slime Activities And Ideas
Creative Play With Slime
Engaging in creative play with slime is not only entertaining but also helps enhance a child’s imagination and sensory skills. Here are a few ideas to spark their creativity:
- Create a slime masterpiece by adding different colors and textures, allowing your child to mix and swirl to their heart’s content.
- Encourage them to mold the slime into various shapes or objects, like animals or food items, and let their imagination run wild.
- Take it up a notch by adding glitter, sequins, or small toys to the slime, making it even more magical and exciting.
- Host a slime fashion show where your child can design and dress up their slime creations, showcasing their unique style and flair.
- Organize a slime party with friends or siblings, providing various slime supplies and letting them collaborate to create a slime extravaganza.
Educational Activities Using Slime
Slime can also be a valuable tool for educational activities, making learning fun and engaging. Consider these educational ideas:
- Create a slime-based science experiment, exploring concepts such as viscosity, polymers, or chemical reactions.
- Use slime as a sensory tool during math activities, allowing children to count, measure, and compare quantities using slime as a tactile representation.
- Introduce letters and numbers by shaping slime into different shapes and figures, helping children practice their alphabet and counting skills.
- Enhance fine motor skills by incorporating slime into arts and crafts projects, like using it as a unique adhesive or as a 3D element in collages.
- Encourage storytelling and language development by using slime as a prop for imaginative play, letting children create scenes or characters to narrate their own stories.
Storing Your Diy Slime
Store your DIY slime made with a glue stick in an airtight container to maintain its texture and prevent drying out. Keep it away from direct sunlight and excessive heat to ensure longevity and optimal playtime fun.
Storing Your DIY Slime So, you’ve made your own slime using a glue stick, and it turned out fantastic! Now, you might be wondering how to store your slime to keep it fresh and ready to use whenever you want to play with it. Well, fear not, because we’ve got you covered!
Best Practices for Slime Storage First and foremost, it’s important to store your slime in an airtight container. This will prevent air from drying out your slime and keep it from becoming hard and unusable. You can use any container with a tight-fitting lid, such as a plastic food container or a mason jar.
When storing your slime, make sure to keep it in a cool, dry place. Avoid storing it in direct sunlight or in a warm area, as heat can also dry out your slime and cause it to lose its stretchiness. If you want to keep your slime fresh for longer, you can add a few drops of saline solution to it before storing it.
This will help keep the slime moist and prevent it from drying out. Extending the Life of Your Slime To extend the life of your slime even further, there are a few additional steps you can take. First, make sure to wash your hands thoroughly before playing with your slime.
This will prevent any dirt or bacteria from getting into the slime and causing it to spoil. If your slime starts to feel a bit dry or stiff, you can add a small amount of lotion to it and knead it in. This will help restore the slime’s stretchiness and make it feel fresh again.
Finally, if you want to keep your slime for an extended period of time, you can freeze it. Simply put the slime in an airtight container and pop it in the freezer. When you’re ready to use it again, just let it thaw at room temperature for a few hours.
In conclusion, storing your DIY slime is easy and requires just a few simple steps. By following these best practices for slime storage and extending the life of your slime, you can keep your slime fresh and stretchy for longer and enjoy playing with it whenever you want.
Frequently Asked Questions
How To Turn A Glue Stick Into Liquid Glue?
To turn a glue stick into liquid glue, heat it in a microwave-safe container until it melts. Then, add a small amount of water and stir until you achieve the desired consistency. Be careful not to overheat the glue, as it can become too runny.
How Do You Make Slime With Glue Stick Without Borax?
To make slime with glue stick without borax, you need to mix equal parts of glue and liquid laundry detergent. Stir the mixture until it becomes a slimy consistency. Add food coloring or glitter for extra fun. Enjoy your homemade slime!
Can You Make Slime With A Glue Pen?
Yes, you can make slime with a glue pen. The glue pen works well for creating slime due to its adhesive properties.
How Do You Make Slime With Glue Stick And Dish Soap?
To make slime with glue stick and dish soap, mix equal parts of both ingredients until well combined.
Conclusion
Making slime with a glue stick is a fun and easy activity for both kids and adults. With just a few simple steps, you can create your own slime using common household items.
Whether you prefer classic slime or want to add some glitter and color, the possibilities are endless. So, grab some glue sticks and get ready to have some slimy fun!