To glue a shoe sole, apply a strong adhesive to the sole and press it firmly onto the shoe. It’s important to prepare the surface and let the glue dry completely before wearing the shoes.
Shoe soles can become loose due to wear and tear, and fixing them with glue is a cost-effective solution. However, it’s important to choose the right adhesive for the job and follow the instructions carefully.
We’ll discuss how to glue a shoe sole step-by-step, including preparation, application, and drying time. We’ll also provide tips on choosing the right glue for your shoes and how to ensure a strong bond that lasts.
Contents
Introduction To Shoe Repair
Shoe repair is a valuable skill that can save you money and extend the life of your favorite footwear. From fixing loose heels to repairing worn-out soles, learning how to perform basic shoe repairs can be both practical and rewarding.
Why Diy Shoe Sole Repair?
Repairing shoe soles at home can be cost-effective and convenient. DIY repairs allow you to address minor damages quickly and prevent further deterioration of the sole.
Common Causes Of Sole Damage
- Wear and tear: Regular use can cause soles to wear out over time.
- Moisture exposure: Water damage weakens the adhesive holding the sole in place.
- Improper care: Neglecting to clean and condition shoes can lead to sole damage.
Selecting The Right Adhesive
When it comes to gluing a shoe sole, selecting the right adhesive is crucial for a durable and long-lasting bond. The type of adhesive you choose can make all the difference in how well your shoe sole adheres to the upper.
Let’s delve into the different types of glues available and weigh the pros and cons of popular adhesives to help you make an informed decision.
Types Of Glues For Shoe Soles
When it comes to gluing shoe soles, various types of adhesives are suitable for different materials. Here are some common types of glues used for shoe soles:
- Epoxy Adhesive: A strong and durable adhesive suitable for bonding different materials, including rubber and leather.
- Neoprene Adhesive: Ideal for attaching rubber soles to athletic shoes, neoprene adhesive provides flexibility and water resistance.
- PU Adhesive: Polyurethane adhesives are suitable for a wide range of materials and provide excellent flexibility and resistance to heat and chemicals.
- Contact Cement: This adhesive is commonly used for attaching rubber soles to casual shoes and provides a strong and flexible bond.
Pros And Cons Of Popular Adhesives
Before selecting an adhesive for gluing shoe soles, it’s essential to consider the advantages and disadvantages of popular options:
| Adhesive Type | Pros | Cons |
|---|---|---|
| Epoxy Adhesive | Provides a strong and durable bond | Requires mixing before application |
| Neoprene Adhesive | Offers flexibility and water resistance | May have strong fumes during application |
| PU Adhesive | Excellent flexibility and resistance to heat and chemicals | Requires careful handling due to potential skin irritation |
| Contact Cement | Provides a strong and flexible bond | May not be suitable for certain materials |
Preparation Steps
To ensure a successful shoe sole gluing, proper preparation is essential. The process begins with cleaning the sole and shoe surface, followed by gathering the necessary tools for gluing.
Cleaning The Sole And Shoe Surface
Before gluing the shoe sole, it’s crucial to clean both the sole and the shoe surface thoroughly. This will ensure maximum adhesion and a long-lasting bond. Here’s how to do it:
- Remove any dirt, dust, or old adhesive from the sole and shoe with a stiff-bristled brush or sandpaper.
- Wipe the cleaned areas with a damp cloth to remove any remaining debris or residue.
- Allow the sole and shoe to dry completely before proceeding with the gluing process.
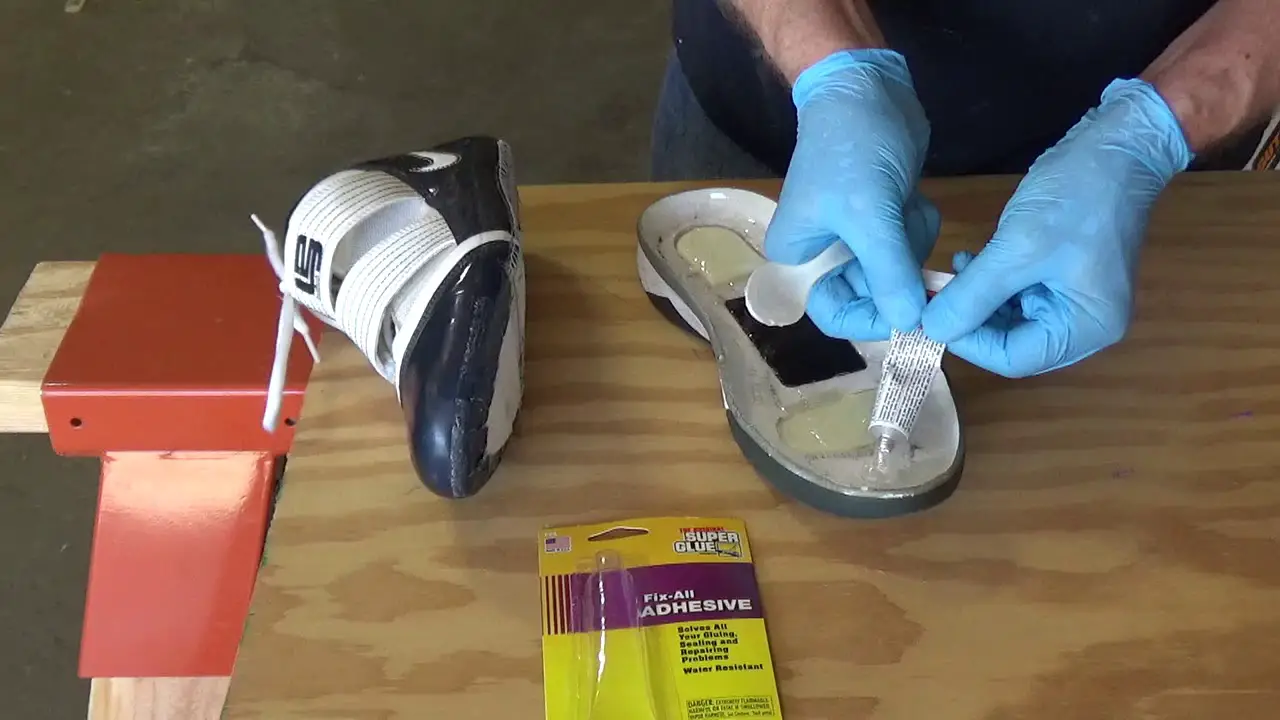
Tools You’ll Need For Gluing
Having the right tools at your disposal makes the gluing process more efficient and effective. Here are the essential tools you’ll need:
| Tools | Description |
|---|---|
| Adhesive | High-quality shoe adhesive designed for the specific material of the sole and shoe. |
| Clamps | Clamps or heavy objects to apply pressure to the glued sole for proper adhesion. |
| Gloves | Protective gloves to ensure safe handling of adhesive and prevent skin contact. |
| Masking Tape | To secure the sole in place and prevent any adhesive spillage. |
| Applicator or Brush | To apply the adhesive evenly on both the sole and shoe surface. |
Gluing Techniques For A Strong Bond
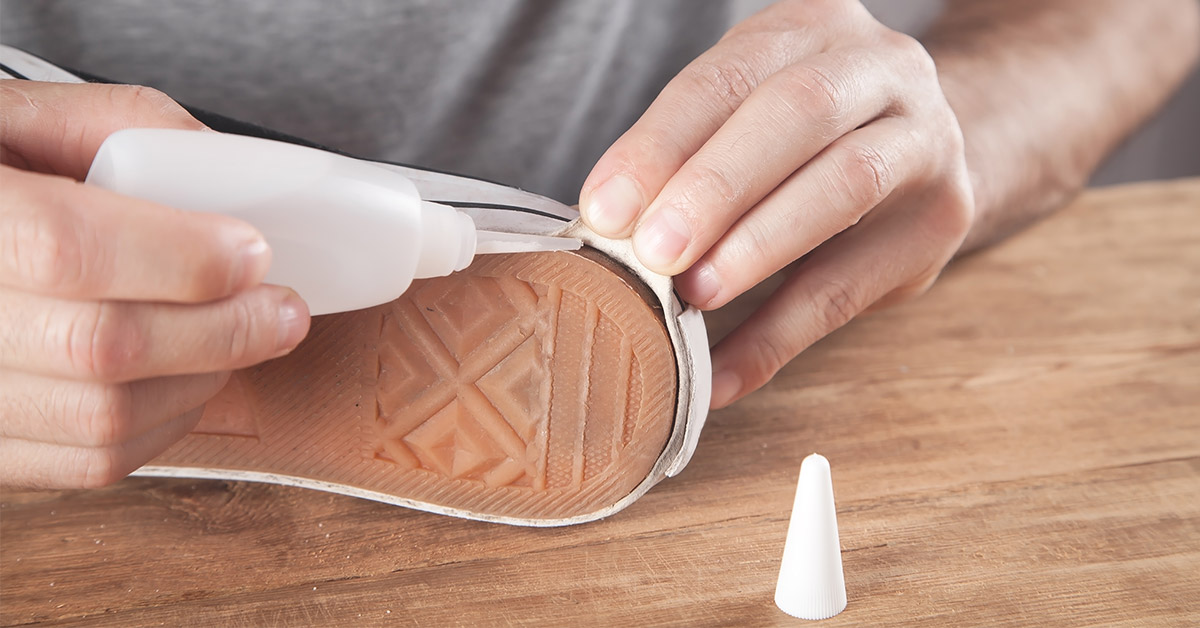
Applying The Adhesive
First, clean the surfaces to be glued with rubbing alcohol. Apply shoe glue evenly and generously on both the sole and shoe upper.
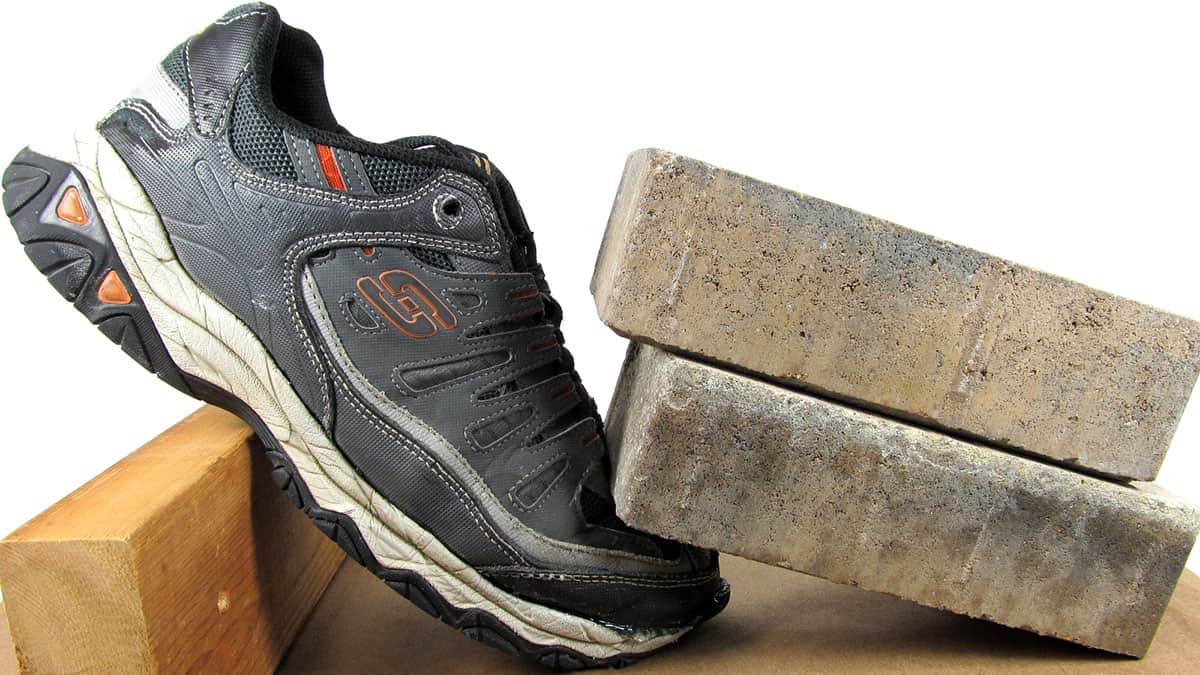
Clamping For Effective Bonding
After applying the adhesive, clamp the sole and shoe upper together firmly. Use C-clamps or heavy objects to provide even pressure for a secure bond.
Curing Time And Conditions
When it comes to gluing shoe soles, understanding the curing time and conditions is crucial for ensuring a strong and long-lasting bond.
The curing process refers to the time it takes for the adhesive to fully dry and reach its maximum strength. Additionally, factors such as temperature and humidity play a vital role in determining the ideal curing time.
Ideal Curing Times
The ideal curing time for gluing shoe soles can vary depending on the type of adhesive used. It is essential to follow the manufacturer’s instructions for the specific adhesive product you are using, as they provide valuable guidance on the recommended curing time. Typically, most shoe adhesives require a curing time of 24 to 48 hours to achieve optimal strength.
Temperature And Humidity Factors
The temperature and humidity conditions in which you perform the gluing process can significantly impact the curing time and the overall bond strength.
It is essential to consider the following factors:
- Temperature: Adhesive curing time can be influenced by the temperature of the environment. Higher temperatures generally result in faster curing, while lower temperatures can slow down the process. It is advisable to work in a temperature range recommended by the adhesive manufacturer to ensure the best results.
- Humidity: Humidity levels can affect the curing time of the adhesive as well. High humidity may extend the curing time, while low humidity can accelerate it. Maintaining a moderate humidity level is ideal for achieving the optimal bond strength.
It is important to note that extreme temperature and humidity conditions should be avoided, as they can negatively impact the adhesive’s performance. Always aim for a controlled environment with moderate temperature and humidity levels to ensure the best results.
Post-gluing Care
After gluing the shoe sole, post-gluing care is essential to ensure longevity and proper bonding. Clean the shoe with a damp cloth, avoid wearing for at least 24 hours, and store in a cool, dry place. Applying a shoe protector spray can also prevent future damage.
After successfully gluing your shoe sole, you need to take care of it properly to ensure the glue lasts longer. Below are some tips you can follow to maintain your shoe soles.
Pressure And Weight Distribution
Once you have glued the sole, make sure you apply pressure on the sole to ensure it is well bonded with the shoe. You can do this by putting a heavy object on top of the shoe and leaving it for some time.
This will help the glue to dry properly and create a strong bond. Also, ensure that you distribute your weight evenly while wearing the shoe to avoid putting too much pressure on one part of the sole.
Avoiding Water And Heat
Water and heat can weaken the glue bond and cause the sole to come off. To avoid this, do not expose your shoes to direct sunlight or heat sources like a radiator or heater.
Additionally, try to avoid walking in wet conditions or wearing your shoes in water. If you do get your shoes wet, make sure you dry them properly before wearing them again.
Other Tips
In addition to the above, here are some other tips you can follow to take care of your shoe soles:
- Store your shoes in a cool, dry place to prevent the glue from melting or weakening.
- Use a shoe horn when putting on your shoes to prevent the back of the shoe from bending and the sole from coming off.
- Regularly check the sole of your shoes to ensure that it is still well bonded to the shoe. If you notice any signs of separation, re-glue the sole immediately.
Following these tips will help you maintain your shoe soles and ensure that they last longer, giving you the most value for your money.
Troubleshooting Common Issues
When gluing a shoe sole, it’s important to address any potential issues that may arise during the process. Troubleshooting common problems can help ensure a successful and long-lasting repair. Here are some tips to help you deal with common issues that may occur when gluing a shoe sole:
Dealing With Excess Glue
Excess glue can create a messy and unprofessional look on the shoe sole. To address this issue, use a cotton swab or a clean cloth dampened with acetone to carefully remove any excess glue before it dries. Be cautious not to spread the glue further or damage the surrounding area of the sole.
When The Sole Starts Peeling Again?
If you notice the sole starting to peel again after gluing, it may be due to inadequate surface preparation or improper application of the adhesive.
In such cases, carefully remove the sole, clean the surfaces thoroughly, and reapply the glue following the manufacturer’s instructions.
Ensure that the adhesive is evenly spread and that proper pressure is applied during the drying process to achieve a secure bond.
Maintaining Your Repaired Shoes
After you have successfully glued the sole of your shoes, it’s important to take proper care of them to ensure the longevity of the repair. Regular inspections and preventive measures will help you keep your shoes in good condition for a longer period.
Regular Inspections
Regularly inspect your repaired shoes for any signs of wear and tear. Check the glued areas for any peeling or loosening. Look for any gaps or cracks that may have developed over time. Addressing these issues promptly can prevent further damage and the need for more extensive repairs.
Preventive Measures For Longevity
To ensure the longevity of your repaired shoes, consider taking the following preventive measures:
- Keep your shoes clean and dry to prevent moisture from compromising the glue.
- Store your shoes in a cool, dry place away from direct sunlight to avoid heat damage to the adhesive.
- Avoid wearing the repaired shoes for activities that may put excessive stress on the glued sole, such as strenuous sports or prolonged exposure to water.
- Consider using protective sole covers or toe caps for added reinforcement and protection against abrasion.
Frequently Asked Questions
What Is The Best Glue To Stick Shoe Soles?
The best glue to stick shoe soles is a strong adhesive specifically designed for shoe repair, such as Barge All-Purpose Cement or Shoe Goo.
These adhesives provide a durable bond and can withstand the wear and tear of daily use. It’s important to follow the instructions carefully for best results.
Can I Glue The Sole Of My Shoe Back On?
Yes, you can reglue the sole of your shoe back on using a strong adhesive. Clean the surfaces before applying glue for best results.
Is Gorilla Glue Good For Shoe Soles?
Yes, Gorilla Glue is good for shoe soles as it creates a strong and durable bond.
How To Fix A Detached Shoe Sole?
To fix a detached shoe sole, clean the area, apply strong adhesive, press the sole back in place, and let it dry completely before wearing the shoes. If the damage is extensive, consider professional repair or a new pair of shoes.
Conclusion
Mastering the art of gluing shoe soles is a valuable skill for footwear enthusiasts. By following the proper techniques outlined in this guide, you can extend the life of your favorite shoes and save money on repairs. Remember, patience and precision are key to successful shoe sole repairs.