
Views: 6
Are you ready to unleash the full potential of your Ryobi drill? Whether you’re a DIY enthusiast or just someone looking to tackle a few home improvement projects, mastering the use of your Ryobi drill can be a game-changer.
Imagine effortlessly hanging shelves, assembling furniture, or even building a new deck with confidence and precision. With its versatile features and robust performance, the Ryobi drill is your trusted ally. In this guide, you’ll discover step-by-step instructions, pro tips, and insider tricks that will transform you into a drill-wielding maestro.
Get ready to harness the power of your Ryobi drill and revolutionize the way you approach your projects. Keep reading to unlock the secrets that will make every drill task a breeze.
Contents
Choosing The Right Ryobi Drill
Choosing the right Ryobi drill can be a game-changer for your DIY projects. Whether you’re a beginner or seasoned pro, the right drill makes all the difference. Finding the perfect match for your needs involves understanding the basics and weighing the options available.
Cordless Vs. Corded
When deciding between cordless and corded drills, consider your project’s scope. Cordless drills offer freedom of movement and are perfect for outdoor tasks or areas without power outlets. They let you work without the hassle of tangled wires. However, they rely on battery life, which might not be ideal for long projects.
Corded drills, on the other hand, provide consistent power and are great for heavy-duty tasks. They’re generally lighter since there’s no battery, making them comfortable for prolonged use. If you often work near power sources, corded drills can be your reliable companion.
Drill Types And Their Uses
Ryobi offers a variety of drill types tailored to different tasks. Hammer drills are your go-to for drilling into concrete or masonry. Their powerful force tackles tough materials effortlessly. You might find these handy for renovation projects or installing brackets.
For lighter tasks, consider a standard drill. It’s versatile for wood, plastic, and metal. If precision is your priority, opt for a drill driver. It excels in driving screws and small drilling tasks. Each type serves distinct purposes, so match the tool to your specific needs.
Key Features To Consider
Pay attention to the drill’s specifications before buying. Look for adjustable speed settings, which give you control over the drill’s intensity. This feature is crucial for different materials and tasks. Also, consider the chuck size—larger chucks accommodate bigger drill bits.
Ergonomics play a significant role too. A comfortable grip ensures you work efficiently without strain. LED lights are a handy feature for visibility in dimly lit areas. Think about what features make your work easier and more efficient.
Finding the right Ryobi drill isn’t just about ticking off features. It’s about aligning those features with your specific needs and project goals. What’s your next project, and which drill will help you achieve it?
Credit: www.loveandrenovations.com
Safety Precautions
Using a Ryobi drill offers many advantages for DIY enthusiasts. Yet, safety remains paramount. Taking necessary precautions ensures a smooth and risk-free experience. This section highlights essential safety measures. These are crucial for effective and safe drill use.
Personal Protective Equipment
Always wear safety goggles to protect your eyes. Flying debris can pose a threat. Use ear protection to guard against loud noises. Prolonged exposure might harm hearing. Consider wearing gloves to shield your hands. They provide extra grip and reduce injury risk.
Safe Handling Practices
Ensure your workspace is clutter-free. A tidy area prevents accidents. Secure your materials before drilling. Unsteady objects can lead to mishaps. Always disconnect the drill when changing bits. This practice prevents unintended starts.
Understanding Drill Controls
Familiarize yourself with the drill’s controls. Know the trigger, speed settings, and reverse function. Understanding these enhances your control over the tool. Practice using the drill on scrap material. This builds confidence and skill before tackling major tasks.
Setting Up Your Drill
Learn to use a Ryobi drill with ease. Start by charging the battery fully. Then, insert the drill bit securely into the chuck. Adjust the torque settings for your task. Follow safety guidelines to ensure a smooth experience.
Setting up your Ryobi drill is simple. This step ensures efficient performance and safety. Understanding the basics helps avoid common mistakes. Let’s look at the key steps to get your drill ready.Charging The Battery
Start by charging your drill’s battery. Insert the battery into the charger. Ensure the charger is plugged into a power outlet. A light will indicate charging. Wait for the battery to fully charge. This process may take a few hours. A fully charged battery ensures longer drill usage.Installing Drill Bits
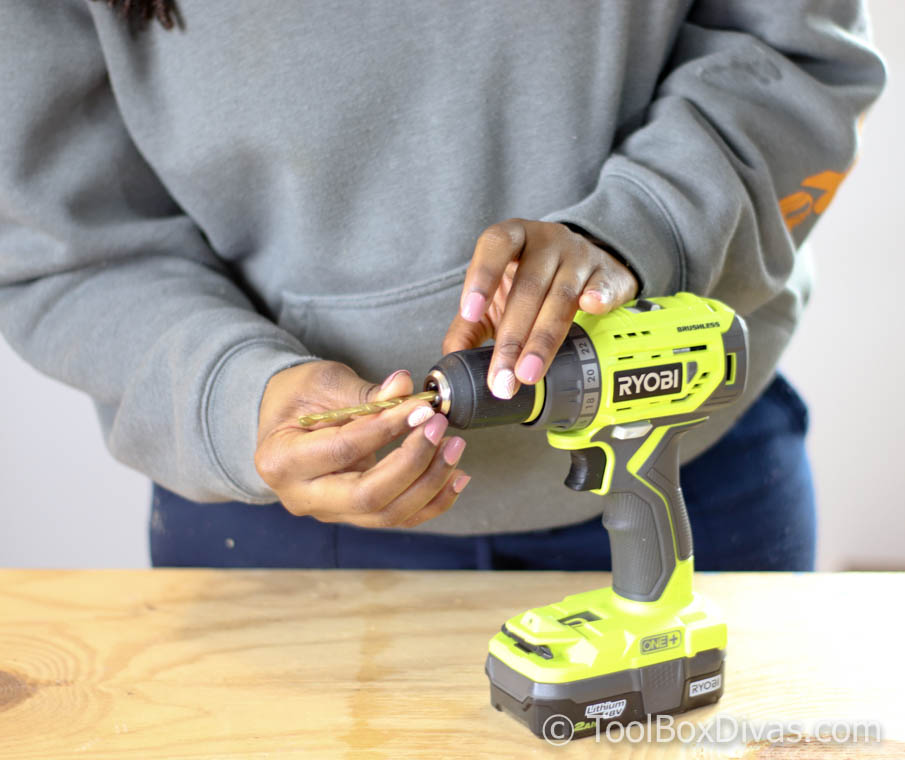
Choose the correct drill bit for your task. Hold the drill firmly. Loosen the chuck by turning it counterclockwise. Insert the drill bit into the chuck. Tighten the chuck by turning it clockwise. Ensure the bit is secure. A tight fit prevents the bit from slipping.Adjusting Torque Settings
Locate the torque adjustment ring near the chuck. Turn the ring to select your desired torque level. Lower settings are for softer materials. Higher settings suit harder materials. Adjusting torque prevents overdriving screws. It ensures precise control during drilling.
Credit: www.youtube.com
Basic Drilling Techniques
Mastering basic drilling techniques is essential for any DIY enthusiast. Whether you’re drilling into wood, metal, or concrete, using a Ryobi drill can make the task easier. Understanding the right posture and techniques ensures your project is successful and safe.
Correct Drilling Posture
Stand with feet shoulder-width apart. This stance offers stability. Hold the drill firmly with both hands. Keep your elbows close to your body. Align the drill bit with the target surface. Apply steady pressure. Avoid leaning too much forward. This prevents fatigue.
Drilling Into Wood
Choose the correct drill bit. A spade bit works well for larger holes. For smaller holes, use a twist bit. Mark the spot with a pencil. This ensures precision. Begin at a slow speed. Increase speed gradually. Apply gentle pressure. Stop if the wood starts splintering.
Drilling Into Metal And Concrete
Use a carbide-tipped masonry bit for concrete. For metal, use a high-speed steel bit. Mark the spot with a center punch. This prevents the bit from slipping. Start drilling at a low speed. Increase speed once the hole starts forming. Let the drill do the work. Avoid pushing too hard. This prolongs the life of the bit. Use water as a lubricant for concrete. It keeps the bit cool.
Advanced Tips For Better Results
Using a Ryobi drill is straightforward. But mastering it requires skill. With a few advanced tips, you can achieve better results. Let’s explore some strategies to enhance your drilling experience. Whether you’re a hobbyist or a professional, these tips will help you improve.
Using Drill Accessories
Drill accessories expand your tool’s capabilities. Use a depth stop to control drilling depth. This ensures consistent holes every time. For sanding, attach a sanding drum. It smooths surfaces effortlessly. To mix paint, use a mixing paddle. Attach it to your drill for even mixing. Each accessory has a specific function. Choose the right one for your task.
Precision Drilling Techniques
Precision is key in drilling. Start by marking your spot with a pencil. Use a center punch to prevent slipping. Secure your workpiece with clamps for stability. Apply steady pressure to the drill. Let the drill bit do the work. For deeper holes, use a pilot hole first. This guides the drill and reduces errors. Keep your hands steady for cleaner results.
Troubleshooting Common Issues
Even the best tools face issues. If the drill stalls, check the battery. Low power can affect performance. Inspect the drill bit for wear. A dull bit won’t cut well. If the drill overheats, pause and let it cool. Regular maintenance prevents many problems. Clean your drill after each use. Store it in a dry place to avoid rust. Simple checks can ensure your drill works smoothly.
Maintenance And Care
Taking care of your Ryobi drill extends its life. Regular maintenance keeps it running smoothly. Proper care also ensures safety during use. Follow these simple tips for maintaining your drill. A well-maintained tool is a reliable tool.
Cleaning Your Drill
Dust and debris can damage your drill. Clean it after each use. Use a dry cloth to wipe the surface. Avoid using water. It can harm the motor. For stubborn dirt, use a soft brush. Focus on the vents. Ensure air can flow freely. This prevents overheating.
Storing The Drill Properly
Store your drill in a cool, dry place. Humidity can cause rust. Use a case for protection. Keep it away from direct sunlight. High temperatures can damage the battery. Position the drill upright. This prevents accidental falls. Remove the battery before storing. It ensures safety.
Battery Maintenance Tips
Battery care is crucial. Always use the correct charger. Overcharging shortens battery life. Charge it fully before first use. Avoid draining it completely. Store batteries in a cool place. Extreme temperatures reduce efficiency. Clean the battery contacts regularly. This ensures a good connection.
Credit: toolboxdivas.com
Frequently Asked Questions
How Do I Charge A Ryobi Drill Battery?
To charge a Ryobi drill battery, connect it to the Ryobi charger. Ensure the battery terminals align properly. Plug the charger into a power outlet. The charger’s indicator light will show the charging status. Once fully charged, the light will turn green, indicating the battery is ready for use.
What Drill Bits Are Compatible With Ryobi Drills?
Ryobi drills are compatible with most standard drill bits. You can use them with wood, metal, and masonry bits. Always select the appropriate bit for your material. Ensure the bit fits securely in the drill chuck. This compatibility makes Ryobi drills versatile for various projects.
How Do I Change The Drill Bit On My Ryobi Drill?
To change a drill bit, first ensure the drill is off. Loosen the chuck by turning it counterclockwise. Remove the current bit and insert the new one. Tighten the chuck by turning it clockwise. Check that the bit is secure before using the drill.
This ensures safe and effective drilling.
Can Ryobi Drills Be Used For Masonry?
Yes, Ryobi drills can be used for masonry work. Use a masonry drill bit and ensure the drill has a hammer function. Set the drill to hammer mode for best results. Always wear safety goggles and gloves when drilling into masonry to protect yourself from debris and dust.
Conclusion
Using a Ryobi drill is straightforward. Follow the instructions for safe use. Practice helps improve your drilling skills. Keep your drill clean and store it properly. Choose the right drill bit for each task. Always wear protective gear while drilling.
Regularly check the drill’s battery and charge it. This makes sure your drill is ready for use. A Ryobi drill can handle many home projects. With a little practice, you’ll be comfortable using it. Enjoy your DIY tasks with confidence.
Happy drilling!