To use a Porter Cable Dovetail Jig, set up the jig according to the user manual. Adjust the template guide and router bit for desired dovetail size.
In this blog, we will discuss the step-by-step process of setting up and using a Porter Cable Dovetail Jig to create perfect dovetail joints effortlessly. Mastering the art of dovetail joinery can elevate your woodworking projects to a professional level.
Whether you are a seasoned woodworker or a hobbyist looking to enhance your skills, understanding how to use a dovetail jig effectively is essential. Join us as we explore the intricacies of using a Porter Cable Dovetail Jig for flawless dovetail joints every time.
Contents
- Introduction To The Porter Cable Dovetail Jig
- Assembling The Jig
- Selecting The Appropriate Dovetail Bit
- Securing The Wood
- Setting Up The Template
- Routing Techniques
- Troubleshooting Common Issues
- Finishing Touches
- Maintenance And Care For The Jig
- Advanced Tips For Mastering The Jig
- Frequently Asked Questions
- Conclusion
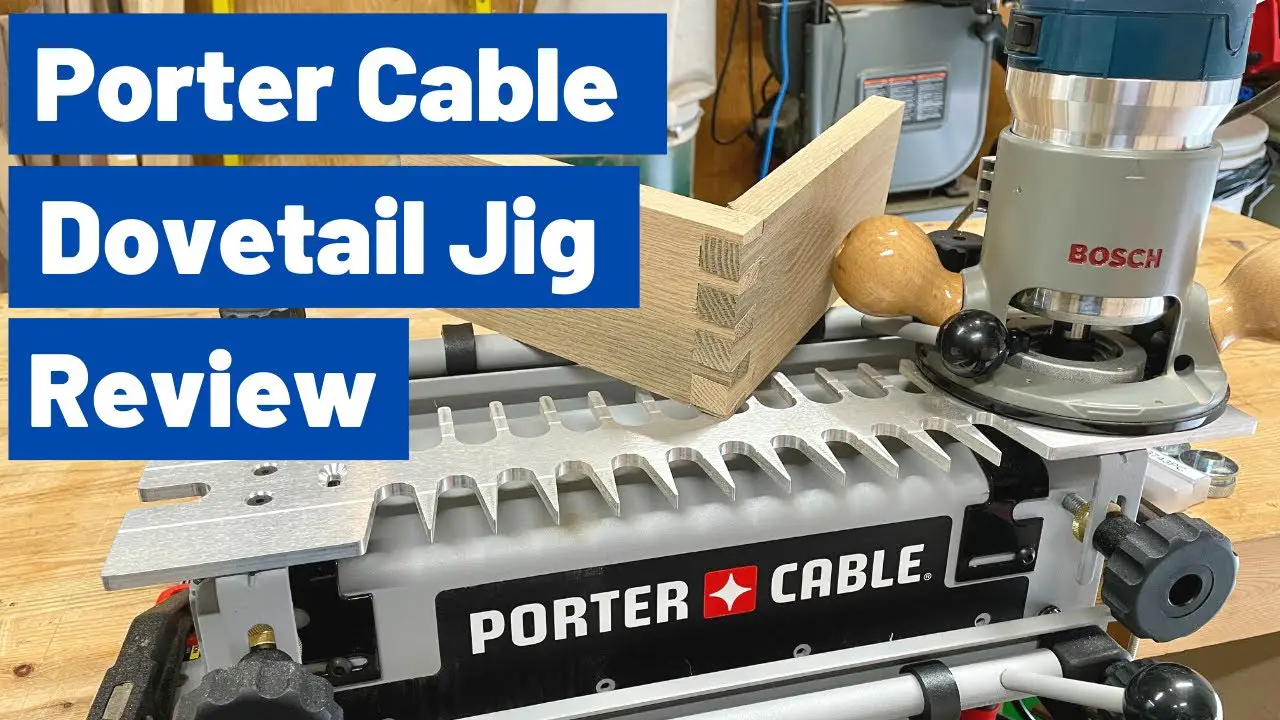
Introduction To The Porter Cable Dovetail Jig
Essential Features
The Porter Cable Dovetail Jig is a versatile tool for creating strong, precise dovetail joints for woodworking projects.
Benefits Of Using A Dovetail Jig
- Saves time by ensuring accurate cuts
- Enhances the quality of dovetail joints
- Increases efficiency in woodworking projects
Assembling The Jig
To assemble the jig for the Porter Cable Dovetail Jig, carefully follow the instructions provided. Secure the pieces firmly before starting the dovetailing process. Follow the step-by-step guide to ensure precise and efficient use of the jig.
Assembling the Porter Cable Dovetail Jig is an essential step to start creating professional dovetail joints. This article will guide you through the process of assembling the jig to ensure you can use it effectively.
The assembly process can seem overwhelming at first, but following the steps below will make it much easier for you to get started. We will cover all the tool requirements and unpacking details to get you ready for the setup process.
Unpacking And Setup
The first step is to unpack the Porter Cable Dovetail Jig from its box and ensure that all the necessary parts are included. The jig comes with several components that need to be assembled, so it is essential to check that each part is present.
After ensuring that all the parts are present, you can start the setup process. The Porter Cable Dovetail Jig comes with an instruction manual that outlines the process step-by-step. It’s important to read the manual carefully before starting to assemble the jig.
Tool Requirements
Before assembling the jig, it’s essential to have all the necessary tools. The following tools are required:
- Phillips-head screwdriver
- Flat-head screwdriver
- Allen wrench (supplied with the jig)
- Adjustable wrench
- Drill and bits
Ensure that you have all the tools required before starting the assembly process. This will save you time and make the process smoother. The assembly process of the Porter Cable Dovetail Jig involves several steps.
Here are the steps you need to follow:
- Attach the base plate to the jig body using the supplied screws.
- Attach the template guide to the base plate using the supplied screws.
- Attach the router support to the template guide using the supplied screws.
- Attach the dovetail fingers to the router support using the supplied screws.
- Attach the clamp bars to the base plate using the supplied screws.
- Attach the workpiece clamp to the clamp bars using the supplied screws.
- Attach the stop to the base plate using the supplied screws.
- Attach the depth stop to the router support using the supplied screws.
Make sure to follow the instructions in the manual carefully and take your time with each step. Once you’ve assembled the jig, you can start creating professional dovetail joints.
In conclusion, assembling the Porter Cable Dovetail Jig is a crucial step in creating professional dovetail joints.
By following the instructions carefully and ensuring that you have all the necessary tools, you can assemble the jig quickly and efficiently. With the jig assembled, you can start creating perfect dovetail joints for your woodworking projects.
Selecting The Appropriate Dovetail Bit
When using a Porter Cable Dovetail Jig, choosing the right dovetail bit is crucial. Let’s dive into Types of Bits and Matching Bit to Wood Thickness.
Types Of Bits
- Straight Bits
- Dovetail Bits
- Flush Trim Bits
Matching Bit To Wood Thickness
| Wood Thickness | Recommended Bit |
|---|---|
| 1/2 inch | 1/2 inch dovetail bit |
| 3/4 inch | 3/4 inch dovetail bit |
| 1 inch | 1 inch dovetail bit |
Securing The Wood
When using a Porter Cable Dovetail Jig, securing the wood is a crucial step in achieving accurate and precise dovetail joints. Properly securing the wood ensures stability and prevents any unnecessary movement during the cutting process. There are several key steps to consider when securing the wood for dovetail joint creation.
Clamping The Boards
Start by clamping the boards securely onto the jig platform using appropriate clamps. Ensure that the boards are held firmly in place to prevent any shifting or misalignment during the cutting process. Proper clamping is essential for maintaining the integrity of the joint and achieving a professional result.
Aligning For Precision
Next, carefully align the boards to ensure they are positioned accurately for the dovetail joint creation. Use precise measurements and alignment guides provided with the jig to achieve the desired fit and finish. Taking the time to align the boards correctly will contribute to the overall precision of the dovetail joint.
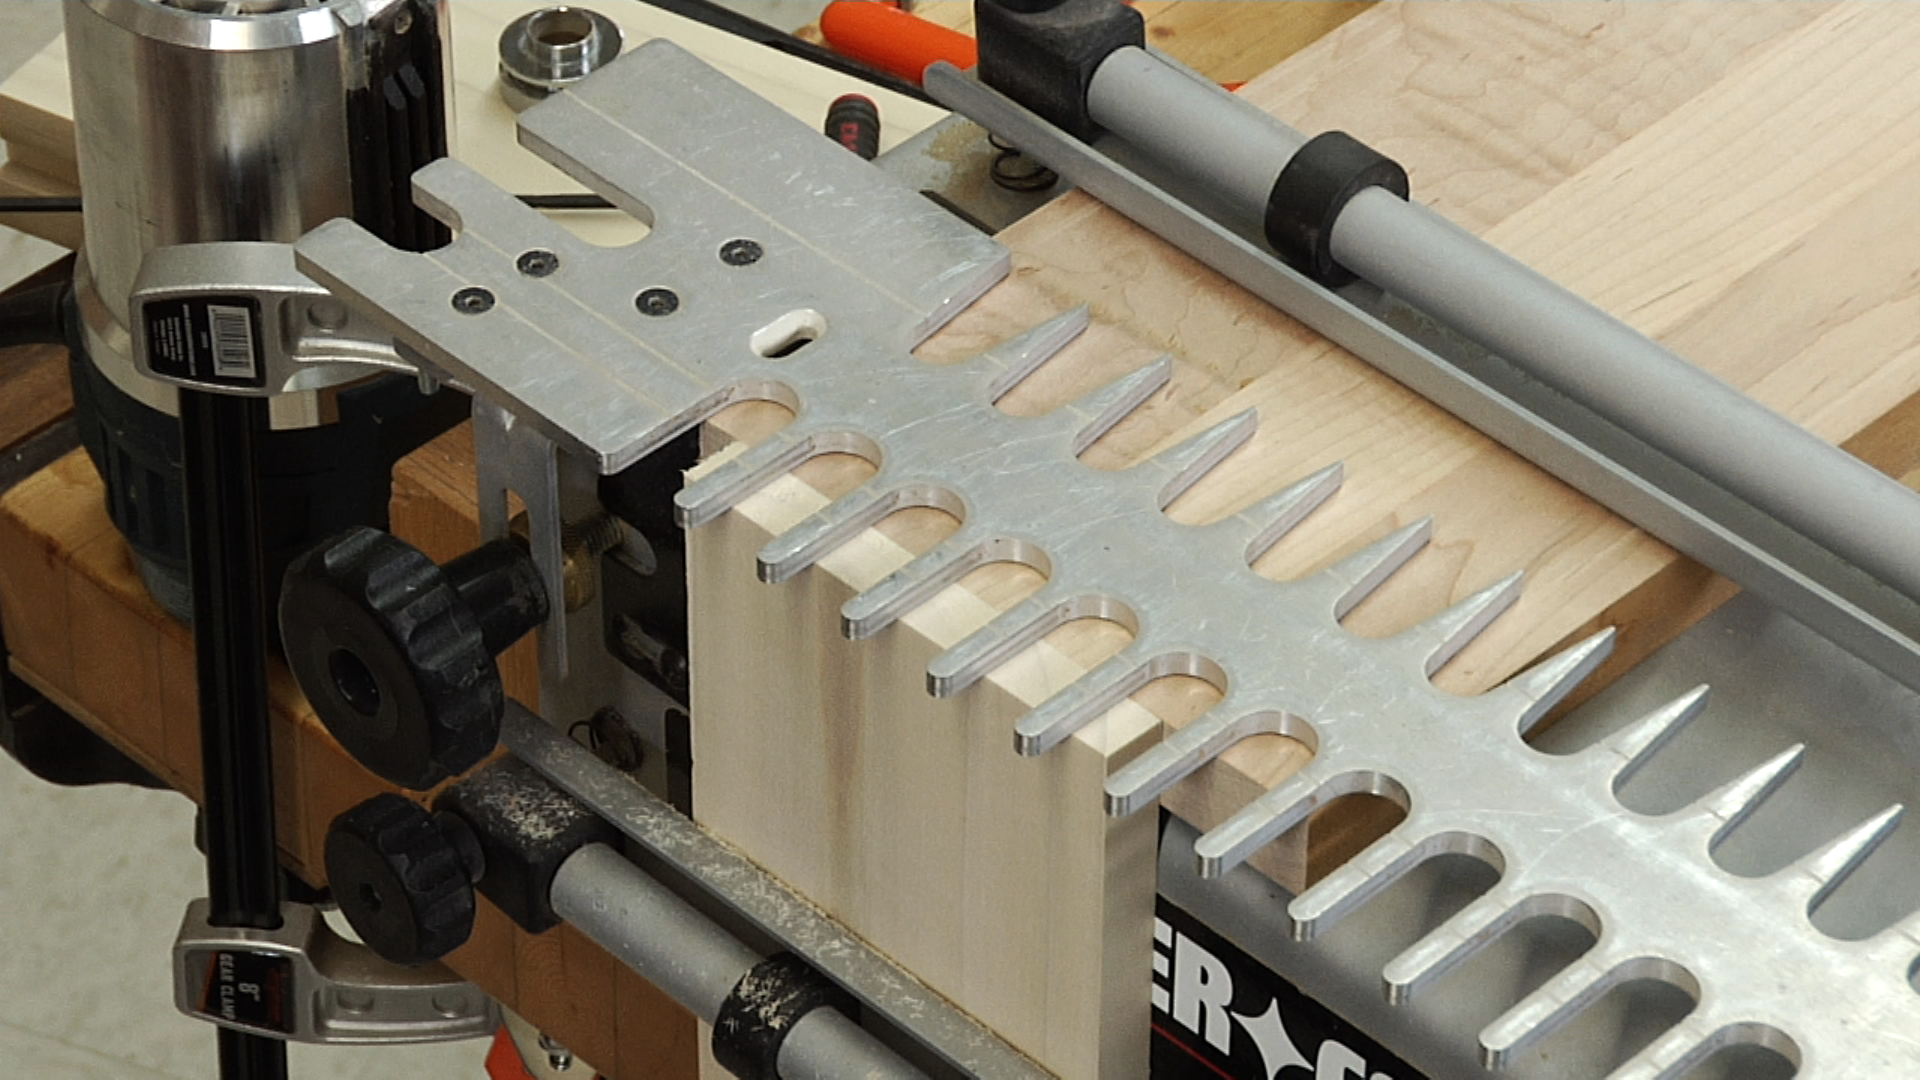
Setting Up The Template
When it comes to using a Porter Cable Dovetail Jig, setting up the template is the crucial first step in creating precise and professional-looking dovetail joints. The template alignment, depth, and spacing adjustments are essential for achieving the perfect fit for your woodworking projects.
Template Alignment
Proper template alignment is fundamental to ensure the accuracy of your dovetail joints. Begin by securing the template to the workpiece using clamps or screws to prevent any movement during the routing process. Check the alignment by using a square to ensure that the template is perfectly perpendicular to the workpiece.
Depth And Spacing Adjustments
Adjusting the depth and spacing of the dovetail jig is vital for achieving the desired fit and appearance of your joints. Follow the manufacturer’s instructions to set the appropriate depth for the router bit, and use the provided guides to configure the spacing between the tails and pins.
Routing Techniques
Discover effective routing techniques with the Porter Cable Dovetail Jig for precise and professional woodworking results. Create flawless dovetail joints effortlessly with this innovative tool, perfect for both beginners and experienced craftsmen. Master the art of dovetail joinery with ease using this versatile jig.
Cutting The Joints
Routing techniques are crucial for using the Porter Cable Dovetail Jig effectively. Cutting the joints is a key step that requires precision and attention to detail. Ensure the router bit is properly set up before starting the routing process.
Managing Chips And Dust
Managing chips and dust is essential for a clean and efficient routing process. Use a shop vacuum or dust collector to minimize debris buildup and maintain a clear workspace. Wear protective gear to safeguard against flying wood chips.
Troubleshooting Common Issues
When using a Porter Cable Dovetail Jig, common issues may arise. To troubleshoot, ensure the router is compatible and properly set up. Verify the dovetail bit is sharp and correctly installed.
Additionally, double-check the wood’s thickness and make any necessary adjustments for precise results. If you’re having trouble with your Porter Cable dovetail jig, don’t worry, you’re not alone.
Even the most experienced woodworkers run into issues from time to time. Fortunately, most of these problems can be easily solved with a little troubleshooting. In this section, we’ll take a look at some of the most common issues that arise when using the Porter Cable dovetail jig and how to fix them.
Loose Fits
One of the most common issues you might encounter when using the Porter Cable dovetail jig is loose fits. This can happen if you’re not careful when setting up the jig or if you’re not using the right size bit.
To fix this issue, make sure to tighten all the knobs and screws on the jig before using it. You should also double-check that you’re using the correct size bit for your project. A loose fit can cause your joint to come apart, so it’s important to address this issue right away.
Preventing Tear-out
Tear-out is another common issue when using a dovetail jig. This occurs when the wood fibers tear away from the rest of the board, leaving an unsightly and weak joint. To prevent tear-out, make sure that your bit is sharp and clean before using it.
You should also use a backer board to support the wood as you cut, which will help prevent the wood from splintering. Finally, make sure to take your time and go slowly when cutting your dovetails to prevent tear-out.
By following the tips outlined in this section, you should be able to troubleshoot most common issues when using the Porter Cable dovetail jig. Remember to take your time and pay attention to detail when setting up the jig and cutting your dovetails. With a little practice and patience, you’ll be able to create beautiful, strong joints in no time!
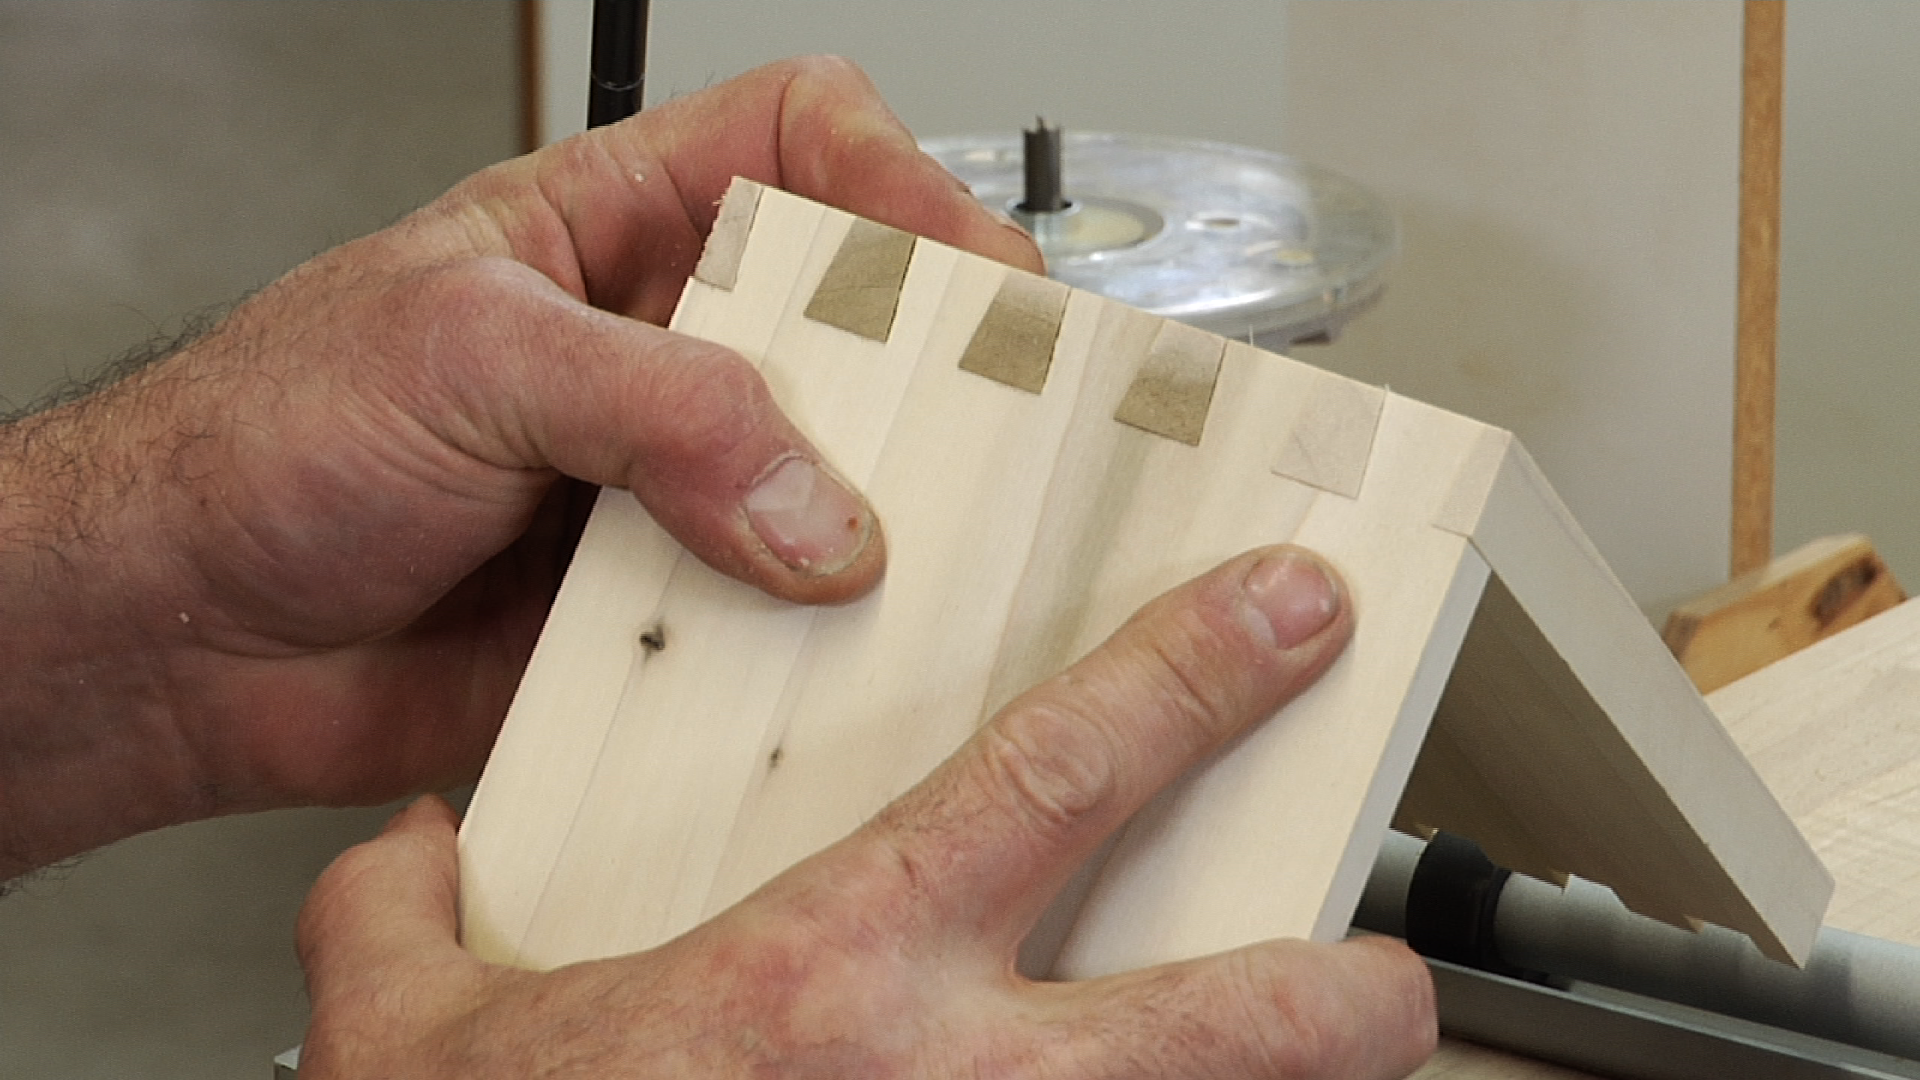
Finishing Touches
Mastering the use of the Porter Cable Dovetail Jig involves paying close attention to the finishing touches. By carefully adjusting the depth and ensuring a tight fit, you can create precise and professional-looking dovetail joints. Take your time to perfect the final adjustments for a flawless result.
Sanding The Joints
To ensure a smooth finish, sand the dovetail joints gently with fine sandpaper.
Assembling The Final Product
Once sanded, assemble the final product using wood glue for sturdy construction. After sanding the joints, assemble the final product with precision for a professional look.
Maintenance And Care For The Jig
Proper maintenance and care are essential for maximizing the lifespan and performance of your Porter Cable Dovetail Jig. Regularly clean the jig after each use and store it in a dry place to prevent rust and ensure precision in your woodworking projects.
Regularly check and tighten any loose screws or parts to keep the jig in top working condition. Maintenance and Care for the Jig Proper maintenance and care of your Porter Cable dovetail jig are essential to ensure its longevity and optimal performance.
Regular cleaning and appropriate storage are key to keeping your jig in top condition for all your woodworking projects. Cleaning Cleaning your dovetail jig after each use is important to remove any sawdust, debris, or residue that may have accumulated during operation.
Use a soft brush or compressed air to gently remove sawdust from the jig’s components, ensuring that all moving parts are free from obstructions. For stubborn residue, a mild solvent can be used, followed by thorough drying to prevent rust or corrosion.
Storage Tips When not in use, it’s crucial to store your dovetail jig in a clean, dry, and well-ventilated environment. Consider using a protective cover or case to shield the jig from dust and moisture when stored.
Additionally, to prevent any damage, it’s advisable to store the jig in a secure location where it won’t be knocked or jostled. These simple maintenance practices will help to preserve the precision and functionality of your Porter Cable dovetail jig, ensuring it remains a valuable tool for your woodworking projects.
Advanced Tips For Mastering The Jig
Advanced Tips for Mastering the Porter Cable Dovetail Jig can take your woodworking projects to the next level. By incorporating decorative elements, speeding up the process, and mastering the intricacies of the jig, you can achieve professional-looking results. Let’s explore some advanced tips to help you make the most of this versatile tool.
Incorporating Decorative Elements
Enhance the aesthetic appeal of your dovetail joints by incorporating decorative elements. Consider adding inlays or contrasting wood species to create visually striking dovetails. Experiment with different router bits to achieve unique profiles that elevate the overall design of your project.
Speeding Up The Process
Maximize efficiency by using specialized accessories such as router guide bushings to expedite the routing process.
Additionally, creating multiple templates for common dovetail configurations can streamline your workflow and reduce setup time. Utilize quick-release clamps to secure workpieces in place swiftly, allowing you to focus on precision and accuracy.

Frequently Asked Questions
What Is The Easiest Dovetail Jig To Use?
The Leigh D4R Pro is considered the easiest dovetail jig to use. It has a unique guide system that makes setup and routing fast and accurate.
The jig also has a wide range of adjustable settings, making it versatile and suitable for a variety of woodworking projects.
Can You Cut Box Joints With A Dovetail Jig?
Yes, you can cut box joints with a dovetail jig. This versatile tool allows for precise and efficient joint cutting.
What Is A Dovetail Jig Used For?
A dovetail jig is used for creating precise and strong dovetail joints in woodworking. It helps to guide the cutting of the wood to make interlocking joints. This tool ensures accuracy and efficiency in creating dovetail joints for furniture and other wood projects.
How Do You Connect A Dovetail Joint?
Connect a dovetail joint by aligning the pieces and sliding them together. Secure with glue or fasteners.
Conclusion
The Porter Cable Dovetail Jig is a versatile tool for creating strong and precise dovetail joints.
By following the step-by-step instructions and taking the time to practice and perfect your technique, you can achieve professional-looking results.
With its durability and ease of use, this tool is a valuable addition to any woodworker’s arsenal.