To take the disc off a DeWalt grinder, first unplug the tool, then use the provided wrench to loosen the nut and remove the disc. Proper maintenance of your DeWalt grinder includes changing the disc when necessary.
Learning how to safely and efficiently take off and replace the disc is crucial for the longevity and performance of your tool. In this guide, we will walk you through the step-by-step process of removing the disc from your DeWalt grinder.
Whether you are a DIY enthusiast or a professional tradesperson, having this skill will ensure your tool is always in top working condition. Let’s dive into the easy-to-follow instructions on how to take the disc off your DeWalt grinder.
Contents
Understanding Your Dewalt Grinder
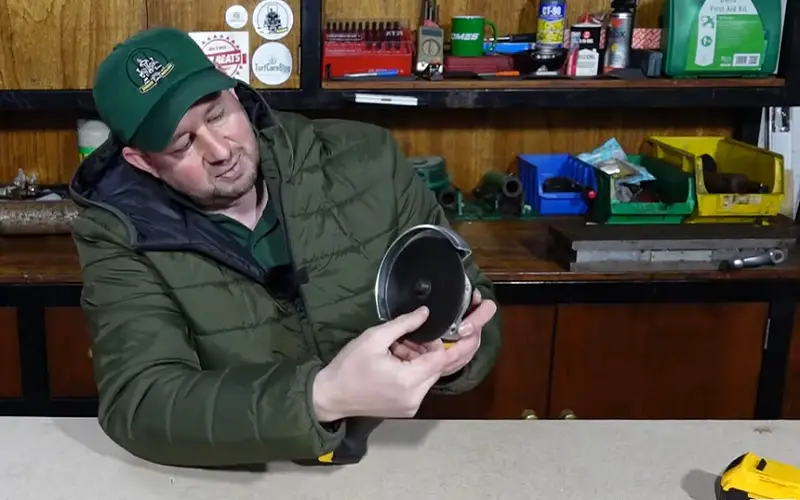
Learn how to remove a disc from your Dewalt grinder with ease. Discover step-by-step instructions to safely and efficiently take off the disc, ensuring smooth operation for your power tool.
Understanding Your Dewalt Grinder:
Types Of Dewalt Grinders
Dewalt offers various types of grinders, each designed for specific tasks. The most common ones are angle grinders, bench grinders, and die grinders.
Angle grinders are versatile, suitable for cutting, grinding, and polishing metal, while bench grinders are primarily used for sharpening tools. On the other hand, die grinders are small, handheld tools ideal for intricate work.
Disc Removal Mechanism
Dewalt grinders are equipped with a straightforward disc removal mechanism making it relatively simple to change discs. To remove the disc, first, lock the spindle by pressing the spindle lock button on the grinder.
Then, use a wrench to loosen the nut holding the disc in place. Once the nut is loosened, carefully remove the old disc and replace it with a new one, ensuring it is properly aligned with the spindle.
Finally, tighten the nut securely before unlocking the spindle. Taking the disc off a Dewalt grinder is a fundamental maintenance task that any DIY enthusiast or professional should be able to perform.
By understanding the different types of Dewalt grinders and the process of disc removal, you can effectively utilize your tool while maintaining its optimal performance. Remember to always consult the user manual for your specific Dewalt grinder model before performing any maintenance tasks.
Preparing For Disc Removal
Before proceeding with disc removal, safety precautions must be a top priority.
Gathering Necessary Tools
To remove the disc, have the following tools ready:
- Allen wrench
- Work gloves
- Protective eyewear
- Replacement disc
Step-by-step Disc Removal Process
Removing a disc from your Dewalt grinder is essential for maintenance and replacement purposes.
By following a simple step-by-step process, you can ensure a smooth disc removal without any hassle. In this section, we will guide you through the process, starting from securing the grinder to unlocking the disc.
Securing The Grinder
To begin with, it is crucial to secure the grinder before attempting to remove the disc. This will help prevent any accidental slips or injuries during the process.
Follow these steps to secure the grinder:
- Power off the Dewalt grinder and unplug it from the power source.
- Place the grinder on a flat and stable surface, ensuring it won’t move or wobble during the removal process.
- Use clamps or a vise to secure the grinder firmly in place. This will provide stability and prevent any unwanted movement.
Unlocking The Disc
Once the grinder is securely positioned, it’s time to unlock the disc. Follow these steps to unlock the disc:
- Locate the spindle lock button or lever on your Dewalt grinder. This feature is usually present near the disc and is used to secure the spindle in place.
- Press or engage the spindle lock button or lever to lock the spindle. This will prevent it from spinning during the disc removal process.
- Next, use a wrench or an accompanying tool to loosen the disc retaining nut. Turn the nut counterclockwise to loosen it and remove it completely.
- With the retaining nut removed, gently pull the disc away from the grinder’s spindle. Be cautious not to touch the disc’s sharp edges to avoid any injuries.
By following these straightforward steps, you can safely and efficiently remove the disc from your Dewalt grinder.
Remember to always prioritize safety by securing the grinder and using appropriate tools during the removal process. This will ensure smooth disc removal and enhance the overall longevity of your grinder.
Tips For Smooth Removal
When it comes to taking the disc off a Dewalt grinder, proper removal is essential to ensure the safety and functionality of the tool.
By following these tips for smooth removal, you can maintain your grinder and prevent damage to the machine or injury to yourself. Let’s explore the key steps to ensure a smooth and safe disc removal process.
Inspecting For Damage
Before starting the disc removal process, it’s crucial to inspect the grinder for any signs of damage.
This includes checking for cracks, dents, or any other visible issues that could affect the removal process.
If you notice any damage, it’s important to address it before proceeding further.
Cleaning The Grinder
Prior to removing the disc, it’s recommended to clean the grinder to ensure a smooth removal process.
Use a brush or compressed air to remove any debris, dust, or residue that may be present. This simple step can help prevent any interference with the disc removal and ensure a hassle-free process.
Troubleshooting
When taking the disc off your Dewalt grinder, you may encounter issues that require troubleshooting. Here are some solutions:
Stuck Disc Solutions
For a disc that won’t budge, try applying lubricant and gently tapping the disc to loosen it.
Dealing With Stubborn Residue
If residue is causing the disc to stick, use a wire brush to clean the arbor and threads.

Maintenance And Storage
Proper maintenance and storage are crucial for the longevity and efficiency of your Dewalt grinder.
By adhering to regular maintenance practices and employing suitable storage techniques, you can ensure that your grinder remains in optimal working condition for an extended period.
Proper Storage Techniques
- Store the Dewalt grinder in a clean, dry area away from direct sunlight or moisture. Ensure that the storage space is well-ventilated to prevent rust or corrosion.
- Utilize a designated storage container or case to protect the grinder from dust and debris when not in use. This will also prevent accidental damage or impact that could occur if the grinder is left exposed.
- Consider hanging the grinder on a hook or storing it on a shelf to avoid contact with other tools or equipment, reducing the risk of potential damage or wear.
Regular Maintenance Practices
- Inspect the grinder before and after each use, checking for any signs of wear, damage, or loose components. Address any issues immediately to prevent further damage.
- Regularly clean the grinder by removing any dust, debris, or residue. Use a soft brush or compressed air to clear the vents and moving parts, ensuring smooth operation.
- Apply a thin layer of lubricating oil to the grinder’s moving parts to minimize friction and wear. This will help maintain the grinder’s performance and extend its lifespan.
Frequently Asked Questions
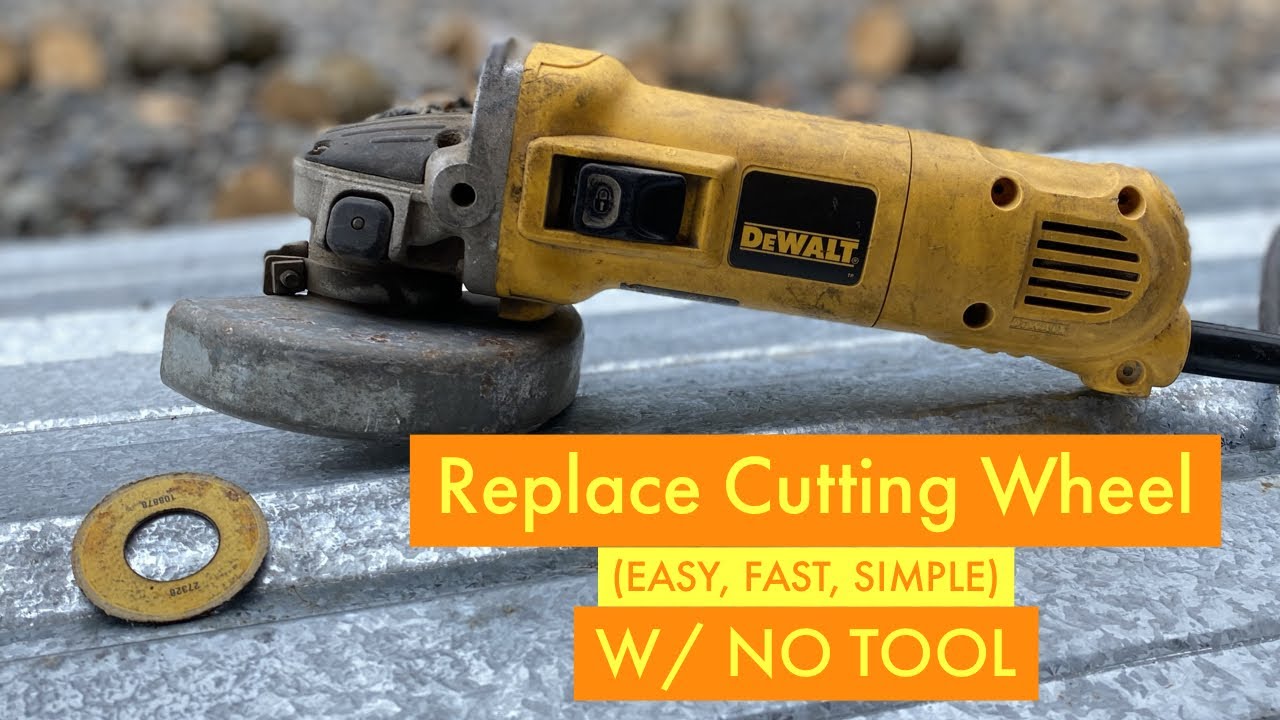
How To Remove Disc From Dewalt Angle Grinder?
To remove the disc from a Dewalt angle grinder, follow these steps:
1. Unplug the grinder for safety.
2. Use a wrench to loosen the spindle nut on the grinder.
3. Once the nut is loose, remove it and the flange from the spindle.
4. Slide off the disc carefully.
5. Replace the disc if necessary and reassemble the grinder.
How Do You Get A Disc Out Of A Grinder?
To remove a disc from a grinder, first, unplug the tool. Then, use the wrench supplied to unscrew the disc. Carefully lift off the disc once it’s loose.
How To Put A Cut Off Wheel On A Dewalt Grinder?
To put a cut off wheel on a Dewalt grinder, first, remove the grinder’s nut and washer.
Then, place the cut off wheel on the grinder’s spindle. Finally, reattach the washer and nut, and tighten securely, using the wrench.
How Do You Remove An Angle Grinder Disc Without A Tool?
To remove an angle grinder disc without a tool, carefully hold the grinder and unscrew the disc by turning it counterclockwise.
Then, remove the disc by hand. Be sure to wear protective gloves, and always double-check that the grinder is unplugged before beginning.
Conclusion
Replacing or removing a disc off a Dewalt grinder can greatly enhance your tool’s efficiency and performance. This simple process can be done with the right technique and tools.
By following the steps outlined in this guide, you can easily master this task and get back to your projects in no time!