To replace trimmer line on an Echo GT 225, first, turn off the engine and disconnect the spark plug. Then, remove the spool and old trimmer line, and insert the new line following the arrows on the spool.
Lastly, reassemble the trimmer and reconnect the spark plug. Are you struggling with replacing the trimmer line on your Echo GT 225? No worries, I’ve got you covered with a quick and easy guide to help you tackle this task like a pro.
By following a few simple steps, you’ll have your trimmer ready to tackle those overgrown weeds and grass in no time. Let’s dive in and get your Echo GT 225 back in action with a fresh trimmer line!
Contents
- Introduction To Echo GT 225 Line Replacement
- Safety Precautions Before Starting
- Accessing The Trimmer Head
- Choosing The Right Trimmer Line
- Preparing The New Trimmer Line
- Installing The New Line
- Reassembling The Trimmer Head
- Testing The Trimmer For Proper Function
- Maintenance Tips For Trimmer Line Longevity
- Troubleshooting Common Line Replacement Issues
- Frequently Asked Questions
- Conclusion
Introduction To Echo GT 225 Line Replacement
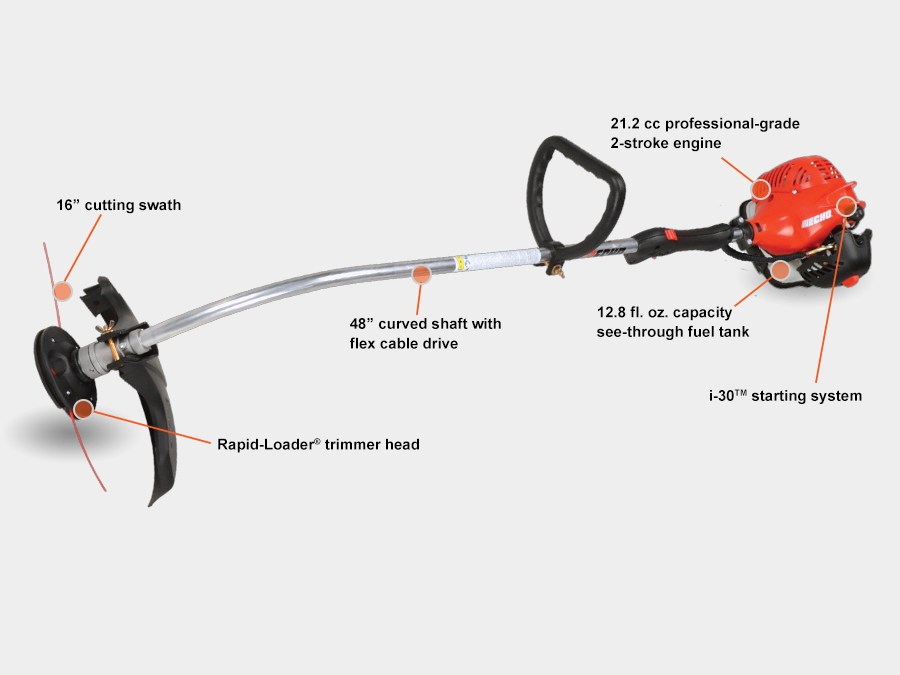
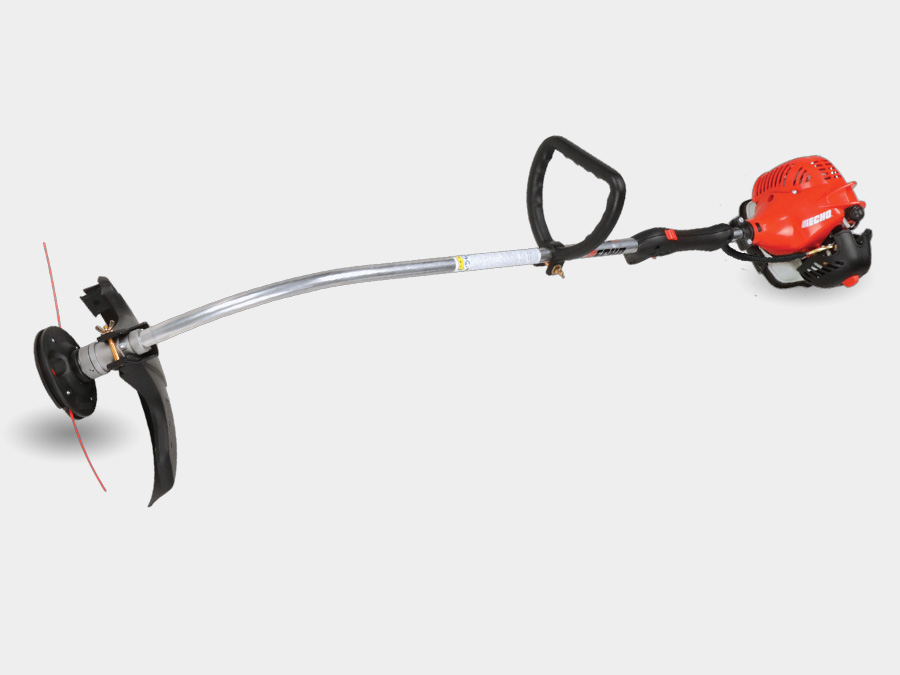
When it comes to maintaining your lawn, having a reliable trimmer is essential. The Echo GT 225 is a popular choice for homeowners due to its efficiency and ease of use.
One important aspect of keeping your trimmer in top condition is regular line replacement. In this guide, we will walk you through the process of replacing the trimmer line on the Echo GT 225.
Importance Of Regular Line Replacement
Regular line replacement is crucial for maintaining the performance of your trimmer. Over time, the trimmer line wears down, leading to reduced cutting efficiency.
By replacing the line regularly, you ensure that the trimmer can tackle tough weeds and grass with ease, keeping your lawn looking neat and well-maintained.
Tools Needed For The Job
Before you begin the line replacement process, it’s important to gather the necessary tools. The following items are required for this task:
- Replacement trimmer line
- Work gloves
- Safety goggles
- Flathead screwdriver (if applicable)
Safety Precautions Before Starting
Before starting the process of replacing the trimmer line on your Echo GT 225, it is crucial to follow safety precautions. These precautions ensure your well-being and prevent accidents. Remember, safety always comes first.
Powering Off The Trimmer
1. Turn off the Echo GT 225 trimmer by pressing the stop switch to the “off” position.
Wearing Appropriate Protective Gear
1. Prior to starting, put on safety glasses to protect your eyes from debris.
2. Wear heavy-duty gloves to shield your hands from sharp edges and rotating parts.
3. Wear closed-toe shoes to protect your feet from any falling objects.
Accessing The Trimmer Head
To access the trimmer head on the Echo GT 225 for replacing the trimmer line, follow these steps: First, turn off the trimmer and disconnect the spark plug. Next, remove the spool cover and take out the spool. Finally, replace the trimmer line and reassemble the trimmer head for smooth operation.
To replace the trimmer line on your Echo GT 225, you must first access the trimmer head. The trimmer head is located at the bottom of the trimmer, and it holds the spool that contains the trimmer line. Here’s how to access the trimmer head:
Removing The Spool Cap
The first step in accessing the trimmer head is to remove the spool cap. The spool cap covers the spool and holds the trimmer line in place. To remove the spool cap, follow these steps:
- Turn off the trimmer and unplug it if it’s electric.
- Hold the spool with one hand and turn the spool cap counterclockwise with the other hand.
- Remove the spool cap from the trimmer head.
Taking Out The Old Line
After removing the spool cap, you can take out the old trimmer line. Here’s how to do it:
- Remove the spool from the trimmer head.
- Take out any remaining trimmer line from the spool.
- Cut a length of new trimmer line to the manufacturer’s recommended length.
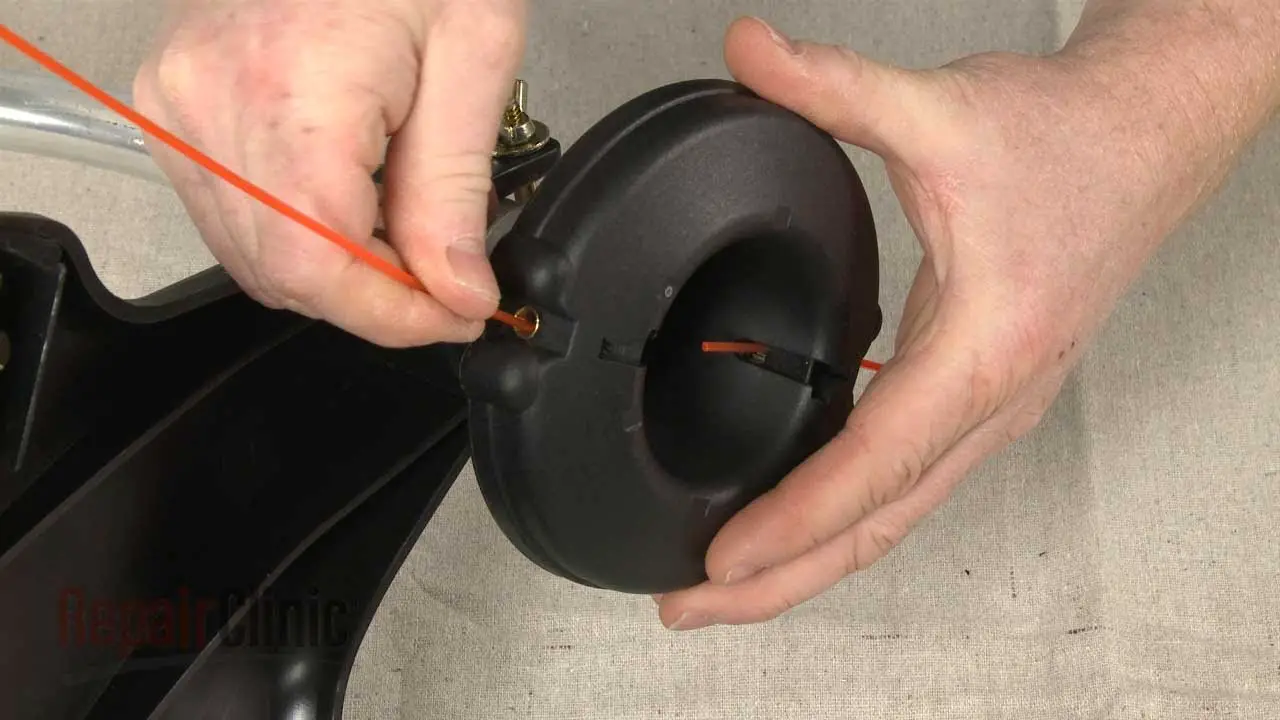
- Insert one end of the trimmer line into the hole on the spool.
- Wind the trimmer line around the spool in the direction indicated by the arrows on the spool.
- Leave about 6 inches of trimmer line unwound and insert the other end into the opposite hole on the spool.
- Replace the spool in the trimmer head.
Now that you’ve accessed the trimmer head and replaced the trimmer line, you can reattach the spool cap and start trimming again.
Choosing The Right Trimmer Line
When it comes to replacing trimmer line on your Echo GT 225, choosing the right trimmer line is essential for optimal performance.
The type and diameter of the line can impact the efficiency and effectiveness of your trimmer. Let’s explore the key factors to consider when selecting the right trimmer line for your Echo GT 225.
Types Of Trimmer Line
There are various types of trimmer line available, each designed for specific cutting tasks. Round trimmer line is suitable for general-purpose trimming and is easy to use.
Twisted trimmer line provides enhanced cutting power, making it ideal for thicker grass and weeds. Serrated trimmer line features teeth that aid in cutting through dense vegetation, making it a great choice for tough, overgrown areas.
Selecting The Correct Diameter
Choosing the correct diameter of the trimmer line is crucial for optimal cutting performance. The Echo GT 225 is compatible with trimmer lines ranging from 0.080 inches to 0.105 inches in diameter. Thicker lines are suitable for tackling heavier vegetation, while thinner lines are ideal for lighter trimming tasks.
Preparing The New Trimmer Line
When it comes to replacing the trimmer line on your Echo GT 225, preparing the new trimmer line is an essential step to ensure smooth and efficient operation.
Proper preparation of the new trimmer line will help to avoid tangles, jams, and uneven cutting, ultimately saving you time and frustration.
In this section, we will walk you through the process of preparing the new trimmer line, including cutting the line to the proper length and creating loops and insertion tips.
Cutting The Line To The Proper Length
To begin, it’s crucial to cut the trimmer line to the correct length. Refer to the user manual for the Echo GT 225 to determine the recommended line length.
Use a pair of sharp scissors or wire cutters to make a clean, straight cut. Avoid using dull tools, as they can cause fraying and uneven edges, leading to complications during use.
Creating Loops And Insertion Tips
After cutting the line to the proper length, the next step involves creating loops and insertion tips. Start by folding the line in half to form a loop.
Ensure that the ends of the line are evenly aligned to create a balanced loop. Then, twist the loop several times to create a secure insertion point that will fit seamlessly into the trimmer head.

Installing The New Line
Installing a new trimmer line on your Echo GT 225 is an important part of maintaining your yard. The process involves winding the line onto the spool and securing the ends of the line.
In this section, we will explore the steps involved in installing the new line and discuss some tips to make the process easier.
Winding The Line Onto The Spool
To begin the process, you will need to remove the spool from the trimmer head. Once you have removed the spool, you can begin winding the line onto the spool. Start by inserting one end of the line into the anchor hole on the spool.
Then, wind the line in the direction indicated on the spool until you have wound the line around the spool several times. Next, insert the second end of the line into the anchor hole on the opposite side of the spool.
Hold the spool in one hand and continue winding the line in the same direction as before with the other hand. Be sure to keep the line tight and evenly spaced as you wind it onto the spool. Continue winding the line until you have filled the spool to the desired level.
Securing The Line Ends
Once you have wound the line onto the spool, you will need to secure the ends of the line. To do this, insert each end of the line into the holes on the spool.
Be sure to follow the instructions on your trimmer to ensure that you insert the line correctly. Once the line is inserted, pull it tight to ensure that it is securely in place.
Finally, reattach the spool to the trimmer head and you are ready to go. With these simple steps, you can easily install a new trimmer line on your Echo GT 225 and get back to maintaining your yard in no time.
Reassembling The Trimmer Head
After replacing the trimmer line on your Echo GT 225, it’s time to reassemble the trimmer head. Follow these steps to ensure proper reassembly:
Attaching The Spool Cap
- Align: Align the spool cap with the trimmer head.
- Press: Press down firmly to secure the spool cap in place.
Ensuring Everything Is Secure
- Check: Check that the spool cap is tightly attached.
- Tug: Give a gentle tug on the trimmer line to ensure it’s secure.
- Spin: Spin the trimmer head to verify smooth rotation.
Testing The Trimmer For Proper Function
When it comes to testing the trimmer for proper function, it’s crucial to ensure that the replacement of the trimmer line has been done correctly.
Before putting the trimmer to use, it’s important to carry out a few checks and adjustments to guarantee its safe and efficient operation.
Performing A Safety Check
Start by conducting a thorough safety inspection of the Echo GT 225 trimmer to identify any potential hazards or malfunctions. Check for loose parts, damaged components, and signs of wear and tear that may affect its performance.
Making Adjustments If Necessary
If any issues are detected during the safety check, take the necessary steps to address them. This may involve tightening screws, replacing worn-out parts, or adjusting the trimmer’s settings to ensure it operates smoothly and safely.
Maintenance Tips For Trimmer Line Longevity
Proper maintenance of your trimmer line is essential for ensuring its longevity and optimal performance. By following some simple maintenance tips, you can keep your Echo GT 225 trimmer line in top condition for longer periods.
Storing Your Trimmer Properly
Store your trimmer in a cool, dry place away from direct sunlight and moisture to prevent damage.
Regular Cleaning And Inspections
- Clean the trimmer line after each use to remove debris and prevent clogging.
- Inspect the trimmer line regularly for wear and tear, replacing it when necessary.
Troubleshooting Common Line Replacement Issues
When it comes to maintaining your Echo GT 225 trimmer, replacing the trimmer line is a crucial task. However, there are common issues that can arise during the line replacement process.
Understanding how to troubleshoot these problems can make the task much easier and save you time and frustration. In this guide, we will address some of the most common line replacement issues and provide solutions to help you get your trimmer back in working order.
Line Feeding Problems
If you are experiencing issues with the trimmer line not feeding properly, there are a few steps you can take to troubleshoot the problem. First, ensure that you are using the correct type and diameter of trimmer line for your Echo GT 225.
Next, check for any tangles or knots in the line that may be preventing it from feeding smoothly. Additionally, inspect the spool for any debris or grass clippings that could be obstructing the line. If the issue persists, it may be necessary to disassemble the trimmer head and inspect the line feed mechanism for any damage or blockages.
Spool Jamming Solutions
Spool jamming can be a frustrating issue when replacing trimmer line, but there are steps you can take to resolve this problem. Start by ensuring that you are winding the trimmer line onto the spool correctly, following the manufacturer’s guidelines.
Next, check for any obstructions or tangled line inside the spool that may be causing the jamming.
Moreover, make sure that the spool cover is securely fastened to the trimmer head, as a loose cover can lead to jamming. If the spool continues to jam, it may be necessary to replace the spool with a new one to ensure smooth line feeding.
Frequently Asked Questions
How Do You Remove The Head Of An Echo Gt 225 Trimmer?
To remove the head of an Echo GT 225 trimmer, unscrew the bump knob counterclockwise, then remove the spool cover.
How To Replace Trimmer Line Bump Feed?
To replace trimmer line bump feed, follow these steps:
1. Turn off the trimmer and disconnect the spark plug.
2. Remove the spool and take out any remaining line.
3. Cut a new line to the required length.
4. Insert the line into the spool, following the directional arrows.
5. Reassemble the trimmer and test the line.
What Size Trimmer Line For Echo Gt 225?
The Echo GT 225 trimmer uses 0. 080-inch diameter trimmer line for optimal performance.
How To Load String In Echo Trimmer?
To load string in an Echo trimmer, follow these steps:
1. Turn off the trimmer and disconnect the spark plug.
2. Remove the spool cover and pull out the old string.
3. Cut a new piece of trimmer line and insert it into the spool.
4. Wind the line following the arrows on the spool.
5. Reassemble the trimmer and you’re ready to go.
Conclusion
Replacing trimmer line on an Echo GT 225 is a straightforward task that can be done quickly with the right tools and knowledge.
By following the step-by-step guide outlined in this blog post, you can ensure that your trimmer is always ready for action. Keeping your equipment in top condition will help you maintain a well-manicured lawn or garden.