
I’ve replaced more Bosch dishwasher fascia panels than I care to admit, often after a coffee-fueled midnight troubleshooting session. If you want a clear, friendly, and funny walk-through on how to replace Bosch dishwasher fascia panel parts without breaking clips or your spirit, you’re in the right place. I’ll show you exactly what to do, what to avoid, and how to get your dishwasher looking and working like new.
Source: www.deaven.net
Contents
- What The Fascia Panel Does And When To Replace It
- Tools, Parts, And Prep
- Step-By-Step: Replace A Bosch Dishwasher Fascia Panel
- Model Variations And Tricky Bits
- Testing, Reassembly, And Error Checks
- Cost, Time, And Skill Level
- Common Mistakes To Avoid
- Safety And Warranty Notes
- Frequently Asked Questions Of How To Replace Bosch Dishwasher Fascia Panel
- How do I find the correct Bosch fascia panel part number?
- Do I need to remove the entire dishwasher from the cabinet?
- Why do my buttons not work after installing the new panel?
- Can a bad fascia panel cause error codes?
- Is adhesive needed to secure the fascia panel?
- Will this fix a cracked display window?
- What if I see moisture inside the control area?
- Conclusion
- Watch This Video on how to replace bosch dishwasher fascia panel
What The Fascia Panel Does And When To Replace It
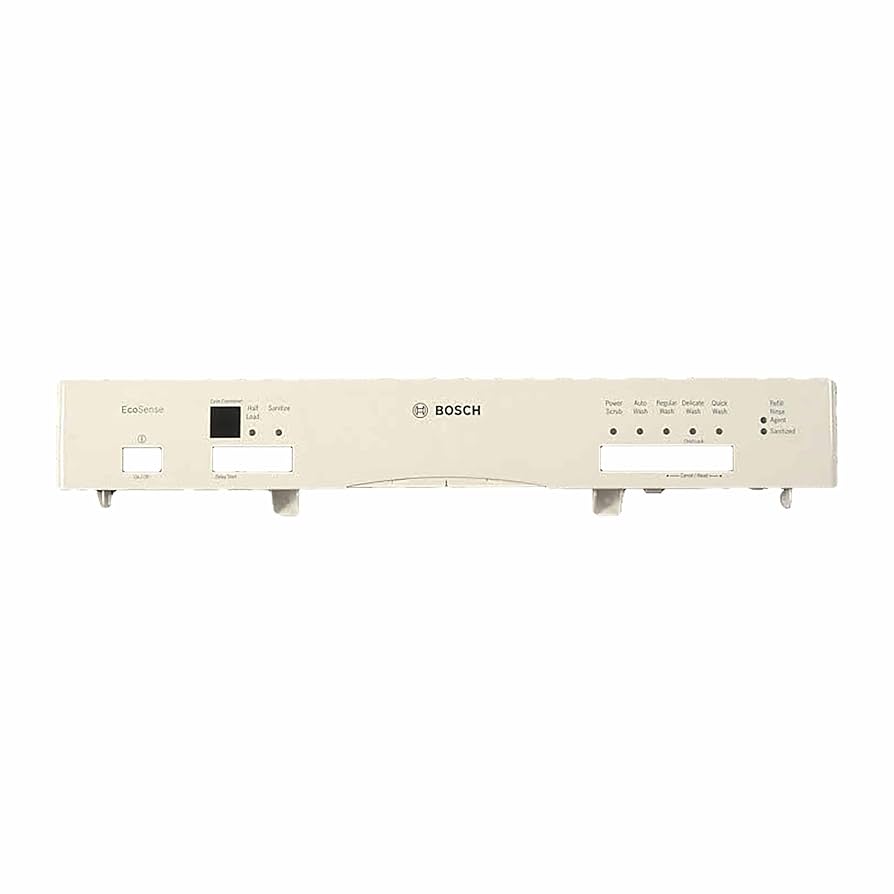
The fascia panel is the face of your Bosch dishwasher. It holds the buttons, display, and sometimes the touch controls. It doesn’t just look pretty. It protects the control board and lets you tell your machine what to do.
You should replace the fascia panel if the buttons stick, the plastic is cracked, the display lens is foggy, or you’re upgrading to match your kitchen. If the controls work but the front is damaged, a fascia swap is usually faster and cheaper than a full control assembly.
From experience, many issues come from worn button posts, damaged mounting tabs, or a door that was pulled open mid-cycle. If the controls fail after a spill, the fascia can trap moisture. In that case, inspect the control board while you’re in there.

Source: www.youtube.com
Tools, Parts, And Prep
Before you start, cut power. Unplug the dishwasher or flip the breaker. You might also turn off water and pull the machine forward for easier access, but you can often work with the door open in place.
What you’ll need:
- Replacement Bosch fascia panel Match by model number like SHEM, SHPM, or 800 Series variant.
- Torx screwdrivers Most Bosch use T15 and T20.
- Small flat screwdriver For clips and prying gently.
- Painter’s tape To protect stainless surfaces and to label screws.
- Microfiber cloth To clean while open.
- Optional: Multimeter If you want to verify button function or check the door switch while there.
Prep steps:
- Open the door and remove the lower rack for space.
- Place a towel on the door to protect it when you lay parts down.
- Take photos of each step with your phone. You’ll thank yourself in five minutes.
- Label screws by location. Bosch loves Torx, but lengths vary.

Source: www.amazon.com
Step-By-Step: Replace A Bosch Dishwasher Fascia Panel
These steps cover most Bosch front-control models. If yours is top-control, note the variations in the next section.
Step 1: Kill power
- Unplug or switch off the breaker. Safety first. No heroics.
Step 2: Open the door and remove outer screws
- Look along the inner door perimeter. Remove the Torx screws that hold the outer panel and control area. Keep the shorter screws separate from the longer ones.
Step 3: Separate the inner and outer door skins
- Hold the outer panel so it doesn’t drop. Gently lift it away. On many models, the control fascia stays attached to the top edge. If it doesn’t, don’t panic.
Step 4: Access the control fascia assembly
- At the top of the door, you’ll see the fascia clipped to the control module or a bracket. Remove the Torx screws that secure the fascia to the door and to the control module.
Step 5: Disconnect wiring and ribbon cables
- Take a photo of connectors. Carefully unplug the keypad ribbon or harness from the control board. Do not pull by the cable. Use the connector body. If there’s a latch, gently lift it with a small flat screwdriver.
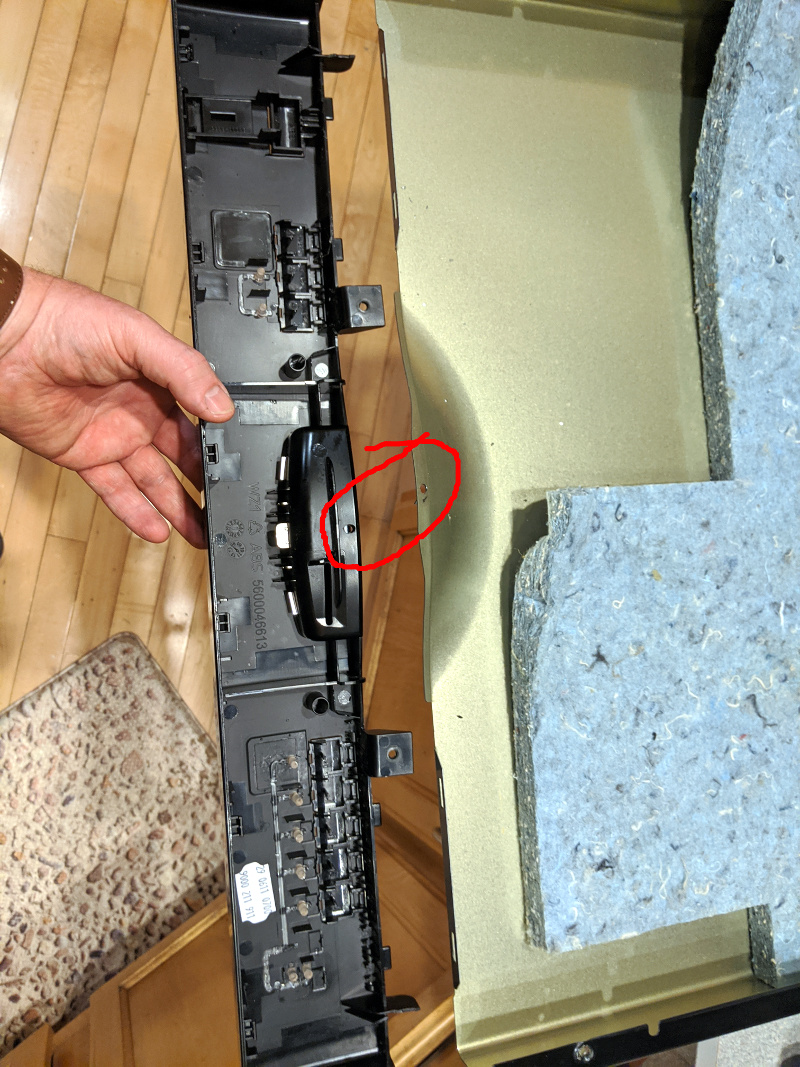
Step 6: Release fascia clips
- Locate plastic tabs along the fascia. Press them in and lift the fascia off. Work slowly from one side to the other. If a tab fights you, switch sides and come back. Don’t twist hard. Bosch tabs are tough but not unbreakable.
Step 7: Transfer parts if needed
- Some models require you to move the light pipe, button caps, or gaskets to the new fascia. Match them piece for piece. Compare old and new before snapping anything in.
Step 8: Install the new fascia panel
- Align the tabs and press until each clip clicks. No gaps. If it doesn’t sit flush, a clip is misaligned. Don’t force it.
Step 9: Reconnect wiring
- Plug in the ribbon cable and harness exactly as before. Firm, gentle pressure. If the latch was lifted, secure it back down.
Step 10: Reassemble the door
- Fit the outer door to the inner door. Start a few screws by hand to align everything, then install the rest. Snug, not gorilla tight.
Step 11: Power up and test
- Restore power. Run a quick test: buttons responsive, display visible, no error beeps. Start a short cycle, confirm the door latches, then cancel.
Pro tip from the field: If buttons don’t respond after install, reseat the ribbon cable. Nine times out of ten, it’s not fully home or is upside down.

Source: www.youtube.com
Model Variations And Tricky Bits
Bosch model families differ in small but important ways. Here’s what to watch:
Top-control models
- The control is on the door’s top edge. You will remove the door skin and work along the top lip. Be careful with the door seal. Do not stretch it.
800 Series with touch controls
- Expect a delicate ribbon cable. Some use a ZIF-style latch. Lift the tiny locking bar before pulling the cable.
Panel-ready models
- If you have a custom cabinet panel, support it well. These panels are heavier. Have a second set of hands to avoid stressing the hinges.
Home Connect models
- There may be an extra harness for Wi-Fi. Route wires exactly as before to avoid pinching.
Old vs. new fascia part numbers
- Bosch often supersedes part numbers. New panels may include a light pipe adapter or revised buttons. Compare the alignment posts before snapping in.

Source: www.siscotelcloud.com
Testing, Reassembly, And Error Checks
After reassembly, check:
- Button function Do they all click and register?
- Display brightness Is the window clean and aligned?
- Door latch Does the cycle start and pause when opened?
- Leaks Run a quick rinse and inspect the door corners.
If you see an error code:
- E01 to E09 Often heater or control issues, unrelated to fascia, but check for pinched wires.
- E15 Water in base pan. If you tipped the unit, you may have sloshed water. Unplug, tilt slightly, let it dry, then inspect for leaks.
- Dead controls Re-seat the ribbon cable and verify breaker is on.
I like to wipe the inner door, clean the vent, and check the hinge cords while I’m in there. Two birds, one toolbox.

Source: partsdr.com
Cost, Time, And Skill Level
Budget
– Fascia panel Typically 70–180 USD, depending on model and finish.
– Tools Usually what you already own. Torx set is about 10–20 USD.
Time
- First-timer 45–75 minutes with photo-taking and careful cable work.
- Pro 20–30 minutes.
Skill
- Moderate. If you can assemble flat-pack furniture without tears, you can do this.
When to call a pro
- If the control board shows heat damage or corrosion.
- If your dishwasher has persistent error codes beyond the panel issue.
- If your model has integrated cabinetry you don’t want to risk scratching.

Source: www.youtube.com
Common Mistakes To Avoid
– Forgetting to kill power The only sparks you want are in your love life.
– Mixing screws Bosch uses different lengths. Long screws can dimple the stainless front.
– Forcing clips If it won’t click, it’s misaligned. Back up and realign.
– Skipping photos You will swear you’ll remember. You will not.
– Pinching the ribbon cable Route it cleanly with no sharp bends.
Personal lesson learned: I once chased a “dead panel” for 20 minutes before realizing the ribbon cable latch wasn’t closed. Close the latch. Save your Saturday.
Source: www.amazon.com
Safety And Warranty Notes
– Power off always. Capacitors on the control board are small, but don’t risk it.
– Handle edges with care Door skins can be sharp at the corners.
– Static discharge Touch a metal faucet before handling the control module or ribbon cables.
– Warranty If your unit is still under warranty, check terms. Cosmetic parts may have limited coverage. Keep your receipt and the old fascia until the new one passes testing.
According to manufacturer service literature and standard appliance repair practices, the steps above align with Bosch door assembly design and safe DIY procedure. Still, variations exist across model years.

Source: www.youtube.com
Frequently Asked Questions Of How To Replace Bosch Dishwasher Fascia Panel
How do I find the correct Bosch fascia panel part number?
Check the model and FD numbers on the door frame. Look up parts by model on an official parts catalog. Cross‑check for superseded part numbers to ensure fit.
Do I need to remove the entire dishwasher from the cabinet?
Usually no. Most swaps are done with the door open. For panel-ready models or tight installs, pulling it out a few inches can help.
The ribbon cable may be loose, upside down, or the latch is open. Disconnect power, reseat the cable fully, lock the latch, and test again.
Can a bad fascia panel cause error codes?
It can cause unresponsive controls or random inputs. Most error codes relate to sensors, water, or heat. If codes persist, check wiring and the control board.
Is adhesive needed to secure the fascia panel?
No. Bosch uses screws and molded clips. If a clip breaks, replace the fascia. Do not glue it. Glue can interfere with service and seals.
Will this fix a cracked display window?
Yes. The fascia panel includes the display lens. Replacing it restores clarity and protects the board.
What if I see moisture inside the control area?
Dry it fully, inspect the door seal and vent, and verify no leaks. Moisture can cause button failures and corrosion over time.
Conclusion
You can replace a Bosch dishwasher fascia panel with simple tools, a calm pace, and a few smart checks. Power off. Label screws. Treat clips kindly. Test before you celebrate. Do that, and you’ll have a clean, responsive control face that looks like new and works like a charm.
Ready to tackle it today? Save this guide, grab your Torx set, and start with a photo of your wiring. If you found this helpful, subscribe for more practical DIY fixes or drop a comment with your model and a question. I’m here to help.
Watch This Video on how to replace bosch dishwasher fascia panel