
To remove a Dewalt weed eater head, locate the knob at the base and twist counterclockwise. Pull the head away to detach it.
Removing a Dewalt weed eater head is a simple process that can be done quickly with the right steps. Whether you’re looking to replace the head or clean it for maintenance, understanding how to remove it is essential. By following these easy instructions, you’ll be able to tackle this task efficiently.
In this guide, we will walk you through the steps needed to remove the Dewalt weed eater head effectively and without any hassle. Let’s dive in and learn how to effortlessly detach the head from your weed eater.
Credit: support.dewalt.com
Contents
Understanding The Dewalt Weed Eater Head
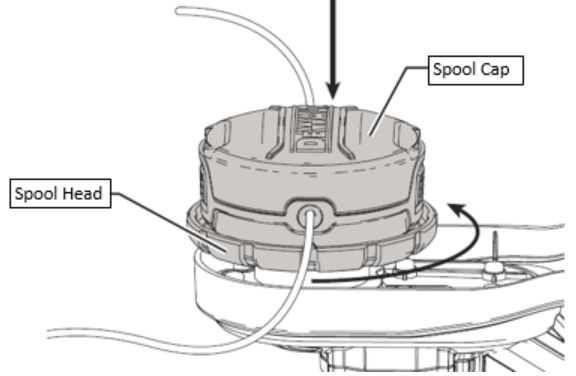
The Dewalt weed eater head is a crucial component of your gardening tool, responsible for the efficient cutting of weeds and grass. To successfully remove the Dewalt weed eater head, you need to have a good understanding of its key components and functionality.
Key Components:
- The trimmer head
- The spool
- The cutting line
Functionality:
- The trimmer head houses the spool and cutting line, allowing the weed eater to effectively trim grass and weeds.
- The spool holds the cutting line in place, ensuring a continuous supply for cutting.
- The cutting line is the actual cutting component of the weed eater head, rotating at high speeds to trim vegetation.
Tools And Supplies Needed
When it comes to removing the head of your Dewalt weed eater, having the right tools and supplies is crucial. Not only will they make the process easier, but they will also ensure your safety. Here are the essential items you’ll need:
Equipment
Before you begin, gather the following tools:
- A socket wrench with the correct size socket
- A pair of pliers
- A flathead screwdriver
- A clean cloth or rag
Safety Gear
Don’t forget to prioritize your safety. Make sure you have these items:
- Protective gloves to shield your hands from dirt, debris, and potential cuts
- Safety glasses or goggles to protect your eyes from any flying particles
- Hearing protection to prevent damage from loud noise
With these tools and safety gear, you’ll be well-prepared to remove the head of your Dewalt weed eater without any issues. Remember to take your time, follow the steps carefully, and stay safe throughout the process!
Step-by-step Removal Process
Removing the weed eater head from your Dewalt trimmer can seem like a daunting task, but fear not! With our easy-to-follow step-by-step process, you’ll have that head off in no time. So, let’s get started!
Preparation
Before diving in, it’s crucial to prepare yourself and your workspace. Follow these simple preparations to ensure a smooth removal process:
- Put on a pair of sturdy gloves to protect your hands from any sharp edges.
- Clear the area around your trimmer of any obstacles to allow for easy access.
- Ensure the trimmer’s power switch is in the “off” position to prevent any accidents.
Removal Steps
Now that you’re all set, it’s time to remove that Dewalt weed eater head. Just follow these step-by-step instructions:
- Locate the locking mechanism on the trimmer head. This is typically a small button or lever that secures the head in place.
- Press and hold down the locking mechanism firmly with one hand.
- Using your other hand, rotate the head counterclockwise. Apply consistent pressure until the head loosens.
- Once the head is loose, continue to rotate it counterclockwise until it comes off entirely.
- Inspect the trimmer head to ensure there are no remaining debris or tangled weeds.
And that’s it! With just a few simple steps, you have successfully removed the weed eater head from your Dewalt trimmer. Now you can clean or replace the head as needed.
We hope this step-by-step guide has been helpful and has made the removal process a breeze for you. Remember to always follow the manufacturer’s instructions for your specific Dewalt trimmer model. Happy trimming!

Credit: m.youtube.com
Tips For Maintenance And Reassembly
After removing the Dewalt weed eater head, it’s essential to perform proper cleaning, reassemble the parts correctly, and ensure smooth operation.
Cleaning
1. Remove any debris and dirt from the weed eater head using a brush or compressed air.
2. Check for any tangled grass or weeds that may be obstructing the cutting mechanism.
3. Wipe down the components with a damp cloth to remove any remaining dirt or residue.
Reassembly
1. Begin by aligning the different parts of the weed eater head according to the user manual.
2. Carefully insert the components back together, ensuring each piece fits snugly into place.
3. Tighten any screws or fasteners securely to prevent the weed eater head from coming loose during operation.
4. Test the weed eater to ensure that it is reassembled correctly and functions smoothly.
Troubleshooting
When encountering issues with the removal of the Dewalt weed eater head, it’s essential to troubleshoot to identify and rectify the problems. Below are the common issues and solutions to guide you through this process.
Common Issues
- The weed eater head is stuck and won’t unscrew
- The head is not spinning freely
- Difficulty in accessing the head
Solutions
- Stuck Weed Eater Head: Apply penetrating oil and use proper tools for additional leverage. Ensure the head is not hot to avoid injury.
- Free Spinning Head: Check for debris or tangled grass around the head and clean it thoroughly.
- Difficulty in Access: Ensure you are using the correct removal technique and tools as per the user manual.
Safety Precautions
For a safe and effective removal of your Dewalt weed eater head, follow these precautions carefully. By taking the necessary safety measures and following the instructions provided, you can ensure a smooth and hassle-free process.
Importance Of Safety
Preventive Measures
Credit: www.homedepot.com
Frequently Asked Questions
How Do You Remove The Head On A Dewalt Cordless Weed Wacker?
To remove the head on a Dewalt cordless weed wacker, locate and press the release button while turning the head counterclockwise.
How Do You Remove The Cap From A Weed Wacker?
To remove the cap from a weed wacker, locate the cap and twist it counterclockwise. Pull the cap off to access the spool for string replacement.
How To Take A Weed Eater Head Off?
To remove a weed eater head, first, locate the retaining bolt. Then, unscrew the bolt using a wrench. Hold the head firmly and rotate counterclockwise to detach it from the shaft. If there’s a nut, unscrew it and remove the head.
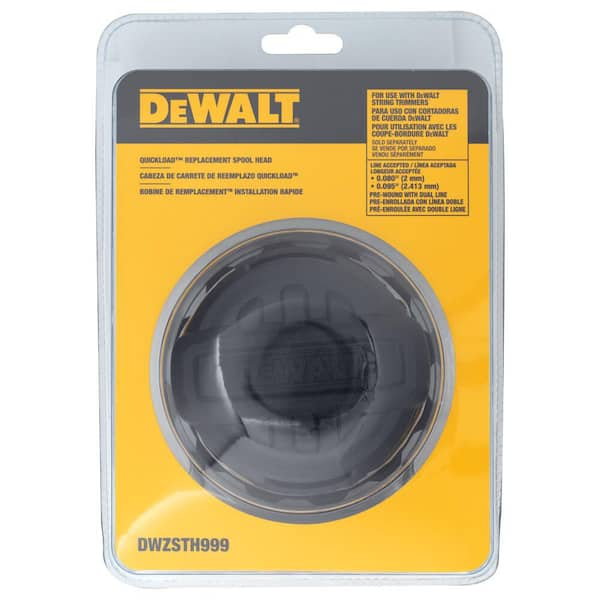
How Do You Remove The Spool On A Dewalt 60v Trimmer?
To remove the spool on a Dewalt 60v trimmer, follow these steps: 1. Disconnect the trimmer from the power source. 2. Turn the trimmer upside down and look for the spool cap. 3. Rotate the cap counterclockwise to loosen it.
4. Lift the cap off to access the spool. 5. Pull the spool straight out to remove it from the trimmer.
Conclusion
Removing the Dewalt weed eater head is simple with these steps. Follow the guide for a hassle-free experience. Take care of your tools to ensure their longevity and optimal performance. With proper maintenance, you can keep your Dewalt weed eater in top shape.
Happy trimming!