Views: 4
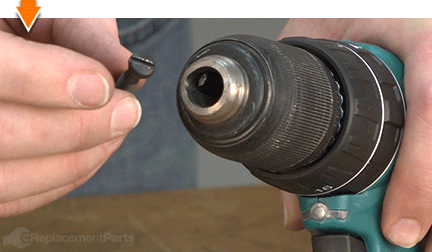
Loosen the chuck screw, lock the spindle, then twist counterclockwise to remove.
If your Makita chuck is stuck or you want to swap it out, you’re in the right place. I’ve removed and replaced many Makita chucks in shops and on job sites. In this guide on how to remove a Makita drill chuck, I’ll show you the exact steps, simple tools, pro tips, and the fixes for stubborn chucks. Let’s make this easy and stress-free.
Contents
- What you need before you start
- Step-by-step: how to remove a Makita drill chuck
- Identify your chuck and threads
- Troubleshooting a stuck or seized chuck
- Model notes and pro tips
- Reinstalling or replacing the chuck
- Safety, care, and maintenance
- Frequently Asked Questions of how to remove a makita drill chuck
- Which way do I turn the screw inside the chuck?
- What if my chuck has no screw inside?
- Can I use heat to loosen the chuck?
- What size threads does my Makita chuck use?
- Is it okay to use threadlocker on reassembly?
- How do I keep the spindle from turning while I loosen the chuck?
- What if the hex key keeps slipping in the jaws?
- Conclusion
What you need before you start
Before you start, understand how to remove a Makita drill chuck safely. A few simple tools and a clear setup make the job quick.
Tools and supplies:
- Hex key, 10–14 mm or a large one that fits your chuck jaws
- Phillips or Torx bit for the retaining screw inside the chuck
- Rubber mallet or a regular hammer and a wood block
- Vise or clamp for extra leverage
- Penetrating oil and a heat gun or hair dryer
- Safety glasses and gloves
- Remove the battery or unplug the corded drill.
- Set the drill to low speed, drill mode, and the clutch to max.
- Open the chuck jaws fully.
Step-by-step: how to remove a Makita drill chuck
Follow these steps. This is the same process I use in the field.
- Power down and prep
- Remove the battery or unplug the drill. This is the golden rule for how to remove a Makita drill chuck.
- Set speed to 1. Set mode to drill. Set clutch to the highest setting.
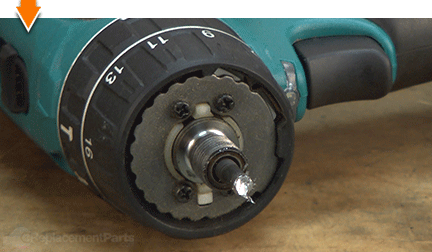
- Open the jaws and find the center screw
- Open the chuck fully. Look down inside.
- You will see a screw at the bottom. It usually has a Phillips head. Some models use Torx.
- Remove the retaining screw
- This screw is left-hand thread on most Makita drills. Turn clockwise to loosen.
- If it resists, seat the bit hard. Use a short burst of pressure. This is the core of how to remove a Makita drill chuck.
- Lock the spindle
- If your drill has a spindle lock, press it now.
- If not, keep the drill in speed 1 and hold the rear handle firmly.
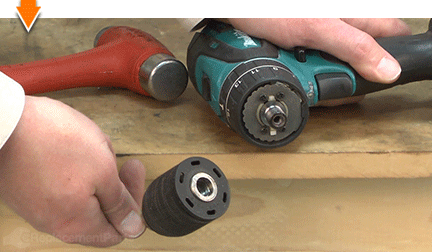
- Use the hex-key trick
- Insert the short leg of a large hex key into the chuck. Tighten the jaws on it.
- Hold the drill. Strike the long leg of the hex key with a mallet counterclockwise. One sharp hit works better than many small taps.
- The chuck will break free and start spinning off the spindle.
- Spin off by hand
- Once it breaks loose, twist the chuck off by hand counterclockwise.
- Keep the retaining screw safe for reassembly.
- Clean the threads
- Wipe the spindle threads. Remove old threadlocker and dust.
- Check the spindle for damage before installing a new chuck.
Identify your chuck and threads
Knowing your chuck type helps you plan the job.
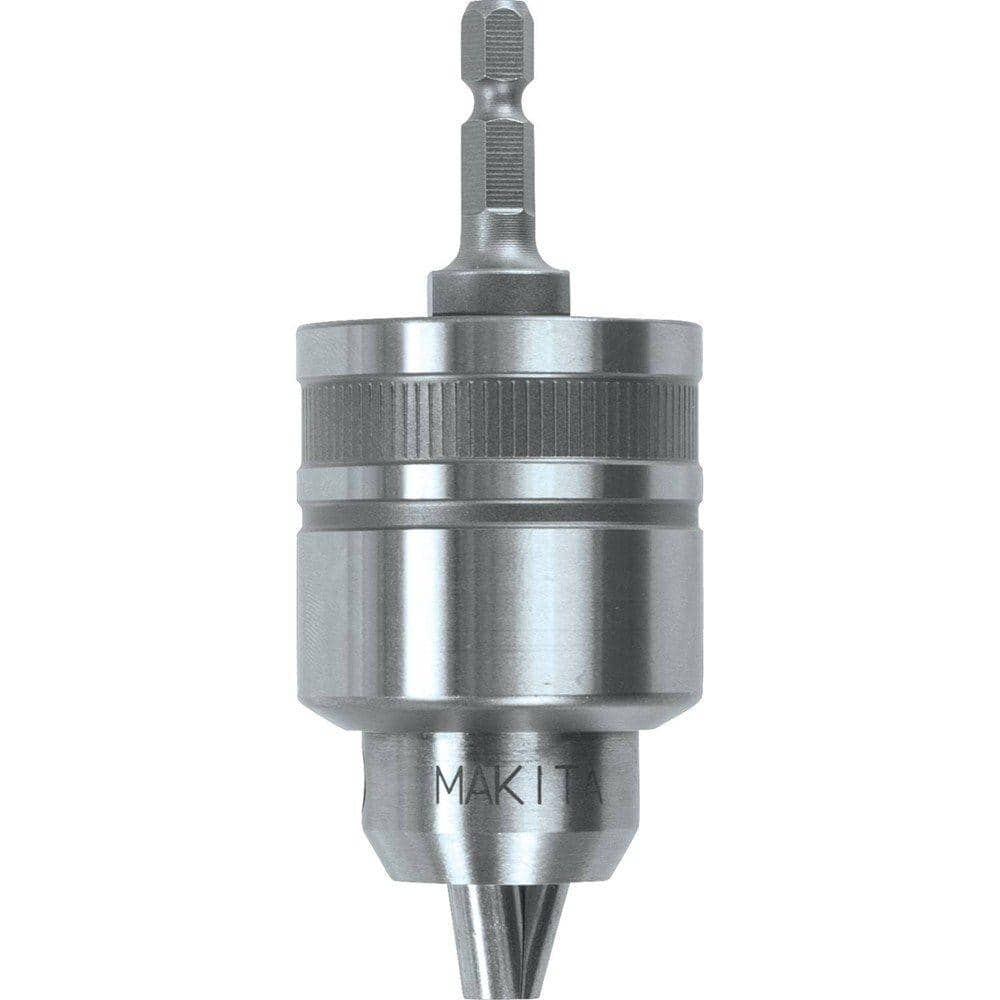
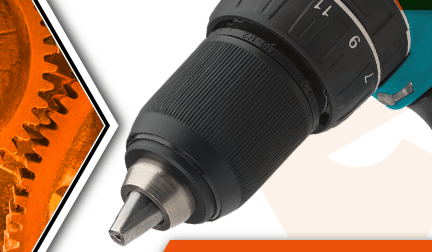
Keyless vs keyed:
- Keyless chucks tighten by hand. Most modern Makita drills use keyless.
- Keyed chucks use a gear key. The removal steps are the same, but keyed models may have older screws.
Left-hand screw details:
- Most Makita drills have a left-hand retaining screw inside the chuck. Turn it clockwise to remove.
- A few specialty models may not use a screw. If you don’t see one, skip that step.
Thread sizes you may see:
- 13 mm chucks often use 1/2"-20 UNF threads.
- 10 mm chucks often use 3/8"-24 UNF threads.
- The size is often stamped on the chuck collar. Check before buying a replacement.
How to spot Loctite:
- Blue or green residue on the threads means threadlocker was used.
- Apply moderate heat to loosen it if needed. Avoid heating plastic parts.
Troubleshooting a stuck or seized chuck
If you hit a snag with how to remove a Makita drill chuck, try these fixes.
Stuck retaining screw:
- Use a fresh bit and push straight down. Turn clockwise to loosen.
- Add a drop of penetrating oil and wait 10 minutes. Try again.
Chuck still won’t budge:
- Keep the hex key in the chuck. Clamp the long leg in a vise. Turn the drill body counterclockwise by hand.
- Use short bursts of heat on the chuck base. Aim for 250–300°F. Avoid the plastic nose.
- Use a strap wrench on the chuck body for extra grip. Do not crush the chuck.
Impact method done safe:
- One firm strike on the hex key is safer than repeated hard hits.
- Support the drill body on a bench or your thigh to absorb shock.
Last resort:
- If the spindle nose is damaged, stop and order parts.
- A service center can remove the chuck without harming the gearbox.
Model notes and pro tips
The exact steps for how to remove a Makita drill chuck are the same across most models, but a few tips help.
18V LXT hammer driver-drills:
- Set to drill mode, speed 1, clutch max. Hammer mode can make the chuck slip.
- These models often have a tight factory fit. Expect to use the hex-key strike.
12V CXT compact drills:
- Smaller chucks use smaller screws. Press hard to avoid stripping the screw head.
- Use a smaller hex key so the jaws bite deep.
Corded drills:
- Unplug. Motor braking is different. Use a vise to hold the hex key for control.
Older keyed-chuck models:
- You may find a slotted or different style screw inside. The screw is still likely left-hand thread.
- Expect stronger threadlocker on factory chucks.
Pro tips I use:
- Seat the hex key against one chuck jaw notch for better grip.
- Keep the drill low to the bench to control the strike and reduce bounce.
- If you work in dust, plan to clean and re-grease light moving parts while you’re there.

Reinstalling or replacing the chuck
Once you know how to remove a Makita drill chuck, putting a new one on is simple.
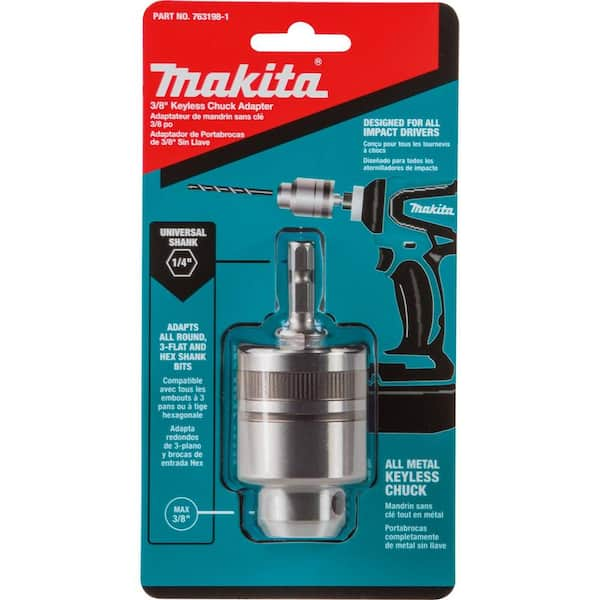
Choose the right chuck:
- Match the thread size stamped on your old chuck.
- Pick a metal-bodied chuck if you drill large holes often.
Install steps:
- Hand-thread the new chuck clockwise onto the spindle. Do not cross-thread.
- Snug it by holding the spindle and turning the chuck by hand.
- Reinstall the retaining screw inside the jaws. Remember, it tightens counterclockwise on left-hand screws.
- Run the drill forward and stop fast to seat the chuck. One or two quick spins is enough.
Threadlocker or not:
- A small drop of medium threadlocker on the spindle is okay if you drill heavy loads.
- Do not flood the threads. You still want to remove it in the future.
Final check:
- Spin the chuck empty. Look for wobble. If it wobbles, remove and re-seat it.
- Test with a straight bit and drill into scrap.
Safety, care, and maintenance
A little care keeps your chuck smooth and safe.
Safety first:
- Remove power before you start. Wear eye protection during strikes.
- Keep fingers clear of the hex key when you swing the mallet.
Care tips:
- Open and close the jaws fully once a week to clear grit.
- Wipe the jaws with a dry cloth. Avoid oil on the jaws. Oil can cause bit slip.
Upgrade ideas:
- If your work needs tight grip, upgrade to a heavy-duty metal keyless chuck.
- Keep a spare chuck for quick swap-outs on big jobs.
Mastering how to remove a Makita drill chuck saves time and money. It also helps you keep your drill running like new.
Frequently Asked Questions of how to remove a makita drill chuck
Which way do I turn the screw inside the chuck?
Most Makita chuck screws are left-hand thread. Turn clockwise to loosen and counterclockwise to tighten.
What if my chuck has no screw inside?
Some models do not use a retaining screw. Skip that step and break the chuck free with the hex-key method.
Can I use heat to loosen the chuck?
Yes, gentle heat helps soften threadlocker. Keep it around 250–300°F and avoid heating plastic parts.
What size threads does my Makita chuck use?
Most 13 mm chucks use 1/2"-20 UNF. Many 10 mm chucks use 3/8"-24 UNF. Check markings on your chuck to be sure.
Is it okay to use threadlocker on reassembly?
A small drop of medium threadlocker is fine for heavy-duty use. Do not overdo it, or future removal will be hard.
How do I keep the spindle from turning while I loosen the chuck?
Use the spindle lock if your model has one. If not, set speed to 1, hold the handle tight, and use the hex-key strike.
What if the hex key keeps slipping in the jaws?
Use a larger hex key and tighten the chuck fully. Seat the key against a jaw notch to improve grip.
Conclusion
You now know how to remove a Makita drill chuck with simple tools and smart steps. Start safe, remove the left-hand screw, use the hex-key strike, and the chuck will come off clean. If it sticks, you have pro-level fixes to finish the job without damage.
Ready to put this to work? Grab your drill, follow the steps, and swap that chuck with confidence. If this guide helped, share it with a friend, subscribe for more tool tips, or drop your question in the comments.