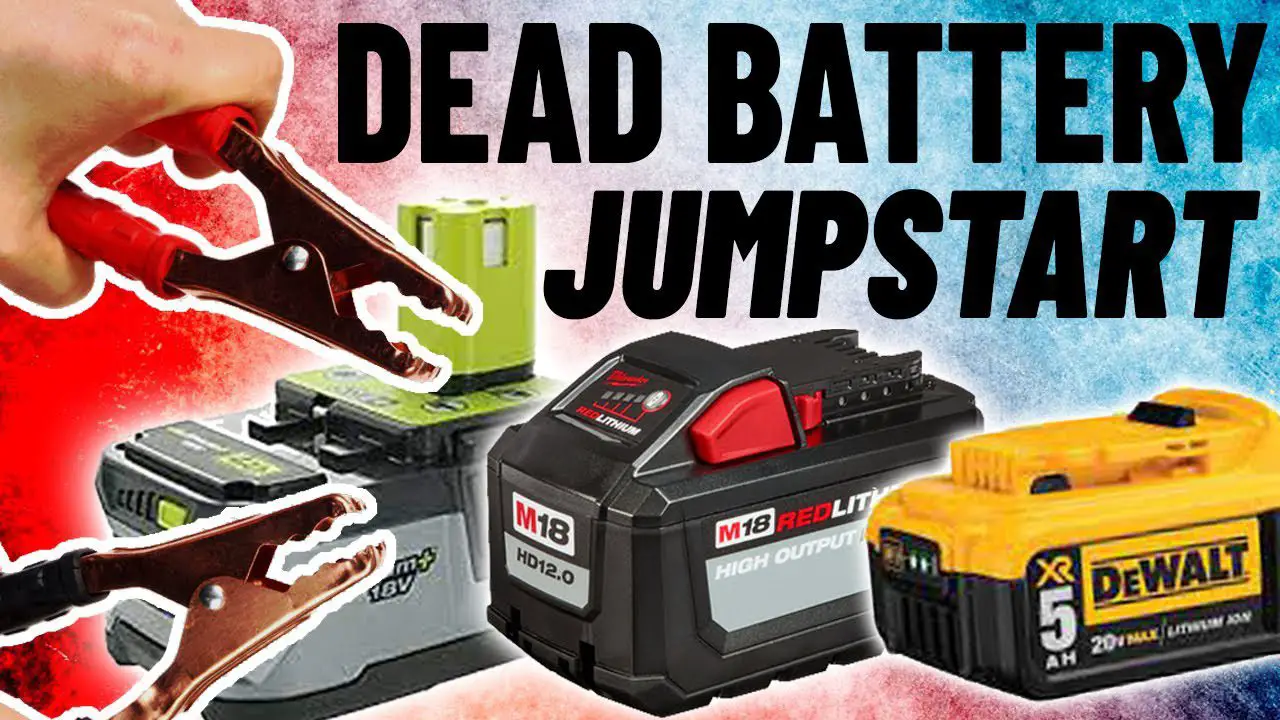
Imagine you’re ready to tackle that overdue DIY project or eager to spruce up your garden, but your trusty Ryobi tool refuses to start because the battery is dead. Frustrating, isn’t it?
But don’t worry—you’re not alone in this predicament. Many Ryobi users face this issue, and the good news is, there’s a simple solution. Learning how to jump start a Ryobi battery can save you time, money, and a lot of hassle.
In this guide, you’ll discover an easy, step-by-step process to breathe new life into your battery, so you can get back to doing what you love. Stay with us, and soon you’ll have your tools humming along, ready for action.
Contents
Safety Precautions
Ensuring safety is crucial when jump-starting a Ryobi battery. Disconnect the battery from any device before proceeding. Always wear protective gloves and goggles to prevent accidents or injuries during the process.
Jump-starting a Ryobi battery can be an essential skill, whether you’re tackling a home improvement project or getting your lawn equipment up and running. However, ensuring your safety should be your top priority. A few simple precautions can make the difference between a successful jump-start and a dangerous mishap. Let’s explore the key safety measures you should take before jump-starting your Ryobi battery. ###Protective Gear
Wearing the right protective gear can prevent injuries. Safety goggles protect your eyes from potential sparks or battery acid, while gloves safeguard your hands against electrical shocks or burns. You might think, “Do I really need all this gear?” Consider this: a friend of mine once underestimated the importance of gloves and ended up with a nasty burn. It’s a lesson learned the hard way. Don’t make the same mistake. ###Battery Handling
Handling the battery correctly is crucial to your safety. Ensure your workspace is dry and free from flammable materials. A wet surface can increase the risk of electrical shock, while flammable items can pose a fire hazard. When connecting cables, start with the positive terminal and then the negative. This sequence minimizes the risk of short circuits. Imagine connecting the cables in reverse; it could lead to sparks flying everywhere. Have you checked the battery for any damage? Cracks or leaks could indicate a faulty battery, which might explode if jump-started. It’s better to replace a damaged battery than risk an accident. Wouldn’t you agree? These precautions may seem time-consuming, but they are worth the effort for your safety. Your well-being is far more important than rushing through the process.Tools And Materials Needed
Jump-starting a Ryobi battery requires proper tools and materials. Without them, the process can become challenging. Understanding what you need ensures a smooth operation. This guide will outline everything necessary.
Required Tools
- Volt meter: Measures battery voltage.
- Wire stripper: Prepares wires for connection.
- Jumper cables: Connects batteries safely.
- Screwdriver: Removes and tightens screws.
- Safety goggles: Protects eyes from sparks.
Each tool plays a crucial role. A volt meter checks the battery’s current state. Wire strippers are essential for clean wire ends. Jumper cables bridge the power gap between batteries.
Necessary Materials
- Ryobi battery: Needs jump-starting.
- Power source: Can be another battery.
- Electrical tape: Insulates exposed wires.
- Manual: Provides detailed instructions.
Using the right materials prevents damage. Electrical tape ensures safe connections. A manual helps avoid common mistakes. All these materials contribute to a successful jump-start.
Identifying Battery Issues
When your Ryobi battery isn’t working, it’s crucial to identify the issue quickly. Knowing the symptoms can save you time and frustration. You’ll be able to decide whether it needs a jump start or a replacement. Let’s dive into the common signs and causes of battery failure.
Signs Of A Dead Battery
Have you ever tried charging your Ryobi battery only to find it unresponsive? A dead battery usually shows no signs of life; it won’t power your tool or hold a charge.
Check the battery indicator. If it remains blank or shows a low charge despite hours of charging, your battery might be dead.
Sometimes, the battery might give off a burnt smell. This is a clear sign that something’s wrong internally, possibly due to overheating or damage.
Common Causes
Leaving the battery in extreme temperatures can sap its life. If your garage feels like a sauna or a freezer, your battery might suffer.
Overcharging is another common culprit. Many people mistakenly think longer charging equals better performance, but it can actually damage the cells.
Frequent use without proper charging cycles can also lead to battery issues. If your battery is constantly drained without full charges, it can wear out faster.
Does your battery face any of these challenges? Identifying the root cause is your first step in jump-starting your Ryobi battery. By understanding these symptoms and causes, you’re already halfway to solving the problem.
Credit: espanol.ryobitools.com
Preparing The Battery
Getting your Ryobi battery ready for a jump start is simple. Ensure it’s clean and free from dirt. Connect the charger to the battery terminals. Wait for the indicator light to show it’s charging. It’s that easy!
Preparing the battery is crucial before jump-starting your Ryobi battery. This ensures it works efficiently and safely. A well-prepared battery prevents issues and extends its life. Follow these steps to prepare the battery effectively.Cleaning Battery Contacts
Dirt can block electric flow. It can make the battery less effective. Clean the battery contacts with a dry cloth. Rub gently to remove dust and grime. Use a cotton swab for tighter spaces. Make sure the contacts shine. Proper cleaning helps maintain good electrical connections.Inspecting For Damage
Check the battery for cracks or leaks. Damaged batteries may not work properly. They can also be unsafe to use. Look for bulges or discolored spots. These are signs of internal damage. If you find any, consider replacing the battery. A healthy battery is vital for efficient performance. Ensuring your Ryobi battery is clean and undamaged is key. This preparation step can save time and enhance battery function.Jump Starting Techniques
Discover easy steps to jump start a Ryobi battery. Ensure safety by wearing gloves and goggles. Connect the charger clips to battery terminals. Turn on the charger and wait for the battery to charge. Test the battery before use to ensure full functionality.
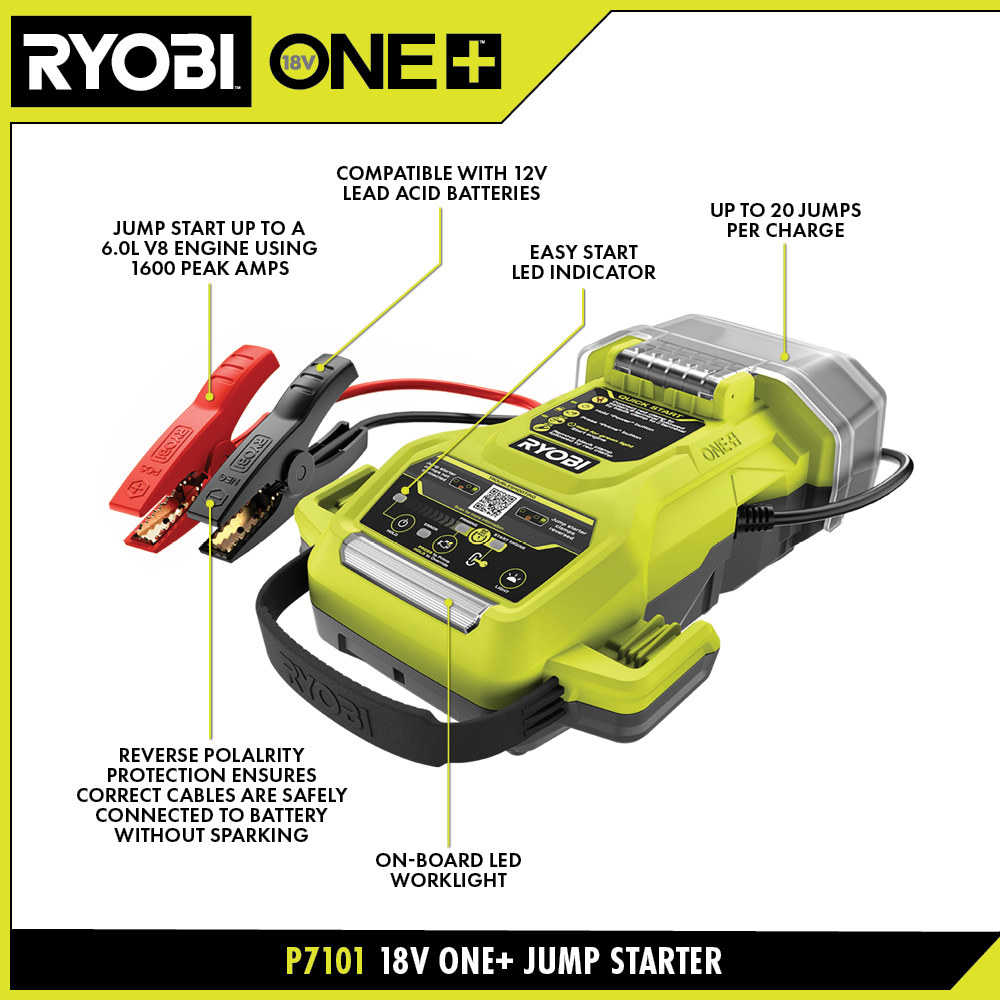
Jump-starting a Ryobi battery can seem daunting, especially when you’re in the middle of a project. But with the right techniques, you can breathe life back into your battery without much hassle. You might even find yourself enjoying the process as you learn more about how these power tools work. The methods below are practical and can be done with items you likely already have at home. So, are you ready to get your Ryobi battery back in action? Let’s dive into some effective techniques.Using A Compatible Charger
Using a compatible charger is one of the simplest ways to jump-start your Ryobi battery. First, ensure that the charger is specifically designed for Ryobi batteries. This ensures compatibility and safety. Connect your dead Ryobi battery to the charger. Keep an eye on the charging indicator. If it lights up, your battery is accepting a charge. Let it charge for a few minutes before testing it in your tool. If the charger does not recognize the battery initially, don’t panic. Sometimes, gently cleaning the battery contacts with a dry cloth can improve connectivity. Have you ever been surprised at how such a simple act can make a big difference?Applying The Paperclip Method
The paperclip method is a clever workaround when you don’t have a compatible charger handy. Start by grabbing two paperclips. They will act as connectors between the battery terminals. Unwind the paperclips and carefully insert them into the positive and negative terminals of the dead battery. Be cautious to avoid creating a short circuit. Connect the other ends of the paperclips to a fully charged battery of the same type. Hold this connection for about 30 seconds, allowing a small charge to pass through. Remove the paperclips and check the battery in your tool. This method can sometimes kickstart a battery that seems completely dead. It’s fascinating how such a simple tool can serve such a purpose, isn’t it? Both of these techniques are useful in different situations. Which one do you think would work best for your Ryobi battery? Have you tried either of these before? Share your experiences in the comments below!
Credit: www.youtube.com
Testing The Battery
Testing the battery is a crucial step in jump-starting your Ryobi battery. Knowing its current charge and performance helps in identifying the issue. A systematic approach ensures the battery is ready for use.
Checking Charge Level
Begin by checking the charge level of your Ryobi battery. Use a voltmeter to measure the voltage. Connect the voltmeter to the battery terminals. A reading between 18-20 volts indicates a charged battery. If the voltage is below 18 volts, the battery needs charging. Ensure the battery is disconnected before testing. This avoids any accidental shorts or sparks. Repeat the test for accuracy.
Monitoring Performance
Monitoring performance involves observing how well the battery holds charge. Charge the battery fully and then use it in a tool. Note how long the tool runs on a full charge. If the tool runs for a short period, the battery may be faulty. Check for overheating during use. Overheating can indicate internal issues. Consider testing the battery under different conditions. This provides insights into its reliability.
Maintenance Tips
Keeping your Ryobi battery in top condition prolongs its life. Effective maintenance ensures consistent performance and prevents unexpected issues. Here are some key maintenance tips to keep your Ryobi battery running smoothly.
Regular Charging
Charge your battery regularly. Even if not in use. This keeps it active and ready for any task. Avoid letting it drain completely. A fully discharged battery can harm its lifespan. Regular charging promotes efficiency.
Proper Storage
Store your battery in a cool, dry place. Extreme temperatures can damage its cells. Avoid leaving it in your car. Extreme heat or cold weakens the battery. Use a protective case for storage. This prevents dust and moisture from affecting its performance.
Troubleshooting
Jump-starting a Ryobi battery involves simple steps. First, ensure the battery is clean and dry. Connect it to a charged battery using jumper cables, red to positive and black to negative. Wait a few minutes for the charge to transfer.
Jump-starting a Ryobi battery can sometimes be straightforward, but what if things don’t go as planned? Troubleshooting is essential in these moments. Knowing how to identify and resolve persistent issues can save time and hassle.Persistent Issues
Even after following the instructions, your Ryobi battery might refuse to charge. This could be due to a few common problems. Check the battery terminals for dirt or corrosion; a simple clean-up might do the trick. Inspect the charger for any signs of damage. A faulty charger can easily disrupt the charging process. Try using a different charger if you have one available. Temperature can also affect battery performance. Ensure the battery is not too cold or too hot, as extreme temperatures can impact charging efficiency.When To Seek Professional Help
Sometimes, despite your best efforts, the battery might still not work. This can be frustrating, especially when you’re keen to get back to your project. But when do you know it’s time to call in the experts? If the battery is physically damaged or swollen, seeking professional help is crucial. Attempting to fix it yourself could be dangerous. Also, if your battery is still under warranty, don’t hesitate to contact Ryobi’s customer service. They can offer guidance or a replacement if necessary. Have you considered the cost of repair versus replacement? Sometimes, investing in a new battery is more economical and less time-consuming. Remember, your safety comes first. Don’t risk it if you’re unsure about handling the battery issues yourself.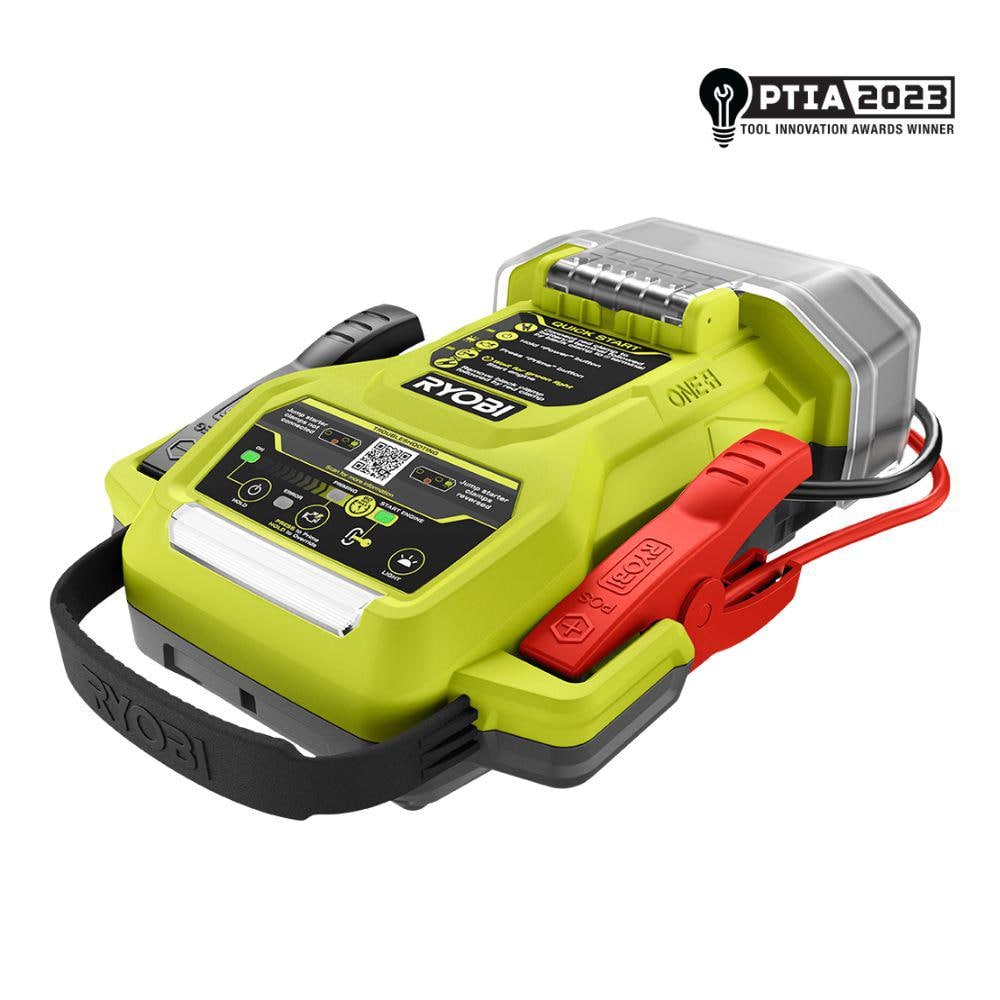
Credit: www.homedepot.com
Frequently Asked Questions
How Do I Jump Start A Ryobi Battery?
To jump start a Ryobi battery, connect it to a fully charged battery using jumper cables. Ensure positive to positive and negative to negative connections. Allow the charged battery to transfer power for a few minutes. Then, try recharging the Ryobi battery normally using its charger.
Can A Ryobi Battery Be Revived?
Yes, a Ryobi battery can often be revived. First, clean the terminals for better connectivity. Then, use a jump-start method or a battery charger to boost its power. If these methods fail, consider checking individual cells or consult a professional for further assistance.
Why Is My Ryobi Battery Not Charging?
A Ryobi battery might not charge due to dirty terminals or a depleted battery. Ensure connections are clean and secure. Another reason could be a faulty charger. If problems persist, test the battery’s voltage. If it’s significantly low, try jump-starting or consult a professional.
How Long Does It Take To Jump Start?
Jump starting a Ryobi battery usually takes a few minutes. Connect the jumper cables properly and wait about 5 to 10 minutes. This allows enough power transfer. Afterwards, try recharging the battery using its regular charger to ensure it holds the charge effectively.
Conclusion
Jump-starting your Ryobi battery can be simple. Follow the steps carefully. Ensure all connections are secure and clean. Use the charger correctly. Always prioritize safety during the process. Understand your battery’s specific needs. This knowledge can help extend battery life.
Regular maintenance ensures reliable performance. Troubleshoot any issues promptly. Consult the manual for detailed guidance. With practice, this task becomes easier. Keep your tools ready for any battery challenges. A little effort goes a long way. Enjoy uninterrupted usage of your Ryobi equipment.
Stay prepared and informed. Your tools will thank you.