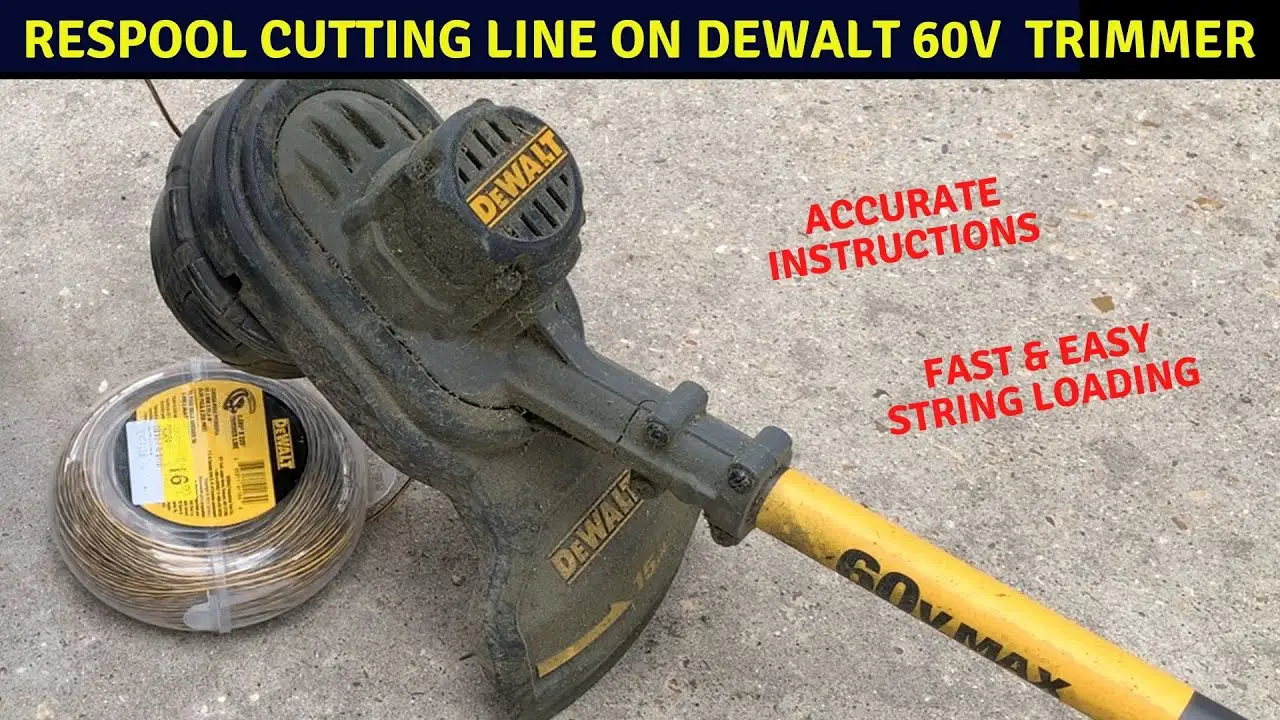
To change the string on your Dewalt 60V trimmer, follow these steps: First, make sure the trimmer is turned off and disconnected from the power source. Then, locate the bump knob at the trimming head and unscrew it to access the spool.
Pull out the old string and replace it with a new one, following the arrow indicators to ensure proper winding. Once the new string is in place, trim any excess and reattach the bump knob securely. Finally, test the trimmer to ensure the string feeds properly.
This process will allow you to efficiently maintain your Dewalt 60V trimmer for optimal performance. Maintaining a well-groomed lawn requires regular upkeep, and having the right tools for the job is essential.
The Dewalt 60V trimmer is a reliable and versatile tool for keeping your lawn looking its best. However, knowing how to change the string on the trimmer is crucial for uninterrupted use.
By understanding the simple steps involved in this process, you can quickly and efficiently replace the string and continue with your lawn care tasks.
In this guide, we will walk you through the steps to change the string on your Dewalt 60V trimmer, ensuring that you can keep your outdoor space looking pristine with ease.
Contents
Understanding String Types
To change the string on your Dewalt 60V trimmer, it’s crucial to understand the various string types available in the market. Choosing the right string, knowing about the string size and compatibility is essential for optimal trimmer performance.
Choosing The Right String
When selecting a string for your Dewalt 60V trimmer, opt for durable yet flexible options that suit your trimming needs. Various materials like nylon or titanium can work well.
String Size And Compatibility
Ensure the string you choose is compatible with your Dewalt 60V trimmer. Check the manual for specifications on string size and type recommended by the manufacturer.

Preparing For String Change
Safety Precautions
Before starting the string change process on your Dewalt 60V trimmer, it’s crucial to prioritize safety precautions to prevent any potential accidents. Make sure to follow these safety guidelines:
- Wear Protective Gear: Prioritize safety by wearing protective gloves and eye goggles to shield yourself from any potential debris or injury.
- Power Off the Trimmer: Ensure that the trimmer is turned off and that the battery is removed to prevent the machine from accidentally starting.
- Inspect the Work Area: Before beginning, ensure that the work area is clear of any obstacles or hazards that could potentially interfere with the string change process.
Gathering Necessary Tools
Be sure to gather the essential tools you’ll need for the string change. Here’s a list of the necessary items:
- Replacement Trimmer Line: Ensure you have the appropriate replacement trimmer line that fits your Dewalt 60V trimmer model. It’s recommended to use genuine Dewalt replacement trimmer lines for the best performance.
- Scissors or Wire Cutters: Having a pair of scissors or wire cutters handy will help with trimming the replacement line to the correct length during the string change process.
- Gloves and Eye Protection: As mentioned in the safety precautions, wearing protective gear such as gloves and eye protection is essential for safe handling of the trimmer and replacement line.
- Clean Cloth: Keep a clean cloth nearby to wipe off any debris or dirt that may have accumulated on the trimmer prior to the string change.
Changing The String
Changing the string on your Dewalt 60V trimmer is a simple process that involves locating the string head, removing the old string, and installing the new string.
By following these steps, you can easily maintain your trimmer and ensure it remains efficient in cutting through tough weeds and grass.
Locating The String Head
To begin changing the string, you first need to locate the string head on your Dewalt 60V trimmer.
The string head is typically found at the bottom of the trimmer, near the cutting blade.
Look for a round shape with notches or grooves. Once you’ve identified the string head, you can proceed to the next step.
Removing The Old String
Before installing the new string, it’s important to remove the old string from the trimmer. This can be done by following these simple steps:
- Turn off the trimmer and unplug it from the power source for safety reasons.
- Hold the trimmer vertically with the cutting blade facing upwards.
- Locate the tabs or buttons on the string head that hold the old string in place.
- Press and hold the tabs or buttons while pulling the old string out.
- Make sure to remove any remaining pieces of string from the trimmer.
Now that you have successfully removed the old string, you can move on to the next and final step.
Installing The New String
Installing the new string on your Dewalt 60V trimmer is a straightforward process. Here’s how to do it:
- Choose the appropriate string for your trimming needs. Dewalt recommends using .080-inch or .095-inch cutting line for optimal performance.
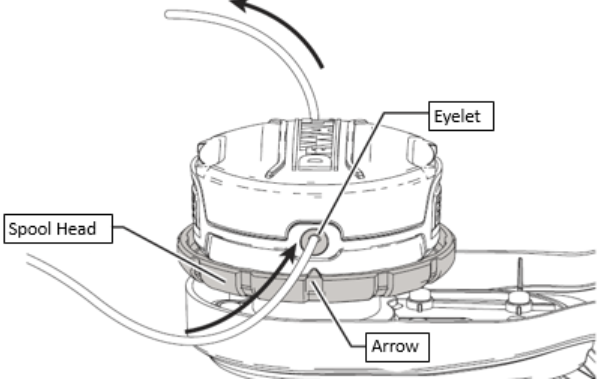
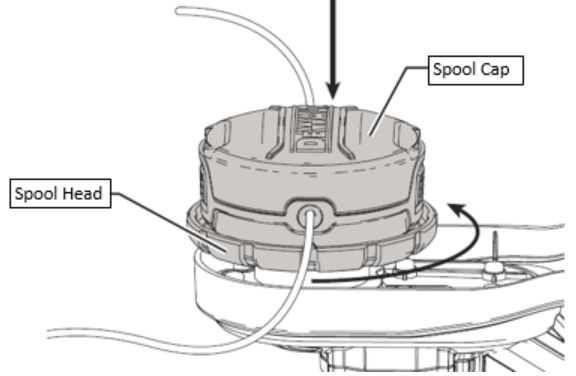
- Insert one end of the new string into the hole or slot on the string head.
- Follow any directional arrows or indicators on the string head to ensure proper string placement.
- Wind the new string tightly and evenly around the string head, following the designated path or grooves.
- Secure the other end of the string in the corresponding hole or slot on the string head, making sure it is firmly in place.
Once you have completed these steps, you can turn on the trimmer and test the new string to ensure it is functioning correctly. Congratulations, you have successfully changed the string on your Dewalt 60V trimmer!
Adjustments And Testing
Adjustments and testing are crucial steps in maintaining the efficiency and performance of your Dewalt 60V trimmer.
Proper tension adjustment and thorough testing ensure that the trimmer operates smoothly and efficiently.
Follow the steps outlined below to make necessary adjustments and thoroughly test your trimmer.
Tension Adjustment
It’s important to ensure that the string on your Dewalt 60V trimmer is appropriately tensioned for optimal performance.
Follow these steps to adjust the tension:
- Turn off the trimmer and disconnect the power source.
- Locate the string head and remove the cover to access the spool and string.
- Adjust the tension by turning the knob or using the tensioning tool provided by Dewalt.
- Reassemble the string head cover and securely tighten it back in place.
Testing The Trimmer
Once the tension is adjusted, it’s essential to thoroughly test the trimmer to ensure that it is operating effectively.
Follow these steps to test the trimmer:
- Reconnect the power source and turn on the trimmer.
- Observe the rotation of the string head to ensure it spins smoothly without any irregularities.
- Run the trimmer on different surfaces, including grass and weeds, to evaluate its cutting performance.
- Check for any unusual sounds or vibrations that may indicate issues with the trimmer’s operation.
Maintenance Tips
Proper maintenance of your Dewalt 60V Trimmer is essential to ensure optimal performance and longevity.
Here are some vital maintenance tips to keep your trimmer in top condition:
Regular String Checks
- Inspect the string: Check the trimmer string for any signs of wear or damage regularly.
- Replace when necessary: Replace the string when it is worn down to maintain efficiency.
- Follow manufacturer guidelines: Refer to the user manual for specific instructions on string replacement.
Cleaning And Storage
- Clean after each use: Remove any debris or grass clippings from the trimmer to prevent clogs.
- Store in a dry place: Keep your trimmer in a dry and secure location to prevent rust or damage.
- Protect the string: Store the trimmer in a way that protects the string from becoming tangled or damaged.
Troubleshooting
When changing the string on your Dewalt 60V trimmer, you may encounter some common issues. Here, we will address these issues and provide simple solutions to ensure a smooth string change process.
Common String Change Issues
- String not feeding properly
- String breaking frequently
- Difficulty in winding the string
Finding Solutions
- Inspect the string: Ensure the string is the correct size and type recommended by Dewalt.
- Clean the spool: Remove any debris or tangled string on the spool that may be obstructing the feeding mechanism.
- Proper winding technique: Follow the manufacturer’s guidelines on how to wind the string onto the spool correctly.
Frequently Asked Questions
How Do You Load A Dewalt 60v String Trimmer?
To load a Dewalt 60v string trimmer, follow these steps:
1. Turn off the trimmer and remove the battery.
2. Find the trimmer line spindle and unlock it.
3. Insert new trimmer line, making sure to follow the manufacturer’s instructions.
4. Lock the spindle back into place.
5. Reinstall the battery and turn on the trimmer.
How Do I Change The String On My Dewalt Trimmer?
To change the string on your Dewalt trimmer, follow these steps:
1. Turn off the trimmer and disconnect the spark plug.
2. Remove the trimmer head cover and take out the old string.
3. Insert the new string into the trimmer head and wind it following the arrow direction.
4. Replace the trimmer head cover and reconnect the spark plug.
5. Test the trimmer to ensure proper string tension and cutting.
How To Replace Trimmer Line Dewalt Dcst920?
To replace the trimmer line on a DeWalt DCST920, follow these steps:
1. Turn off the trimmer and disconnect the battery.
2. Remove the spool cap and take out the empty spool.
3. Load new trimmer line onto the spool, following the arrows.
4. Reassemble and trim excess line.
How Do I Change The String On My Electric Trimmer?
To change the string on your electric trimmer, first turn off the trimmer and disconnect the power source.
Remove the spool cover, take out the old string, and replace it with new trimmer line following the manufacturer’s instructions. Reassemble the trimmer and you’re ready to go.
Conclusion
To sum up, changing the string on your Dewalt 60V trimmer is a straightforward process that can be quickly mastered.
By following the simple steps outlined in this guide, you can ensure that your trimmer is always ready for action.
With this knowledge, you can maintain a well-kept garden with ease and efficiency.