
Views: 72
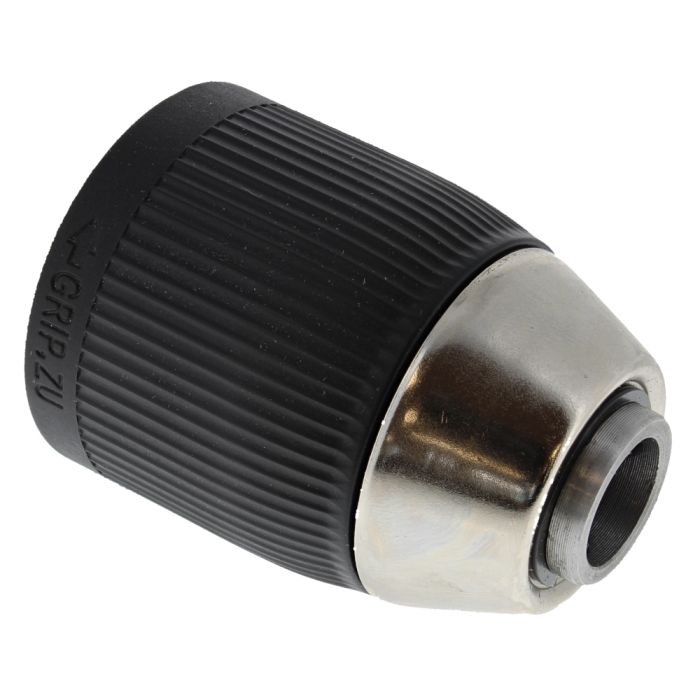
Open the jaws, remove left-hand screw, then unthread the chuck counterclockwise.
If you want to learn how to change Makita drill chuck the right way, you’re in the right place. I’ve swapped dozens of chucks on Makita drills over years on job sites and benches. This guide breaks it down in plain steps, with pro tips to save time, protect your drill, and avoid stuck parts. Stick with me and you’ll master how to change Makita drill chuck like a pro.
Contents
- Before you start: tools, safety, and setup
- Know your chuck and spindle
- Step-by-step: change a Makita keyless chuck
- Step-by-step: change a Makita keyed chuck
- Install the new chuck the right way
- What to do if the chuck is stuck
- Pick the right replacement chuck for your Makita
- Care, lube, and mistakes to avoid
- Troubleshooting after the swap
- Frequently Asked Questions of how to change makita drill chuck
- Do all Makita drills have a left-hand retaining screw inside the chuck?
- Which way do I turn the chuck to remove it from the spindle?
- What size is the spindle thread on most Makita cordless drills?
- Can I change the chuck on a Makita impact driver?
- How tight should I install the new chuck?
- Is threadlocker required on the retaining screw?
- What if my chuck will not open fully to access the screw?
- Can I use a pipe wrench on the chuck?
- Does changing the chuck void my warranty?
- How to change Makita drill chuck if the spindle lock keeps slipping?
- Conclusion
Before you start: tools, safety, and setup
Changing a chuck is simple if you prep well. Set your drill on a clean bench with good light. Remove the battery or unplug the corded model. Lock out the trigger.
What you need:
- Allen (hex) key, 10 mm or 3/8 inch, long arm helps
- Phillips or Torx bit for the retaining screw inside the chuck
- Rubber mallet or small dead-blow hammer
- Vise or clamp to hold the drill body (optional but helpful)
- Strap wrench or pipe strap (for stubborn chucks)
- Medium threadlocker (blue), small drop
- Safety glasses and gloves
- Confirm your drill is a drill/driver or hammer drill. Impact drivers do not use standard chucks.
- Check your manual. Some Makita models have a spindle lock button. That makes removal easy.
- Look inside the chuck. Most Makita chucks use a left-hand retaining screw. That means you turn it clockwise to loosen.
By the end of this section, you know how to change Makita drill chuck starts with safe prep and the right tools.
Know your chuck and spindle
Not every chuck is the same. The thread size matters a lot. The old chuck often shows it on the collar.
Common setups on Makita drills:
- 1/2-20 UNF female thread on many 1/2 inch chucks
- 3/8-24 UNF on smaller chucks
- A left-hand retaining screw inside the jaws
- Keyless chucks on most cordless models, keyed chucks on some corded tools
Special cases:
- Rotary hammers use SDS-Plus or SDS-Max. That is a different system. Do not try to unscrew those like a drill chuck.
- Some chucks mount on a taper (rare on newer Makita drills). Check your manual if you see no threads.
If you are not sure, read the model plate. Compare specs to the new chuck. This is the best way to avoid a mismatch. Knowing this speeds up how to change Makita drill chuck and prevents damage.
Step-by-step: change a Makita keyless chuck
This is the most common job. Take your time. Keep your hands clear.
- Remove power. Take out the battery or unplug the cord. Set the drill to low gear and highest clutch setting.
- Open the jaws fully. Look straight down the throat of the chuck. You will see a screw.
- Remove the retaining screw. It has left-hand threads. Turn it clockwise to loosen. Use a snug bit. Press hard. If it is tight, tap the screwdriver handle once.
- Seat the hex key. Tighten the chuck jaws on the short end of a long hex key. Make it very tight.
- Break it loose. Hold the drill. Strike the long arm of the hex key counterclockwise with a mallet. One clean hit is better than many light taps. You can also lock the hex key in a bench vise and twist the drill body counterclockwise.
- Spin off by hand. Once it cracks loose, unthread the chuck by hand. Note the spindle threads.
- Clean the spindle. Wipe off dust and old threadlocker on the screw.
This simple method covers 90% of cases. It is the fastest path for how to change Makita drill chuck on keyless models like XFD, XPH, and DHP series.

Step-by-step: change a Makita keyed chuck
The method is almost the same. The difference is how you grip the chuck.
- Remove power. Select low gear and max clutch.
- Open the jaws. Remove the left-hand screw by turning clockwise.
- Use the chuck key. Clamp the hex key in the jaws. Use the chuck key to tighten very hard.
- Break it loose. Hit the long arm of the hex key counterclockwise with a mallet. Or lock the hex key in a vise and twist the drill counterclockwise.
- Unthread the chuck. Clean the spindle and screw.
If you use the chuck key to tighten on the hex key, you get more bite. That keeps the hex key from slipping. This trick makes how to change Makita drill chuck easier on older tools.
Install the new chuck the right way
Do not rush the install. A crooked start can ruin threads.
- Confirm the thread size. Check the old chuck markings. Match 1/2-20 or 3/8-24, as needed.
- Thread by hand. Start the new chuck clockwise by hand. It should turn smooth. If it binds, back off and start again.
- Snug it down. Tighten by hand. Then seat the hex key and give a firm turn clockwise. Do not overdo it.
- Refit the retaining screw. Add a tiny drop of blue threadlocker to the screw. Install it counterclockwise to tighten. Make it snug, not brutal.
- Test run. Install the battery. Run the drill low. Check for wobble. Chuck a straight bit and spin. It should run true.
This is the clean finish for how to change Makita drill chuck. A careful hand start is the key to a solid, straight mount.
What to do if the chuck is stuck
A stuck chuck can test your patience. Stay calm. Work in small steps.
Try these moves:
- Heat the chuck sleeve gently with a hair dryer for a minute. That softens old threadlocker. Do not overheat.
- Use a strap wrench on the chuck while holding the hex key. This adds grip without marring the finish.
- Lock the hex key in a vise. Hold the drill with both hands. Twist counterclockwise with steady force.
- Tap the front face of the chuck collar with a plastic mallet. Gentle taps help break corrosion.
- Add a drop of penetrating oil to the spindle line. Wait 10 minutes. Wipe excess before you try again.
If none of that works, stop. For expensive models still under warranty, a Makita service center is smart. Stuck parts can snap. Knowing limits is part of how to change Makita drill chuck without damage.

Pick the right replacement chuck for your Makita
A good chuck feels solid and holds tight. Think about how you work.
What to consider:
- Capacity. 3/8 inch or 1/2 inch. Pick the size you use most.
- Thread size. Match 1/2-20 UNF or 3/8-24 UNF on the spindle.
- Keyless vs keyed. Keyless is fast. Keyed grips very hard on smooth bits.
- Single sleeve vs double sleeve. Single sleeve is quicker with spindle lock. Double sleeve can hold better on some models without a lock.
- Hammer-rated. If you drill masonry, pick a hammer-rated chuck. It resists wear in hammer mode.
- Build. All-metal bodies last longer on job sites. Plastic sleeves are lighter.
- Brands. Makita, Röhm, Jacobs, and Metabo HPT make solid options. Look for low runout specs.
If you upgrade, you can gain a ratcheting feature and better bite. It is a nice win when you plan how to change Makita drill chuck and want a long-term fix.

Care, lube, and mistakes to avoid
A little care keeps a chuck smooth for years.
Do:
- Blow out dust from the jaws now and then.
- Add a micro drop of light oil to the jaw threads rarely, then wipe off.
- Tighten once more after the first click on a ratcheting chuck for max grip.
Avoid:
- Dousing the chuck in heavy oil or solvent. It attracts grit.
- Running hammer mode with a non hammer-rated chuck.
- Starting the thread with power. Always start by hand.
These simple habits help anyone learning how to change Makita drill chuck and keep it in top shape.
Troubleshooting after the swap
Even a clean install can show quirks. Here is how to fix the common ones.
- Wobble or runout: Reseat the chuck. Remove it and hand start again. Check for bent bits before you blame the chuck.
- Chuck slips on bits: Retighten with a firm twist. On keyless, tighten, back off a hair, then tighten again.
- Jaws not centering: Open and close the jaws to full travel a few times. This helps them reset.
- Retaining screw loosens: Use a tiny drop of blue threadlocker. Do not use red. It will be hard to remove later.
- Cross-thread risk: If threading feels gritty, stop. Clean and restart by hand every time.
Dialing these in is part of how to change Makita drill chuck with a pro finish.

Frequently Asked Questions of how to change makita drill chuck
Do all Makita drills have a left-hand retaining screw inside the chuck?
Most do, but not every single model. Look inside the jaws to confirm, and remember it loosens clockwise.
Which way do I turn the chuck to remove it from the spindle?
Turn the chuck body counterclockwise to remove it from the spindle. The retaining screw inside loosens clockwise because it is left-hand thread.
What size is the spindle thread on most Makita cordless drills?
Many use 1/2-20 UNF on 1/2 inch chucks and 3/8-24 UNF on smaller ones. Check the old chuck collar or the manual to be sure.
Can I change the chuck on a Makita impact driver?
No, impact drivers use a quick-change hex collet, not a drill chuck. You can add a chuck adapter, but it is not the same as a full chuck swap.
How tight should I install the new chuck?
Seat it by hand, then give a firm snug with a hex key. Do not over-torque; the retaining screw will secure it.
Is threadlocker required on the retaining screw?
A small drop of medium threadlocker helps, and many factory screws have it. Use only a tiny amount to allow future removal.
What if my chuck will not open fully to access the screw?
Try light taps and compressed air to free dust, then open again. If it is seized, service may be needed to avoid damage.
Can I use a pipe wrench on the chuck?
Use a strap wrench first to avoid marring the sleeve. A pipe wrench can work, but protect the surface and be gentle.
Does changing the chuck void my warranty?
In most cases, replacing a chuck is allowed as normal service. If your drill is new, check the warranty terms or ask a Makita center.
How to change Makita drill chuck if the spindle lock keeps slipping?
Shift to low gear, max out the clutch, and hold the brake with your finger off the trigger. Use a longer hex key for better leverage.
Conclusion
Swapping a chuck is a simple skill that pays off fast. You need the right tools, the right direction, and a light touch. With a careful hand start and a firm finish, you now know exactly how to change Makita drill chuck without stress.
Set up your bench, follow the steps, and take your time. Your drill will feel new, and your bits will hold tight. Ready for more pro fixes like this? Subscribe for new guides, ask a question, or share your own tip in the comments.