Are you tired of struggling with your Ryobi weed wacker every time the line runs out? You’re not alone.
Many people find threading these machines frustrating and time-consuming. But what if I told you there’s a simple way to get it done quickly and effortlessly? Imagine maintaining your lawn effortlessly, with your weed wacker running smoothly every time. This guide will walk you through the process step-by-step, ensuring you can tackle your yard work with confidence.
Get ready to say goodbye to tangled lines and hello to a perfectly manicured lawn. Keep reading to discover how you can master the art of threading your Ryobi weed wacker like a pro.
Contents
Tools And Materials Needed
Gather a new spool of trimmer line and scissors. A Ryobi weed wacker is also essential. These tools help replace the line efficiently.
Threading a Ryobi Weed Wacker might seem like a daunting task at first, but with the right tools and materials, the process becomes straightforward and efficient. Knowing precisely what you need can save you from making unnecessary trips to the store, and ensures that you’re prepared to get the job done smoothly. Before you dive into the task, let’s explore the essentials that will make your weed wacking experience hassle-free.Tools Required
First and foremost, you’ll need your trusty Ryobi Weed Wacker. Ensure it’s in good working condition. A screwdriver might come in handy for disassembling parts or adjusting the spool, so keep one nearby. It’s also beneficial to have a pair of gloves to protect your hands from sharp edges and debris.Materials Needed
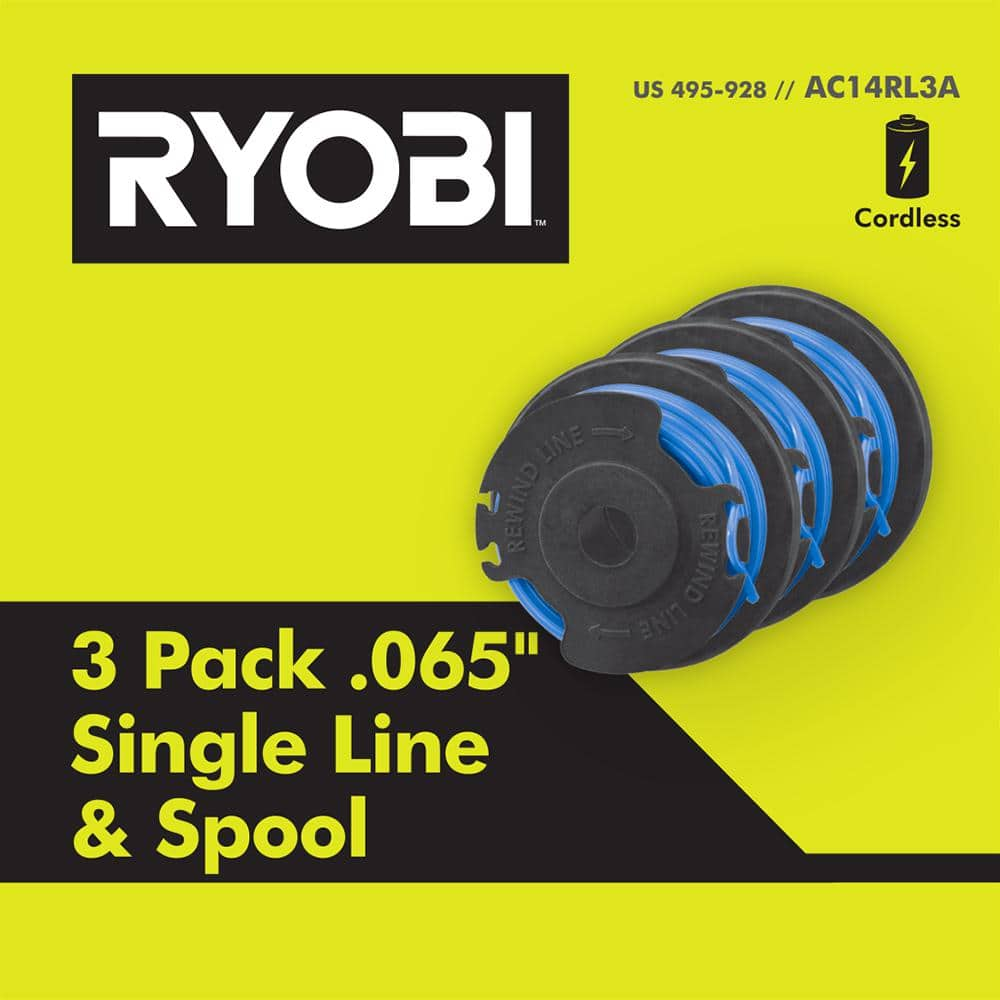
Choosing the right type of line is crucial. Check your Ryobi’s manual for the recommended line size. A spool of trimmer line is essential, and it’s wise to have extra line on hand for future use. You might be surprised at how quickly you go through it, especially if you’re tackling a large area.Optional Accessories
Consider having a small brush or rag to clean the spool and surrounding areas before threading the new line. Dirt and grime can affect the performance of your weed wacker. A clean machine is a happy machine! Have you ever found yourself in the middle of a job and realized you were missing a crucial item? By gathering everything you need beforehand, you can avoid these frustrating setbacks. What tips do you have for organizing your tools effectively? Share your thoughts below!Preparing The Weed Wacker
Before threading your Ryobi weed wacker, preparation is key. Proper preparation ensures a smooth process. It also guarantees safety during the task. This section guides you through essential steps.
Safety Precautions
Safety should always be your first concern. Wear protective gloves to guard your hands. Eye protection is crucial to shield against debris. Consider wearing long sleeves and pants. This clothing offers extra protection against potential injuries. Always work in a well-lit area. Good lighting helps you see clearly and avoid mistakes.
Turning Off And Unplugging
Ensure the weed wacker is off before starting. This prevents accidental activation. Unplug electric models from their power source. For battery-powered models, remove the battery pack. This step is crucial for your safety. Double-check the switch is in the off position. Only proceed when you are sure the machine is safe.
Removing The Spool
Removing the spool from your Ryobi Weed Wacker is a crucial step for effective maintenance. You’ve probably been there, standing in your backyard, frustrated with tangled weeds and wondering how to get your tool back in action. The good news is, it’s simpler than you might think. Knowing how to remove the spool ensures your weed wacker is always ready to tackle overgrown grass and weeds. Let’s dive into the process, starting with locating the spool cap.
Locating The Spool Cap
First things first, you need to locate the spool cap. It’s the plastic cover sitting at the bottom of your weed wacker. If you’re new to this, it might look intimidating. But trust me, once you know where to look, it’s a breeze. Typically, it’s the round component directly beneath the motor. You’ll recognize it by its distinct circular shape. Have you found it yet? Spotting it is the first step in the right direction.
Detaching The Spool
Now that you’ve located the spool cap, it’s time to detach the spool. This part requires a bit of finesse. Press the tabs on each side of the spool cap gently. You might wonder if you’re applying too much force, but a firm press usually does the trick. The cap should pop off easily, revealing the spool. If you’re struggling a bit, don’t worry—patience is key. Once off, you’ll see the spool inside, ready to be worked on.
Ever felt like you’re in a wrestling match with your tool? If the cap doesn’t budge, double-check for any debris that might be blocking it. It’s often the little things that make a big difference. With the spool now visible, you’re set for the next steps in threading your Ryobi Weed Wacker. Ready to tackle the next challenge?
Credit: www.homedepot.com
Choosing The Right Line
Selecting the proper line for a Ryobi weed wacker ensures efficient trimming. Opt for a line compatible with your specific model for smooth operation. Proper threading enhances performance, reducing the need for frequent replacements.
Choosing the right line for your Ryobi Weed Wacker can make a world of difference in your lawn maintenance routine. The line you use impacts not only the cutting efficiency but also the durability and overall performance of your tool. Selecting the right line might seem like a trivial task, but it’s a critical step that ensures your weed wacker operates at its best. ###Types Of Trimmer Line
Trimmer lines come in various types, and each has its unique benefits. Round lines are the most common and are perfect for everyday trimming tasks. They are durable and easy to load, making them a popular choice for most users. Twisted lines are another option, providing a quieter cutting experience and reduced vibration. These lines are ideal if you’re working in a noise-sensitive area or if you prefer a smoother operation. If you’re dealing with tougher vegetation, square lines or serrated lines might be your best bet. They have sharp edges that can cut through thicker weeds efficiently. Think about the kind of work you’ll be doing and choose a line that matches your needs. ###Optimal Line Thickness
The thickness of the trimmer line is crucial for achieving the best results. For light-duty tasks like trimming grass, a line thickness of 0.065 to 0.080 inches is sufficient. This thickness is easy to handle and provides clean cuts without straining your weed wacker. For medium-duty tasks, consider using a line thickness between 0.080 and 0.110 inches. This range offers a good balance between cutting power and flexibility. It’s perfect for tackling denser weeds and light brush. When facing heavy-duty work, such as clearing thick brush or stubborn weeds, a line thickness of 0.110 inches or more is recommended. This thicker line withstands wear and tear, ensuring you can power through tough jobs without constant line replacement. Have you ever found yourself struggling with a line that breaks too often or doesn’t cut efficiently? Choosing the right thickness might just be the solution you need. Take a moment to reflect on your typical trimming tasks and pick the thickness that aligns with those needs. Remember, understanding the types and thickness of trimmer line not only enhances your weed wacker’s performance but also saves you time and effort in the long run. Why settle for anything less than the best efficiency when a simple line choice can make all the difference?Winding The Line
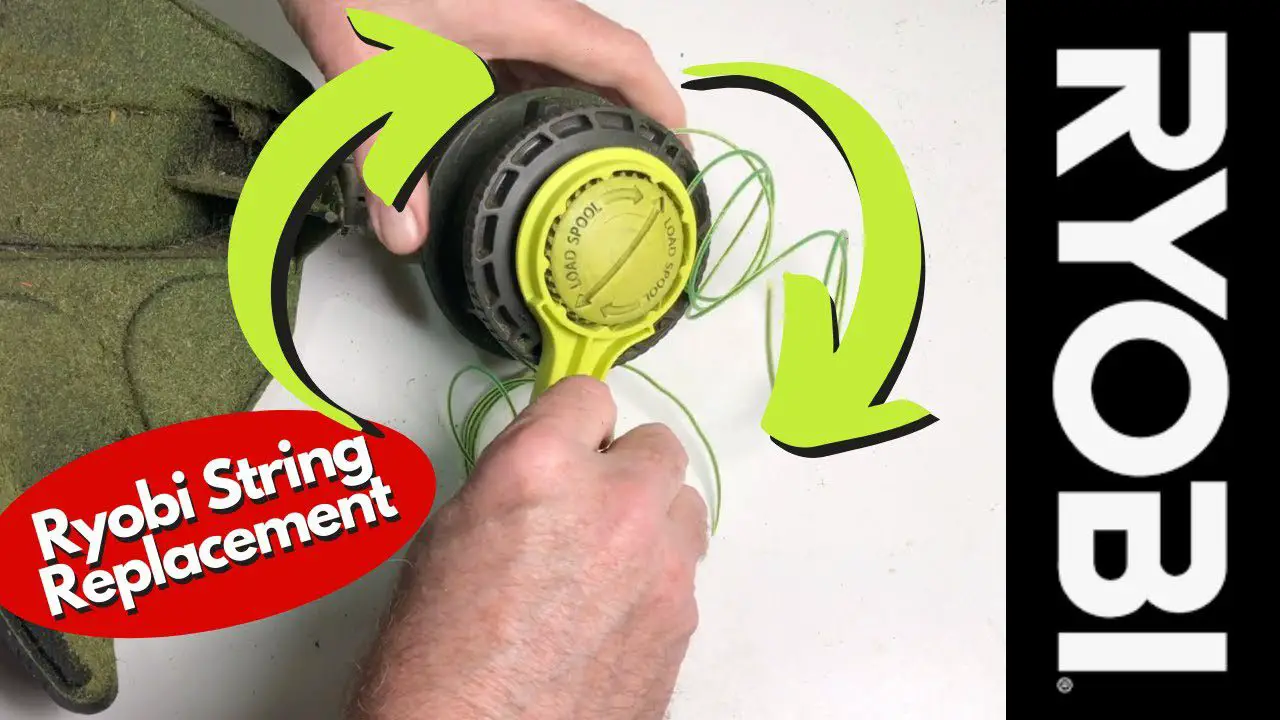
Threading a Ryobi weed wacker requires patience and precision. Start by removing the spool cap and winding the line evenly. Make sure to follow the arrows on the spool for correct direction. Secure the line in the grooves, and replace the cap to finish the process.
Winding the line on your Ryobi Weed Wacker is a crucial step in ensuring your tool works efficiently. Many people find this task daunting, but with the right approach, it becomes a straightforward process. You’ll be surprised at how quickly you can master it with a bit of practice. Let’s break it down into manageable steps, starting with cutting the line to length. ###Cutting The Line To Length
First, determine the appropriate length of the line. For most Ryobi models, about 10 to 15 feet of line should suffice. Measure out the line and cut it cleanly using a pair of sharp scissors or a utility knife. Having the right length ensures the line doesn’t tangle during use. A tangled line can lead to frustration and ineffective trimming. Always keep a spare line handy for future use. ###Inserting The Line Into The Spool
Locate the eyelet holes on the spool. Insert one end of the line through the hole, leaving an equal length on both sides of the spool. This balance is key to an even wind. Isn’t it amazing how a simple insertion can make such a difference? By ensuring equal lengths, you prevent uneven wear and potential damage to your weed wacker. ###Winding The Line Evenly
Hold the spool firmly, and start winding the line in the direction indicated on the spool. Keep the line taut and close together to avoid overlapping. Overlapping can cause jams or uneven cutting. Picture this: a perfectly wound spool, ready to make your trimming effortless. It’s an art that requires attention but pays off in performance. Keep winding until you’ve used all the line, leaving a few inches to secure it in the holding slots. Once done, reattach the spool to the weed wacker. Give yourself a pat on the back. You’ve not only saved time but also ensured your yard looks immaculate. What other small maintenance tasks could you master next?
Credit: www.ifixit.com
Reassembling The Spool
Reassembling the spool is essential for your Ryobi weed wacker’s performance. A well-threaded spool ensures smooth operation and efficient cutting. Follow these steps to reassemble the spool effectively.
Securing The Line
Hold the spool firmly in one hand. Ensure the line is taut and evenly distributed. Guide the line into the retaining notch. This prevents it from unraveling during use. Keep the line tight for optimal spool function.
Reattaching The Spool Cap
Align the spool with the weed wacker’s housing. Ensure the line extends freely from the spool. Place the spool cap over the spool. Press down until it clicks into place. This secures the spool and prepares it for use.
Testing The Weed Wacker
Threading a Ryobi weed wacker involves removing the spool cap and winding new line onto the spool. Ensure the line is fed through guide holes evenly. Secure the spool and test to confirm the line feeds smoothly while trimming.
Testing the Weed Wacker is a crucial step to ensure that your Ryobi Weed Wacker is ready to tackle your yard. After threading the line, it’s important to check if everything is functioning smoothly. This process can save you time and frustration in the long run. Remember the times when you powered on your weed wacker, only to find out the line wasn’t feeding correctly? Let’s avoid that! ###Powering On
Once your Ryobi Weed Wacker is properly threaded, it’s time to power it on. Make sure it’s on a flat surface for stability. Plug it into a power source if it’s electric, or ensure there’s enough fuel if it’s gas-powered. Press the power button gently. Listen for any unusual sounds. A smooth hum indicates everything is in order. If it doesn’t start, check the power connections or fuel level. ###Checking Line Feed
With the weed wacker running, the next step is to check the line feed. This ensures the line advances correctly without getting stuck. Gently tap the head of the weed wacker on the ground. This action should release more line. If it doesn’t, check if the line is tangled or too short. Make sure the line extends evenly on both sides. Uneven lines can lead to an imbalanced operation. Adjust if necessary to achieve optimal performance. Have you ever been in the middle of trimming, only to stop and fix the line? Ensuring it’s feeding correctly now saves you from those interruptions. Testing your Ryobi Weed Wacker after threading ensures a seamless experience when tackling your garden. Are you ready to enjoy a hassle-free trimming session?Troubleshooting Common Issues
Threading a Ryobi weed wacker can be simple. First, unplug the tool for safety. Then, align the arrows on the spool and housing. Insert the line and wind it evenly. Finally, reassemble and test. Follow these steps to ensure smooth operation.
Dealing with a Ryobi Weed Wacker that isn’t cooperating can turn a simple yard task into a frustrating ordeal. Understanding common issues can save you time and keep your machine running smoothly. Let’s explore some troubleshooting tips to make your weed wacker experience as seamless as possible.Line Jamming
Line jamming is a frequent nuisance. It can halt your progress and test your patience. Often, this occurs when the line is wound too tightly on the spool. To fix this, unwind the line and rewind it carefully. Ensure it’s not overlapping or too tight. A little patience here can save you a lot of hassle later. Check for any debris or dirt in the spool area. Even small particles can cause major blockages. Keeping this area clean will help prevent future jams.Uneven Line Feed
An uneven line feed can disrupt your trimming rhythm. This usually happens if the line is not properly seated in the spool. First, make sure the line is evenly distributed. Both ends should extend out evenly from the spool. If not, adjust them by pulling gently. Consider the type of line you’re using. Some lines work better than others with certain models. Experiment to find the best fit for your Ryobi Weed Wacker. Is your line feeding too quickly or not at all? It might be time to check the bump feed mechanism. A little maintenance here can make a big difference. By tackling these common issues, you’ll ensure your Ryobi Weed Wacker operates efficiently. What’s your go-to trick for keeping your tools in top shape? Share your tips in the comments!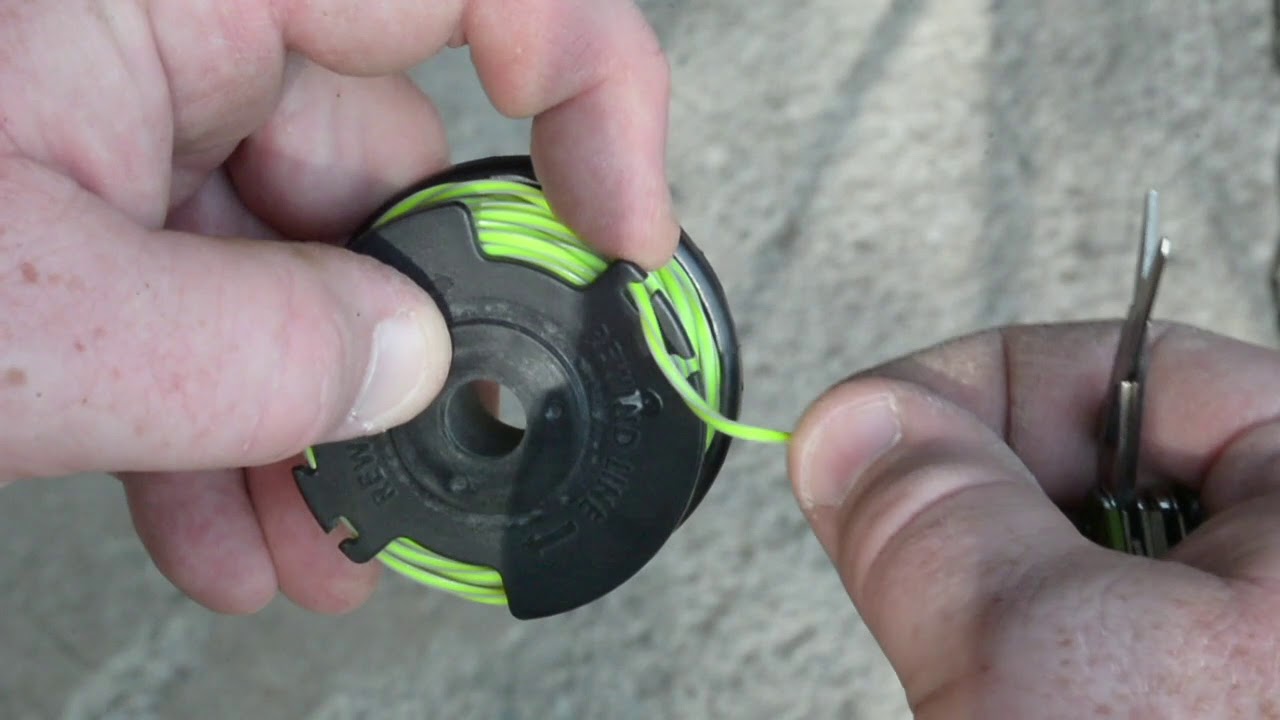
Credit: m.youtube.com
Frequently Asked Questions
How Do I Remove The Spool Cap?
To remove the spool cap, press the tabs on either side of the cap. Gently pull the cap away from the weed wacker. Make sure to keep the spring intact. This process allows easy access to the spool for re-threading.
What Type Of Line Should I Use?
Use a line that matches the specifications of your Ryobi weed wacker. Typically, a 0. 065-inch or 0. 080-inch line is suitable. Check your user manual for exact recommendations. Using the correct line ensures optimal performance and longevity of your trimmer.
How Do I Wind The Line Onto The Spool?
Start by cutting a 10-foot length of line. Insert the line into the spool’s starter hole. Wind the line evenly in the direction indicated on the spool. Ensure the line is tightly wound to prevent tangling during operation.
How Do I Reassemble The Spool And Cap?
Place the wound spool back into the spool housing. Align the tabs on the cap with the slots in the housing. Press down until the cap snaps securely into place. Ensure the line feeds smoothly through the exit holes before starting the trimmer.
Conclusion
Threading a Ryobi weed wacker is simple with practice. Start by gathering your tools. Follow each step carefully for best results. Ensure the spool is seated correctly. This prevents tangles and frustrations. Tighten the cap securely once done. Check for smooth line feed before using.
Regular maintenance keeps your wacker efficient. A well-threaded tool makes yard work easier. Practice these steps often for confidence. Enjoy a tidy garden with less hassle. Your Ryobi weed wacker will serve you well. Happy gardening!