
Are you tired of struggling with your Ryobi 18V Cordless Trimmer when it’s time to replace the string? You’re not alone.
Many people find this task daunting, but it doesn’t have to be. Imagine the ease of trimming your garden with a perfectly functioning tool, without the frustration of tangled or worn-out strings. By mastering this simple task, you can save time, money, and a lot of headaches.
This guide will walk you through each step, ensuring you’re well-equipped to handle your trimmer with confidence. Ready to transform your gardening experience? Let’s dive in and make string replacement a breeze!

Credit: www.youtube.com
Contents
Tools And Materials Needed
Gather the necessary tools and materials for replacing the string on your Ryobi 18V cordless trimmer. You’ll need a new trimmer line, scissors, and gloves for safety. Follow the instructions carefully to ensure proper installation and optimal trimmer performance.
Replacing the string on your Ryobi 18V Cordless Trimmer doesn’t have to be a daunting task. Knowing the tools and materials needed is the first step to ensuring a smooth process. You might be surprised at how few items you actually need, most of which you probably already have at home. Have you ever started a DIY project only to find you’re missing that one essential tool? It’s frustrating, isn’t it? That’s why being prepared is crucial. Here’s a quick guide to what you’ll need:String Replacement Line
The most important item is the replacement line. Make sure you have the correct diameter for your trimmer. Ryobi typically uses a 0.065-inch line, but it’s always good to check your manual. You might think opting for a thicker line means better performance. However, using the wrong size can damage your trimmer. Stick to the recommended specifications for optimal results.Scissors Or Utility Knife
You’ll need scissors or a utility knife to cut the string to the correct length. Sharp tools make clean cuts, which are essential for a smooth operation. Ever tried cutting string with dull scissors? It can fray and become uneven, making it difficult to spool correctly.Screwdriver
A screwdriver might be necessary to open the trimmer head. While some trimmers have a simple snap-on lid, others might require unscrewing. Consider how much easier it is to access hard-to-reach screws with a magnetic screwdriver. It’s a small detail that makes a big difference.Safety Gear
Safety should never be an afterthought. Wear gloves and eye protection when handling the trimmer and replacing the string. Have you ever had a piece of debris fly towards you while trimming? A simple pair of goggles can prevent a nasty surprise. Preparing your materials ahead of time saves you from unnecessary trips to the store. By having everything on hand, you can focus on the task and enjoy the satisfaction of a job well done. What’s your go-to tool for DIY projects?
Credit: www.ifixit.com
Safety Precautions
Ensure the Ryobi 18V cordless trimmer is off and battery removed before replacing the string. Wear safety gloves to protect hands. Keep the trimmer stable on a flat surface during the process. Follow the manual for correct string installation to avoid damage.
Replacing the string on your Ryobi 18V Cordless Trimmer requires careful attention to safety. Before you start, take a moment to understand the necessary precautions. These precautions ensure your safety and protect your trimmer from damage.Turn Off The Trimmer
Always switch off the trimmer before any maintenance. Remove the battery to prevent accidental starts. This step is crucial for your safety.Wear Protective Gear
Safety gear is essential. Wear gloves to protect your hands from sharp edges. Safety goggles shield your eyes from debris.Check The Trimmer’s Condition
Inspect the trimmer for damage. Ensure the guard is secure. A damaged trimmer can be dangerous.Work In A Safe Area
Choose a clean, open space for maintenance. Avoid cluttered areas to prevent tripping. A clear space improves focus and safety.Follow The Manual
Read the user manual before starting. Follow the instructions closely. The manual provides trimmer-specific guidelines. Safety is your priority during maintenance. Adhering to these precautions helps prevent accidents. Keep these steps in mind for a smooth and safe process.Removing The Spool Cap
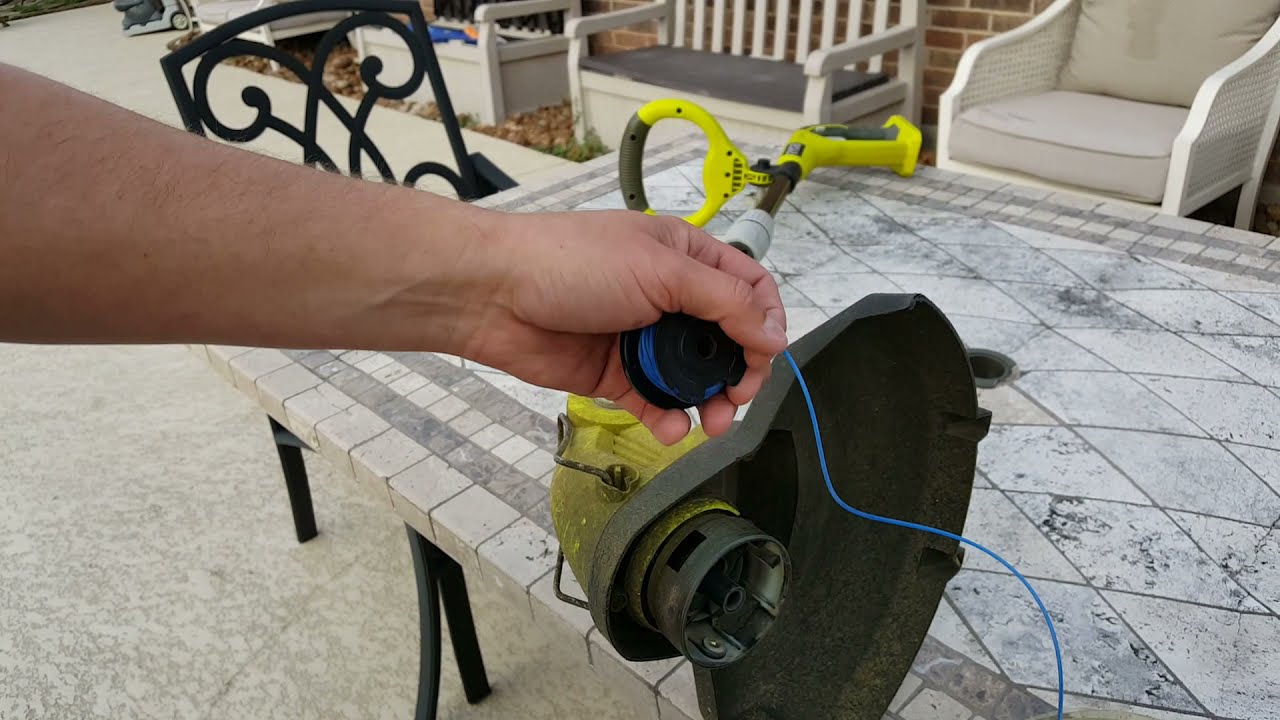
Replacing the string on a Ryobi 18V Cordless Trimmer might seem tricky. But it’s easier than you think. The first step is removing the spool cap. This part is crucial. It allows access to the trimmer’s inner parts. Below, you will find a step-by-step guide. This will help you remove the spool cap with ease.
Step 1: Turn Off The Trimmer
Before anything, ensure the trimmer is off. This prevents accidents. Safety first! Remove the battery as an extra precaution.
Step 2: Locate The Spool Cap
The spool cap is at the base of the trimmer head. It covers the spool. Inspect it closely to understand its mechanism.
Step 3: Press The Spool Cap Tabs
Find the tabs on the spool cap. There are usually two tabs. Press them simultaneously. This action releases the cap.
Step 4: Gently Remove The Spool Cap
With the tabs pressed, gently pull the cap. It should come off easily. Be careful not to force it.
Step 5: Set The Spool Cap Aside
Once removed, set the cap aside. Keep it in a safe place. You will need it later.
These steps make removing the spool cap simple. Follow them carefully. You will be ready for the next stage of string replacement.
Discarding Old String
Discarding old string from your Ryobi 18V cordless trimmer is essential. Over time, the string wears out and loses efficiency. Removing the old string helps maintain your trimmer’s performance and ensures neat edges. Follow these steps to properly discard the old string.
Identify The Spool Location
Locate the spool where the string is housed. It’s usually at the base of the trimmer head. This is where you’ll start the process of removing the old string. Knowing the spool location is crucial for a smooth removal.
Remove The Spool Cover
Gently press the tabs to release the spool cover. This gives you access to the string and spool inside. Make sure not to force the cover; it should come off easily. A damaged cover can complicate the process.
Extract The Old String
Pull the old string from the spool. It might be tangled, so be patient and untangle carefully. Dispose of the old string properly. This ensures your trimmer operates efficiently with new string.
Inspect The Spool
Check the spool for any signs of wear or damage. A damaged spool might need replacement for optimal performance. Ensure the spool is clean and ready for new string installation.
Measuring And Cutting New String
Replacing the string on a Ryobi 18V Cordless Trimmer is essential. Proper string length ensures efficient trimming. This section guides you through measuring and cutting new string. Follow these steps for a smooth process.
Understanding The String Type
Different trimmers use different string types. Ryobi 18V trimmers typically require 0.065-inch line. Check your manual for the correct type.
Measuring The Correct Length
Measure out the string length needed. For most Ryobi trimmers, you need about 10 feet. This length allows for smooth operation without frequent replacements.
Using The Right Tools
A tape measure helps in getting the right length. Scissors or a sharp knife are needed to cut the string. Ensure tools are sharp and clean for a neat cut.
Cutting The New String
Once measured, cut the string straight. A straight cut prevents fraying. This ensures the string feeds correctly in the trimmer.
Checking For Frays
Examine the cut string for any frays. Smooth edges are crucial. Frayed ends can cause the string to jam during use.
Preparing The String For Installation
Roll the string neatly. This makes it easier to install. Avoid tangling to ensure a quick and easy installation.
Credit: www.youtube.com
Winding The String Onto The Spool
Replacing the string on a Ryobi 18V cordless trimmer involves winding it onto the spool correctly. Start by cutting a length of string and aligning it with the arrows on the spool. Ensure the string is tightly wound to avoid tangling while trimming.
Winding the string onto the spool of your Ryobi 18V Cordless Trimmer is a critical step that ensures your trimmer operates efficiently. It’s not just about getting the string in place; it’s about doing it right so you can trim your garden without any hiccups. If you’ve ever struggled with tangled or uneven string, you know how frustrating it can be. Let’s dive into how you can wind the string correctly, ensuring a smooth trimming session every time.Securing The String Ends
Start by cutting a sufficient length of string, typically around 10 to 12 feet. Check your trimmer’s manual for the exact length recommendation. Insert one end of the string into the hole or notch on the spool. This secures the string, preventing it from slipping out while you wind. Ensure that the string is firmly anchored before you start winding. A secure start makes the rest of the process much smoother.Ensuring Even Distribution
Begin winding the string onto the spool evenly. Make sure to follow the directional arrows usually indicated on the spool. Keep the tension consistent as you wind. This prevents the string from bunching up and causing tangles during operation. Double-check that the string is not overlapping excessively. Uneven winding can lead to premature wear or breakage. Have you ever rushed this step only to end up redoing it? Taking a bit more time now saves frustration later. Is your string winding evenly? If not, unwind a bit and adjust. Winding the string correctly is a small task that pays off big. You’ll save time and avoid hassles during your trimming sessions. Next time you grab your trimmer, remember these tips for a hassle-free experience.Reattaching The Spool Cap
Replacing the string on a Ryobi 18V cordless trimmer involves reattaching the spool cap securely. Ensure the spool cap clicks into place properly to prevent the string from unraveling during use. This step helps maintain smooth trimming operations.
Reattaching the spool cap on your Ryobi 18V Cordless Trimmer might sound like a simple task, but doing it right is crucial for your trimmer’s performance. This small step can prevent the frustration of the spool coming loose during use, saving you both time and effort. Let’s dive into the steps to ensure you get it right every time, enhancing both your trimming experience and the longevity of your tool.Secure The Spool In Place
Start by ensuring the spool is properly seated within the trimmer head. Align the spool with the slots and gently press it down. You should feel it click into place, indicating it’s secure.Check The String Alignment
Before reattaching the spool cap, double-check the string’s alignment. Both ends of the string should extend through the eyelets on the trimmer head. If the string is tangled or uneven, adjust it for smooth operation.Attach The Spool Cap
Position the spool cap over the trimmer head, aligning the tabs on the cap with the slots on the head. Press down firmly until you hear a click. This sound signals the cap is locked securely, preventing it from popping off during use.Test The Trimmer
Give the trimmer a quick test by pulling on the strings gently. They should extend freely without resistance. If the strings retract or get stuck, recheck the alignment and the cap’s fit. A well-attached cap ensures optimal performance.Troubleshooting Common Issues
If the spool cap won’t click into place, debris might be obstructing the slots. A quick clean can solve this. Also, worn-out tabs can prevent proper attachment, indicating it might be time for a new cap. Have you ever struggled with a loose spool cap mid-trim? How did you tackle it? Sharing your experiences can help others facing similar issues. Properly reattaching the spool cap ensures a smooth, hassle-free trimming session every time.Testing The Trimmer
Replacing the string on a Ryobi 18V cordless trimmer is simple. First, remove the spool cap. Then, wind the new string tightly onto the spool. Finally, secure the cap back in place. Enjoy a smooth trimming experience.
Testing the trimmer is a crucial step after replacing the string on your Ryobi 18V cordless trimmer. This ensures your tool is functioning as expected, making your lawn care routine smooth and efficient. Neglecting this step could lead to uneven trimming or even damage to the trimmer itself. Let’s dive into how you can effectively test your trimmer for optimal performance.Checking String Feed
First, make sure the string feeds correctly. Turn on the trimmer and gently tap it on the ground. This should release more string, keeping your cuts precise and consistent. It’s essential to observe the string’s length. If it’s too short, it won’t cut properly. If it’s too long, it could become tangled or damaged. Keep an eye on the spool’s rotation. A smooth rotation indicates a properly loaded string.Ensuring Proper Operation
Next, ensure the trimmer operates smoothly. Listen for any unusual sounds. A well-functioning trimmer should produce a steady, even hum. Check for vibrations. Excessive shaking might indicate an issue with the string installation. Test the cutting efficiency on a small patch of grass. The trimmer should deliver clean cuts without missing spots. Have you ever wondered if your trimmer’s performance affects your lawn’s appearance? A well-tested trimmer not only makes your job easier but also enhances the beauty of your garden. Always keep safety in mind. Wear protective gear and stay alert while testing the trimmer. This ensures your safety and the longevity of your tool. Testing your Ryobi 18V cordless trimmer after replacing the string might seem like an extra step, but it’s one worth taking. It gives you confidence in your equipment and ensures your lawn looks its best.Maintenance Tips
Replacing the string on a Ryobi 18V cordless trimmer is simple with a few easy steps. Remove the trimmer head cover, then wind the new string onto the spool. Secure everything back in place, and you’re ready to trim again.
Maintaining your Ryobi 18V Cordless Trimmer ensures it runs smoothly and efficiently. Regular upkeep can extend its life and improve performance. Here are some straightforward maintenance tips to keep your trimmer in top condition.Regular Cleaning
After each use, take a few minutes to clean your trimmer. Remove any debris or grass clippings from the head and shaft. This prevents clogging and ensures optimal performance. A clean trimmer is less prone to mechanical issues.Battery Care
Your Ryobi trimmer relies on a powerful 18V battery. Keep it charged and store it in a cool, dry place. Avoid letting the battery discharge completely before recharging. Proper battery maintenance can save you time and money.Inspect The Spool And Cap
Frequently check the spool and cap for wear and tear. A damaged cap can affect the string feed. Replace any broken parts promptly. This simple check can save you from frustrating interruptions during trimming.String Replacement
Replace the string regularly to ensure a clean cut. A fresh string offers better trimming efficiency. Follow the manufacturer’s instructions for string replacement. Have you ever struggled with tangled or worn-out string? It might be time for a swap.Lubricate Moving Parts
Consider applying a light lubricant to the moving parts. This minimizes friction and wear. Lubrication can also reduce noise during operation. Have you noticed any unusual sounds? A little oil might make all the difference.Storage Solutions
Store your trimmer in a dry, sheltered area. This protects it from weather-related damage. A well-stored trimmer is ready for action whenever you need it. Have you thought about creating a dedicated space for your tools? These maintenance tips are simple yet effective. Implementing them can enhance your trimming experience and prolong the life of your Ryobi 18V Cordless Trimmer. What maintenance routine do you follow to keep your tools in top shape?Frequently Asked Questions
How Do I Remove The Ryobi Trimmer Spool?
To remove the spool, press the tabs on the trimmer head. Then, gently pull the spool out. Ensure the trimmer is off and the battery is removed for safety. This simple step allows you to replace the string easily.
What Type Of String Does Ryobi 18v Trimmer Use?
The Ryobi 18V trimmer typically uses a 0. 065-inch diameter string. It’s a standard size for many cordless trimmers. Check your trimmer’s manual for confirmation. Using the correct string ensures optimal performance and efficient trimming.
How To Wind New String On Ryobi Spool?
First, cut about 20 feet of string. Insert one end into the spool anchor hole. Wind the string evenly in the direction of the arrow. Ensure it’s tight and not overlapping. This ensures smooth operation and reduces the risk of tangling.
Can I Use Thicker String For My Ryobi Trimmer?
Using a thicker string isn’t recommended for Ryobi 18V trimmers. It can strain the motor and reduce efficiency. Always stick to the manufacturer’s specifications. This ensures longevity and optimal performance of your trimmer.
Conclusion
Replacing the string on your Ryobi 18V cordless trimmer is simple. Follow the steps carefully for best results. Regular maintenance keeps your trimmer efficient. Always check your trimmer for wear and tear. Ensure you have the right tools and parts.
This saves time and effort. Proper care extends the life of your trimmer. Enjoy hassle-free gardening with a well-maintained tool. Keep your garden neat and tidy. A sharp string makes cutting easy. Trim edges precisely with minimal effort. Happy gardening with your Ryobi trimmer!