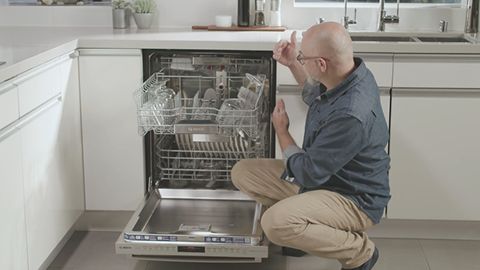
If the front of your Bosch looks tired, cracked, or just the wrong color, I’ve got your back. I’ve replaced more Bosch dishwasher fascia panels than I can count, from tight apartment kitchens to luxury remodels. In this guide, I’ll show you exactly how to replace Bosch dishwasher fascia panel components with confidence. We’ll keep it simple, safe, and a little fun. By the end, you’ll know the tools, the steps, the gotchas, and how to avoid expensive mistakes. Let’s make that dishwasher look showroom fresh.
Source: www.deaven.net
Contents
- What A Fascia Panel Does And How To Pick The Right One
- Tools, Parts, And Prep
- Step-By-Step: How To Replace Bosch Dishwasher Fascia Panel
- Mistakes To Avoid And Pro Tips
- Time, Cost, And Part Numbers
- Troubleshooting After Replacement
- When To Call A Pro
- Care Tips So Your New Fascia Lasts
- Frequently Asked Questions Of How To Replace Bosch Dishwasher Fascia Panel
- Conclusion
What A Fascia Panel Does And How To Pick The Right One
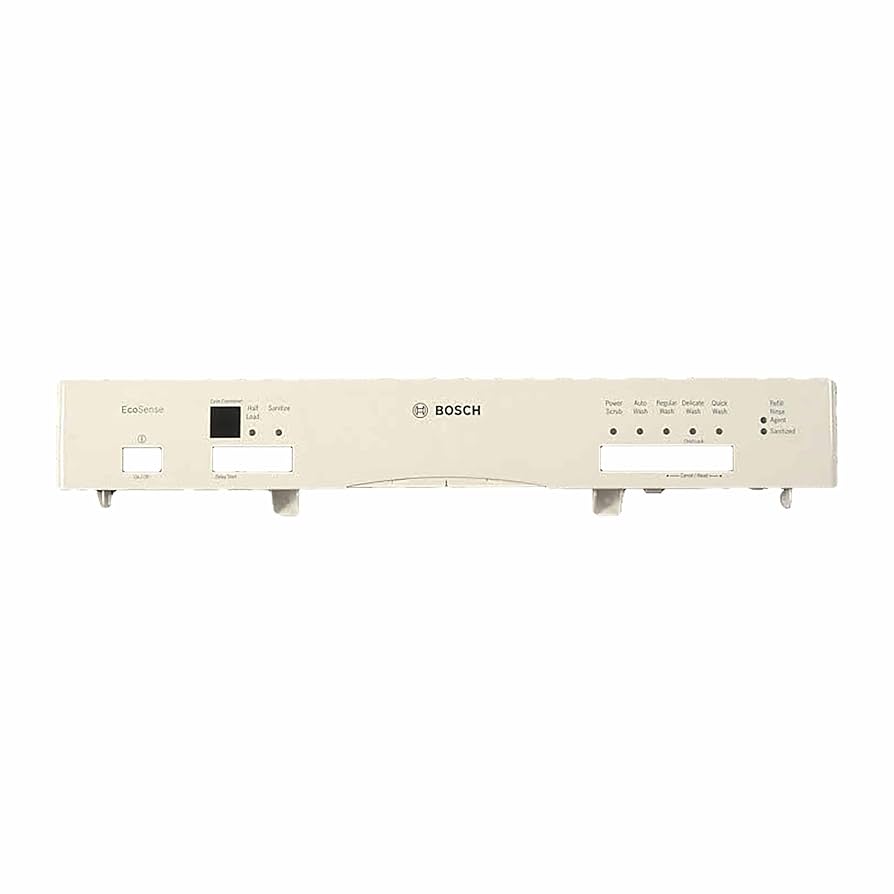
The fascia panel is the front “face” of the dishwasher door. It holds the control interface and sets the look of your kitchen. Bosch panels vary by series, finish, and control style.
- Top-control panels hide the buttons inside the door top and often use more tabs and brackets.
- Front-control panels have visible buttons and simpler access from the front.
- 300, 500, and 800 Series can use different part numbers and screw layouts.
Before you buy, match three details:
- Model number. Find it on the door edge, usually the left side, engraved on a metal tag.
- Production code. Helps confirm compatibility within the same series.
- Finish and handle style. Stainless, black, white, or custom panel-ready.
Pro tip from the field: take a photo of the model tag. It avoids guesswork when ordering. According to Bosch service documentation, fascia and control layouts vary by series, so part matching is key.

Source: www.youtube.com
Tools, Parts, And Prep
You don’t need a workshop. Just a small toolkit and patience.
- Torx drivers T15 and T20. Some models also use T25.
- Phillips screwdriver. For handle screws on some variants.
- Plastic pry tool. Saves the finish and your fingers.
- Needle-nose pliers. For ribbon cables or clips.
- Magnetic parts tray. Screws love to vanish.
- Painter’s tape and a towel. Protects the door and floor.
- ESD strap or at least touch grounded metal. Protects the control board.
- The correct Bosch fascia panel. Optional new handle or nameplate if separate.
Safety first:
- Turn off power at the breaker. Many Bosch units are hardwired.
- Turn off water supply if you plan to adjust the door angle.
- Wear cut-resistant gloves. Inner door edges can be sharp.
If your dishwasher is panel-ready or custom, check if the outer panel is a furniture piece you’ll re-use. The steps are similar, but you’ll transfer the custom panel to the new fascia base.

Source: www.amazon.com
Step-By-Step: How To Replace Bosch Dishwasher Fascia Panel
Take it slow. Keep screws organized by position. I like to label groups with sticky notes.
- Kill the power. Flip the breaker off and verify the display is dead.
- Open the door and support it. Lay a towel on the inner door to protect the finish.
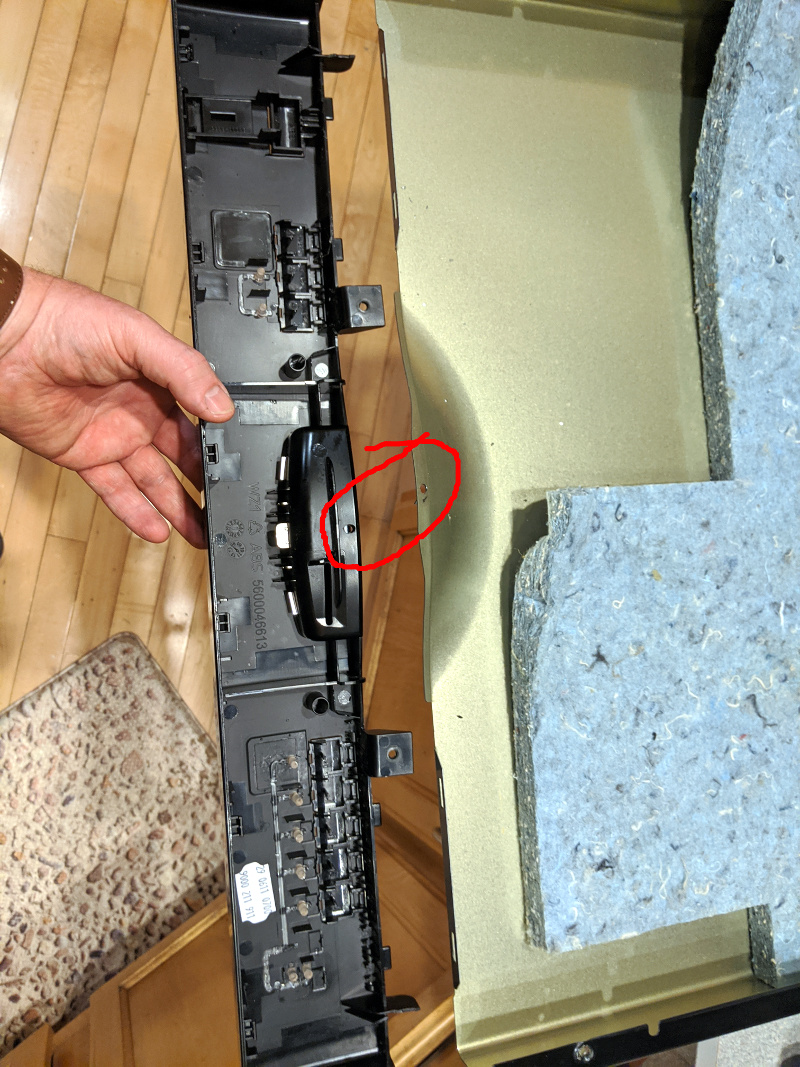
- Remove the inner door screws. Use a T15 or T20 Torx. Work along the sides. Leave the bottom hinge screws alone.
- Separate the inner door from the outer fascia. Hold the outer panel with one hand. It can slide or drop slightly.
- Access the control area. On front-control models, the user interface is fixed to the fascia. On top-control, it’s at the door top.
- Disconnect the ribbon cable and harnesses. Grip connectors, not wires. Note routing and latches. Take photos.
- Transfer components as needed. Some models require moving the user interface, light guides, brackets, or nameplate to the new fascia.
- Fit the new fascia panel. Align tabs and hooks. Ensure the gasket sits flat if present.
- Reinstall screws. Start all screws loose, then snug them evenly. Do not overtighten. Uneven torque can warp the panel or cause door rub.
- Reconnect power and test. Close the door, restore power, and run a quick cycle start to confirm buttons, beeps, and lights work.
Common model notes from the bench:
- 500/800 Series top-control often use more clips at the top edge. Check for hidden tabs before pulling.
- Some variants have a handle that mounts through the fascia. Install the handle before remounting the door if access is tight.
- If your control sits in a separate cradle, make sure the cradle snaps fully into the fascia slots. A half-seated cradle will cause unresponsive buttons.

Source: www.youtube.com
Mistakes To Avoid And Pro Tips
A little care saves a lot of headaches. Here are the traps I see most.
- Dropping the panel. Always support the outer door when removing inner screws.
- Pinched ribbon cable. Route it exactly as before. A pinch can cause random errors.
- Skipping ESD precautions. Static can damage the control. Ground yourself first.
- Mixing screw lengths. Longer screws can dimple the outer skin. Keep groups labeled.
- Over-torquing. Tighten until snug. If the panel creaks, you went too far.
Pro tips I use:
- Tape the edges of adjacent cabinets. Prevents scuffs while handling the door.
- Photograph every step. It’s your reassembly map.
- Test buttons before final tightening. If something feels off, stop and check alignment.

Source: www.siscotelcloud.com
Time, Cost, And Part Numbers
Most DIYers finish in 30 to 60 minutes. First-timers may take 90 with photos and careful routing.
Estimated costs:
- Fascia panel. Often 80 to 250 USD depending on series and finish.
- Handle kit if separate. Often 20 to 60 USD.
- Tools. Usually what you already have.
Sample part cues to search:
- Bosch fascia panels often start with 006, 007, or 110 prefixes.
- Search by exact model plus “fascia panel” to avoid look-alike parts.
I cross-check the illustrated parts list for the exact model. It ensures the correct color and handle style match. Manufacturer documentation confirms which panels fit which serial ranges.

Source: partsdr.com
Troubleshooting After Replacement
If things don’t behave, here’s how I sort it out fast.
- Buttons don’t respond. Check ribbon cable orientation and full seating. Reseat until it clicks.
- Random beeps or flashing lights. Look for a partially seated connector or pinched wire.
- Door rubs or squeaks. Loosen side screws, realign the panel, and tighten evenly.
- Display works but cycle won’t start. Confirm the door latch aligns and closes fully.
- Gaps look uneven. Recheck tabs and hooks. Some panels need a slight upward nudge before tightening.
When in doubt, compare with the photos you took. If warnings persist, consult the service manual section for your series to read error codes.

Source: www.youtube.com
When To Call A Pro
Call a technician if you hit any of these:
- You see corrosion or moisture inside the control area.
- The control board shows burn marks or a melted connector.
- The door springs or cables pop loose during the process.
- You replaced the panel and still have dead controls.
A pro can test continuity, update firmware where applicable, and rule out a control or UI failure.
Source: www.amazon.com
Care Tips So Your New Fascia Lasts
Treat the new panel well and it will look great for years.
- Clean with a soft cloth and mild detergent. Avoid abrasive pads.
- For stainless, wipe with the grain. Use a stainless cleaner if needed.
- Don’t hang heavy towels on the handle. It stresses the mounts.
- Keep steam vents clear. Wipe condensation to reduce mineral spots.
Small habit, big payoff: after steamy cycles, crack the door an inch to vent and protect the control area.

Source: www.youtube.com
Frequently Asked Questions Of How To Replace Bosch Dishwasher Fascia Panel
How do I find the correct fascia panel for my Bosch?
Check the model number and production code on the door edge tag. Search those with “fascia panel.” Match color, control type, and series.
Do I need to remove the dishwasher from the cabinet?
Usually no. You can replace the fascia with the unit installed. Just open the door fully and support the outer panel while removing screws.
Will this void my warranty?
Replacing cosmetic parts typically does not, but damage to electrical parts can. If your unit is under warranty, confirm the terms before DIY.
Recheck the ribbon cable and connectors. Make sure they’re fully seated and oriented correctly. If still dead, the user interface or main control may be faulty.
Can I change the color or finish with a new fascia?
Yes, if a compatible fascia in your desired finish exists for your model. Verify handle style and logo placement match.
What tools are essential for this job?
Torx T15/T20 drivers, a Phillips screwdriver, a plastic pry tool, and needle-nose pliers are the basics. A magnetic tray helps keep screws organized.
Conclusion
You can absolutely replace a Bosch dishwasher fascia panel at home. With the right part, a few Torx drivers, and a careful hand, the job is straightforward and fast. You now know how to pick the correct panel, avoid costly mistakes, and test your work like a pro.
Take the first step today. Grab your model number, order the right fascia, and give your dishwasher the glow-up it deserves. Got questions or a clever trick to share? Drop a comment, subscribe for more DIY fixes, and explore our other appliance guides.